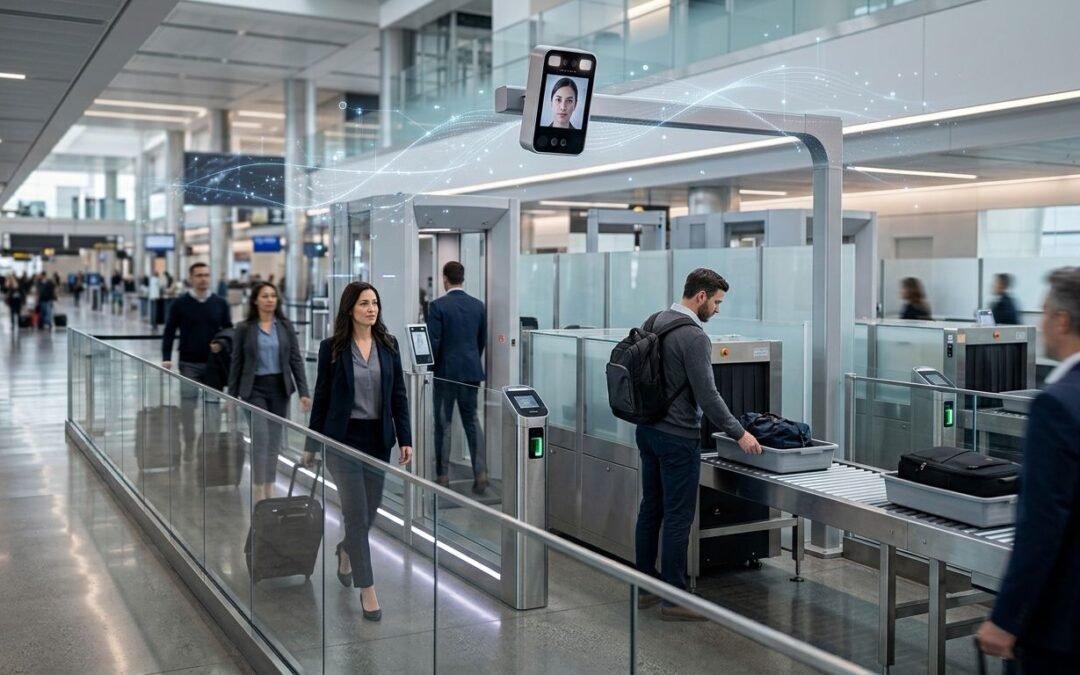
Social media loves a shortcut, and right now the shortcut getting all the love is TSA PreCheck Touchless ID. Skip the ID handoff at security checkpoints, look at a camera, keep moving. I get why that sounds great, especially with shutdown-related delays turning some airport lines into frustrating security wait times.
Still, convenience is never free. My security mindset and my past work with Homeland Security make me look at programs like this a little differently. As of March 2026, Touchless ID is a free add-on for TSA PreCheck members, it works with participating airlines, and it’s available at more than 60 participating airports. That’s useful. It’s also a moment worth pausing on, because when biometric systems become normal, we rarely get less of them later.
What TSA PreCheck Touchless Actually Does, And Why So Many Travelers Love It
At the basic level, TSA PreCheck Touchless ID is simple. If I already have TSA PreCheck, a participating airline account with my valid passport stored in the airline app, and I opt in, I can use a touchless security lane at some airports. Then, instead of handing over my physical ID and mobile boarding pass, I look at a camera for identity verification and move through faster.
TSA’s own Touchless ID page says the TSA PreCheck Touchless ID program is optional and tied to participating carriers. As of spring 2026, TSA says it’s rolling out to 65 airports. Right now, the hype makes sense because regular security lines feel rougher than usual, and any promise of less waiting gets attention fast.
The Convenience Pitch Is Easy To Understand
If you travel often and opt in, this is an easy sell. Parents are juggling kids, bags, snacks, and phones. Business travelers are trying to make a connection. Everyone else is tired, late, or standing behind someone repacking a carry-on like they’re moving apartments.
So yes, I understand the buzz. A face scan feels easier than digging through a backpack for a license and phone. During the current funding lapse, that pitch gets even stronger because staffing pressure and longer waits make any faster option look smarter.
Touchless Still Means Biometric Collection
Here’s the part I don’t want people to blur out. This is facial identification technology, folks! Not magic. Not a harmless shortcut. A camera captures my face and matches it against data already tied to my identity, including passport information and airline records.
That matters because the privacy issue starts the second my face becomes part of the checkpoint routine. Even if the facial scan is quick, and even if the traveler experience feels smooth, my body becomes the credential.
Recent reporting from FedScoop on TSA’s planned biometric collection changes suggests the agency is looking at broader changes around collection, storage, and reuse. That doesn’t mean every scary outcome is already here. It does mean I should stop pretending this is only about shaving a minute off a line.
When my face becomes the ticket, the system starts asking me to trust more than the line speed.
My Big Concern, We Keep Trading Privacy For Speed
Stress changes how people choose. When a line is wrapped around the terminal, most folks aren’t thinking about privacy policy language. They’re thinking, “Please get me through this security lane.”
That’s normal. It’s also why convenience can become the perfect sales pitch for more data collection. The skeptical part of me, the little security superhero sense in my head, keeps coming back to the same point: once TSA PreCheck Touchless ID feels normal in one part of life, it gets easier to accept in the next.
Long Lines Make People Say Yes To Things They’d Normally Question
The current partial government shutdown adds pressure. TSA officers are still working, but the strain is obvious. Real-time reporting says resignations, unscheduled leave, and staffing problems have pushed wait times higher at a bad moment for travelers.
I’m not claiming the shutdown exists to push TSA PreCheck Touchless ID. I am saying it creates the perfect mood for adoption. When people feel squeezed, they accept tools they might question under calmer conditions, which is why more travelers opt in during these stressful times.
That’s why I think this moment matters. Convenience in a crisis has a way of becoming policy by habit.
Optional Today Does Not Always Mean Limited Tomorrow
I’ve watched plenty of programs start narrow and voluntary, then expand over time. That’s the plain-English version of function creep. A tool begins with one use, then picks up more uses, more sharing, and more expectations.
That risk feels more real after reports like USA Today’s coverage of TSA seeking broader biometric data use for PreCheck travelers. When I read stories like that, I start asking boring but important questions. Who gets access? How long do policies stay the same? What happens when a nice opt in option becomes the default lane everyone’s nudged toward?
Carriers like American Airlines, Delta Air Lines, United Airlines, Southwest Airlines, and Alaska Airlines are currently testing these features, often linking the biometric data to your frequent flyer profile or rewards account.
I’m not anti-tech here. I’m anti-sleepwalking.
If The Government Keeps Getting Hacked, Why Would I Want More Sensitive Data In The System
This is where the privacy concern turns into a security concern. No agency can promise perfect protection forever. That’s not cynicism. That’s basic cyber reality.
Biometric data is different from a password. If someone steals my password, I change it. If someone steals a faceprint, fingerprint, or related identity marker like travel documents, I don’t get a reset button. That makes biometric systems higher stakes by design.
Even if TSA limits what it stores from a TSA PreCheck Touchless ID scan at security checkpoints, the larger identity chain still depends on government systems, airline systems for check-in and bag drop, and vendor systems holding sensitive data like Known Traveler Numbers (KTN). That chain only needs one weak link.
### The OPM Hack Showed How Bad A Government Breach Can Get
The clearest warning sign is still the 2015 OPM breach. Attackers tied to China compromised the Office of Personnel Management and exposed about 21.5 million records. That included background investigation files, Social Security numbers, and fingerprints for 5.6 million people. The Washington Post’s reporting on the Chinese breach of OPM remains one of the clearest reminders of how serious that incident was.
That case matters here for one reason above all: the government has already lost biometric data before. Once fingerprints leaked in that breach, those people couldn’t swap in a fresh set like a new password.
SolarWinds Proved Foreign Adversaries Can Sit Inside Federal Systems For Months
Then came SolarWinds in 2020, which showed a different kind of danger. In that case, attackers linked to Russia slipped malicious code into trusted software updates. Multiple federal agencies got exposed because the supply chain itself became the entry point.
If that sounds scary, it should. It means even systems that look normal and approved can become the problem. NPR’s breakdown of the SolarWinds attack is still a solid read because it shows how long sophisticated actors can stay inside government-related environments before anyone notices.
A Smarter Way To Think About TSA Touchless Before I Opt In
Some travelers will look at this tradeoff and say, “Worth it.” Fair enough. I’m not here to make that choice for anyone. I’m here to say the choice should be made with eyes open.
Before I opt in, I want answers to a few simple questions. What data is used, like my Known Traveler Number or valid passport details? Who stores it? How long is it kept? What happens after a breach? Is the time I save in the security lane worth the privacy cost I might carry for years?
### Fast Security Lines Shouldn’t Turn Off My Critical Thinking
I use the same mindset here that I use when I teach people to spot captive portal attacks on airport Wi-Fi. Travel stress makes people click, tap, and agree too fast, especially during check-in or bag drop via the airline app with a mobile boarding pass. Attackers know that. Big systems benefit from that too.
So I slow down. I look for the TSA PreCheck symbol. I read the terms. I carry my physical ID anyway. I remind myself that privacy lost for convenience is hard to win back, even with a linked rewards account.
I’m Not Saying Never, I’m Saying Ask Better Questions
There’s also an important distinction people miss. Not all biometric tech works the same way. With biometric authentication without data sharing, like many passkey setups on your own device, your face or fingerprint often stays local and simply unlocks a cryptographic key. That’s a different model from face matching at a checkpoint tied to broader identity systems.That difference is huge!
I can be pro-efficiency and still demand hard limits, tight retention rules, strong oversight, and plain-English transparency during enrollment. Those things aren’t anti-progress. They’re the minimum.
The hype around TSA PreCheck Touchless ID makes sense, especially when airport lines are ugly, and the shutdown is making travel more frustrating at participating airports, from bag drop to the dedicated lane. Still, my cybersecurity brain keeps coming back to the same problem: every new layer of biometric identity like TSA PreCheck Touchless ID brings new privacy and breach risk with it, even when using the airline app.
I’m not against moving faster through the airport. I’m against giving up more than I realize just to save a few minutes. Before you opt in to these programs, ask those key questions. Then opt in with confidence if the answers satisfy you.
OpenClaw (formerly Clawbot and Moltbot) keeps popping up in my DMs. Friends, family, parents in my neighborhood, and security folks I work with all ask the same thing: “Is it safe to run an AI assistant that can actually do stuff?” Here’s my honest take on OpenClaw security and secure deployment: OpenClaw is impressive because it is an autonomous AI agent that turns a chat message into real actions. But anything that can touch files, browsers, and commands deserves grown-up security. “Convenience is great until it becomes an open door”.
So in this post, I’m going to share how I test OpenClaw in a way that keeps it off the public internet. I’m also going to explain why I personally like Twingate for this, because it lets me keep ports closed while still getting secure remote access.
What OpenClaw Is Great At, And Why That Also Makes It Risky
OpenClaw is a self-hosted AI agent. In plain English, that means it’s a “do-er,” not just a “talker.” You chat with it in an app, and it can run skills that perform real tasks, like updating files, calling APIs, or automating a browser session.
When I say “agent,” I mean software that can take a goal, plan steps, and then act. When I say “skills,” I mean plug-in abilities you enable, like file access or shell commands. If you want a deeper, plain-language rundown of what agents are and why they matter, I wrote AI Agents Explained for 2025 Workflows.
That power is also the risk, especially when considering OpenClaw security and secure deployment.
If OpenClaw can run tools, then a bad prompt, a poisoned skill, or a stolen key can turn “helpful assistant” into “tiny intern with admin access and no fear.” The most common threats aren’t sci-fi. They’re the same boring problems we’ve always had, just with better automation and added runtime risk:
Prompt injection: Trick the agent into ignoring your rules and doing something unsafe via untrusted input.
Prompt injection through authentication bypass: An attacker crafts input to override safeguards and access restricted actions.
Stolen API keys: If someone gets your model tokens, they can burn money or pull data.
Unvetted skills: A skill can be buggy, over-permissioned, or flat-out malicious, enabling remote code execution or data exfiltration.
Accidental exposure: One port-forward, one rushed firewall rule, and you have exposed instances vulnerable on the internet.
My rule: treat OpenClaw like shadow AI that can touch real systems in your home network, because it can. Testing safely beats being fearless.
The Two Ways People Get Burned: Public Exposure And Over-Permissioned Tools
Most “I got wrecked” stories fall into two buckets.
First, public exposure. Someone opens an inbound port for convenience. Maybe it’s SSH, a dashboard, or the OpenClaw gateway itself. The thought process is always the same: “It’s just for a day.” Then life happens, the port stays open, and scanners find it.
Second, over-permissioned tools. People enable the scary skills because they’re fun. Shell access, full disk read and write, browser control, and broad network reach. Then they install a skill they didn’t review, or they paste something into chat that the agent interprets in a surprising way.
Here’s the cause and effect in one sentence: the internet will eventually talk to your agent, and your agent will eventually do what it’s allowed to do.
If you want to see how the broader community is thinking about hardening, I’ve skimmed a few guides, and the most practical one I’ve seen is OpenClaw hardening steps. I don’t agree with every choice, but the defensive mindset is right.
My “Safe Sandbox” Setup For Playing With OpenClaw
When I test OpenClaw (or, for that matter, any new tool), I focus on security and secure deployment. I build in a sandbox mode that assumes something will go wrong. Not because I’m pessimistic, but because it’s cheaper than cleaning up later.
My baseline looks like this:
I run OpenClaw on a spare machine, a VM, or a container. I keep it away from my personal laptop files, family photos, password vault exports, and work credentials. “If I wouldn’t hand it to a stranger at a coffee shop, I don’t mount it into the agent environment”. This setup works well for ecosystem components like OpenClaw.
Next, I keep the OpenClaw gateway bound to localhost. That’s a big one. Localhost means it only listens to itself, not your whole network, and definitely not the internet. If a service must be reachable, I want it reachable through an access layer, not by opening a port and hoping for the best.
I also keep persistent memory and logs locally while I’m learning. I don’t push agent logs into random cloud dashboards on day one. Logs can contain prompts, tokens, filenames, and other “oops” data you did not mean to share.
Containment First: VM Or Container, Limited File Access, And No “God Mode” Accounts
Containment is me asking, “If OpenClaw gets tricked, what’s the blast radius?”
So I start with virtual machine isolation or a container and a dedicated non-admin user. I avoid running anything as root unless I have a clear reason. For file access, I prefer narrow mounts. If the agent needs a folder, it gets one folder, not my whole home directory.
I also keep risky tools disabled at first. Shell execution, shell commands, broad file search, and browser automation are powerful, but they’re also easy to misuse. I turn them on only when I need them, and I turn them back off when I’m done testing that feature.
Gotcha: the “cool demo” permissions are almost never the “safe default” permissions.
Credential Hygiene: API Keys, Tokens, And Skill Review Without Paranoia
Secrets are where most lab setups get sloppy.
I don’t hardcode API keys, SSH keys, or OAuth credentials in plain-text files next to the app. Instead, I use environment variables, or a secrets manager if the setup warrants it. I also keep separate keys for lab vs production. That way, if my test box gets popped, the attacker doesn’t inherit my real-world access.
Rotation matters too. If I’ve been experimenting for a week and sharing screenshots, I assume a key might have leaked. Then I rotate it and move on.
Skills get a quick review with the Skill Scanner (https://clawned.io/), especially those pulled from ClawHub. I’m not doing a full code audit every time, but I do skim for obvious red flags: surprise network calls, broad file permissions, and anything that shells out without guardrails. Info-stealers love config folders, so I treat that directory like it’s sensitive.
For a more “setup-focused” angle (especially if you’re still learning the moving parts), this OpenClaw setup guide is useful background reading.
How I Secure Remote Access With Twingate, So I Don’t Need Public Ports Or A VPN
At some point, you’ll want to use OpenClaw when you’re not at home. That’s where people get tempted to punch a hole in the firewall.
I don’t do that!
Instead, I use Twingate (https://www.twingate.com/) as my preferred way to reach internal resources without exposing them, ensuring OpenClaw security and secure deployment. The core idea is simple: authenticate and authorize every connection, and keep the private service private. From my perspective, the big win is no inbound firewall rules. The connector makes outbound connections, providing network isolation so I’m not publishing a new target to the world.
This is also why I don’t start with a traditional VPN like ExpressVPN for this use case. VPNs can be fine, but they often feel like giving someone a wristband for the whole venue. For a more general comparison, I’ve got thoughts on that in best VPNs for secure remote access, but my OpenClaw stance is tighter access, smaller blast radius.
The Simple Mental Model:Localhost Gateway, Outbound Connector, And Policy-Based Access
I think about it like a locked door with a guest list.
OpenClaw stays on localhost with gateway binding (for example, 127.0.0.1:18789, but use whatever your OpenClaw config sets.) A Twingate Connector sits inside my network and phones out. My devices use the Twingate Client, and I only allow access to the specific resource and port I choose, leveraging this gateway binding for secure localhost exposure.
In Twingate terms, I’m working with a few building blocks:
Connector: The piece that lives in my network and creates outbound connectivity.
Client: The app on my phone or laptop that proves it’s me.
Resources: The internal things I want to reach, like the OpenClaw gateway that implements the Model Context Protocol for agent communication.
Policies: The guest list, which says who can access what, and under what conditions.
Because nothing has to listen on the public internet, scanning bots can’t even knock.
The Policies I Use: Groups, MFA For Anything Serious, And Logging I Actually Review
Policies are where the safety really shows up.
I assign access by group instead of building one-off exceptions, effectively creating an allow-list. For anything tied to sensitive data, I require MFA. If OpenClaw is allowed to touch even mildly important systems, MFA is non-negotiable. Even with this setup, remote access doesn’t solve issues with untrusted input.
Then I turn on logging and actually look at it. I’m not staring at dashboards all day, but I do check for weird access patterns, like odd hours, unknown devices, or repeated connection attempts that don’t match my habits. I also monitor Connector health, because availability signals can double as security signals. If the Connector flaps, I want to know why.
If I’m going to run an AI agent, I want receipts!
Conclusion
OpenClaw is a powerful autonomous AI agent, which is why I treat it as a tool that can interact with real systems. My three guardrails stay the same: isolate the environment, minimize permissions and credentials to prevent risks like credential dumping, and avoid public exposure by using Zero Trust access (Twingate is my go-to for that).
This guide on OpenClaw security and secure deployment emphasizes starting small, keeping risky skills off at first, and proving your setup is safe before you expand it. If you’re running OpenClaw already, I’d love to hear what you’re using it for, and what part you want to lock down next.
Is Now The Time to Move From Windows to Linux After KB5074109?
2 weeks ago, my PC started acting like a moody toaster. I didn’t think it would turn into a whole operating system crisis. Then the Windows 11 update KB5074109 landed (released January 13, 2026), and suddenly “normal computer stuff” became a rotating cast of boot failures, apps freezing, and sleep mode doing its best impression of a coma.
I’m not new to troubleshooting, but even I hit that point where you stare at the screen and think, why is the thing I pay time and attention to the one demanding more of both? If you’re tired of Windows on Windows 10 or 11, you’re not alone, and if you’ve been side-eyeing a switch from Windows to Linux, that’s not a weird impulse anymore in 2026. It’s a reasonable question.
I’m focusing on Nobara and Pop!_OS because they’re friendly Linux distributions for normal humans but serious enough for gamers and power users who want to embrace open-source software. And if you want the messy, real timeline, receipts, and all, my full journey is in this shared chat: my Linux switch journal. Here, I’m going to summarize the key steps and lessons without assuming you speak fluent terminal.
What KB5074109 Broke, And Why It’s Making Me Rethink My Relationship with Windows
An update gone wrong can turn a normal work setup into a recovery-mode afternoon, created with AI.
KB5074109 wasn’t “just another Patch Tuesday” for a lot of people. The problem wasn’t only that things broke; it was that the breakage hit basics: booting, stability, and everyday apps. Microsoft did ship out-of-band fixes after the fact for some symptoms (more on that below), but the main damage was trust. When an update can brick the start of your day, you stop treating system updates like routine maintenance and start treating them like Russian roulette with your calendar.
From what I’ve seen in reports and user threads, KB5074109 issues have been persistent on certain Windows 11 builds and configurations, often in environments where a prior update had already left the system in a fragile state. If you want a quick, readable overview of the boot failures tied to this update, NotebookCheck’s summary is a solid starting point: KB5074109 boot failure reports.
Here’s the thing that matters for families and for work: forced updates plus a big blast radius equals risk. When a patch can take out email, cloud files, or booting, the cost isn’t “tech annoyance.” It’s missed school assignments, missed meetings, and a weekend eaten by recovery screens.
The Real-World Problems People Faced After Installing It
The stories were painfully consistent and, honestly, too relatable.
Some people hit boot failures with black screens and errors like “UNMOUNTABLE_BOOT_VOLUME.” That’s not a “reboot and try again” kind of day. That’s a “find another computer and start making a recovery USB” kind of day.
Others ran into Outlook problems, especially with POP and PST files. A common flavor was Outlook freezing or crashing when dealing with mail storage, and it got worse when cloud storage entered the chat. Picture this: Outlook locks up while saving an attachment to OneDrive, and now your “quick email” becomes a troubleshooting session. Windows Latest tracked a pile of these symptoms in one place, including Outlook and freeze issues: KB5074109 reported problems.
Then there were the oddball-but-real issues: Notepad or Snipping Tool refusing to launch, sleep mode failing (S3 sleep issues on some older systems), restart loops, Task Manager acting weird, and even reports of hardware compatibility problems with legacy drivers (like older modem drivers) breaking.
And yes, I saw reports of NVIDIA users hitting black screens. If that’s your world, Pureinfotech documented a set of symptoms and workarounds worth skimming: NVIDIA black screen fix notes.
What I Learned: It’s Not Just One Bad Patch, It’s The Lack of Control
Even when Microsoft fixes a chunk of it, the core lesson sticks: with this proprietary software, I don’t control the timing, and I don’t control the risk. That’s the part that wears people down.
Sure, there are mitigation steps. Uninstall the update, use System Restore, boot into Windows Recovery Environment (WinRE), roll back, pause updates, and repeat. Microsoft’s own user threads show how common “black screen after update” has become as a category of pain: Microsoft Q&A on KB5074109 black screens.
But ask a non-tech parent to do that while the family laptop won’t boot, and you’ll see why this is stressful. It’s not that people can’t learn (even if Windows errors feel more daunting than typing commands in a Linux terminal); it’s that they shouldn’t have to learn disaster recovery because they clicked “Restart now.”
This whole mess also re-lit the privacy conversation for me. When you’re already frustrated, it’s hard to ignore how much telemetry and account tie-in is baked into the experience. I wrote more about that angle here: Microsoft update privacy concerns.
How I’m Deciding If Linux Is Right for Me (And How You Can Decide Too)
My goal isn’t to “switch operating systems.” My goal is to stop wasting time on chaos I didn’t choose. So I built a simple decision framework I can actually live with, and you can steal it.
First, I’m getting honest about what I truly need, versus what I’m just used to. If the only reason I keep Windows is muscle memory, that’s not a good reason. If the reason is a must-have app for work, that’s a very good reason.
Second, I’m measuring my tolerance for troubleshooting. Linux in 2026 is dramatically easier than it used to be, but it’s still not magical. If you want something that behaves like a locked-down appliance, you can test a Linux distribution in VirtualBox first, but you’ll still need a little curiosity.
Third, I’m looking at hardware support like it’s a deal negotiation, especially since the hardware requirements for Wi-Fi, Bluetooth, sleep/wake, GPU drivers, multi-monitor setups, and printers are where “perfect on paper” becomes “why is this button greyed out?”
Finally, I’m weighing security and privacy goals. Not in a tinfoil hat way. In a “who’s in charge of my device” way.
My Deal Breakers: Apps, Files, And Workflows I Can’t Lose
I started with an inventory. Not a fancy spreadsheet, just a real list of what I open every week. You can quickly get one by using this command line command from a PowerShell prompt:
I then fed all of the text files that these commands created into Claude (you could use ChatGPT if you want), which told me which drivers or apps would be an issue.
For many people, the big rocks are Microsoft Office and Outlook. If your life lives inside Outlook desktop with PST/OST files, you need to test carefully. The Office web apps in Microsoft 365 help a lot, and LibreOffice provides a solid local alternative for managing documents. Many work portals are browser-first now, which makes switching easier than it was a few years ago.
I also checked my “adulting apps”: password manager, VPN, backup tool, printer/scanner utilities, and anything tied to school or work identity logins. On the password side, I’m a fan of keeping it simple and consistent across devices, and a password manager is non-negotiable for me. If you need a push on that, here’s why I treat it as basic hygiene: why a password manager is essential.
The file format question matters too. DOCX is usually fine. Photos are usually fine. PST files can be… spicy. CloudSync services, like OneDrive or Dropbox, also change the risk. If your plan is “I’ll move later,” you’ll end up moving during a crisis. Testing is the calm way.
Gaming and Creator Stuff: Where Linux Is Great Now, And Where It Still Hurts
Linuxux gaming is legit now, mostly because Steam’s Proton makes a lot of Windows games run well. But I’m not going to sugarcoat the pain points.
Anti-cheat can still block some titles, and certain launchers can be stubborn. VR support can be hit or miss depending on your hardware and the games you play. Streaming setups can be great (OBS is strong on Linux), but you’ll want to validate capture devices, audio routing, and GPU encoding.
My rule is simple: test your top 5 games and your top 3 creator tools before you commit. If you don’t test, you’re not “switching,” you’re gambling.
Security, Privacy, And Family Use: The Quiet Reasons Linux Is Getting Popular
Linux doesn’t make you invincible. You still need updates, strong passwords, and backups. You can still install something sketchy and ruin your day.
But Linux does change the default relationship. I get more control over when updates happen, what gets installed, and how noisy the system is. Less nagging. Fewer ads baked into the OS experience. Fewer “helpful suggestions” that feel like sales.
For families, that control can be a relief. A kid just needs a stable machine for school, video, and maybe Minecraft. A parent needs an email and a browser that doesn’t implode after an update. Linux can do that.
A home setup where Linux can serve both work and play without constant interruptions, created with AI.
Also, if you’re migrating partly for security, don’t forget the basics still matter across any OS: secure browsing, safe downloads, and encrypted connections when you’re on public Wi-Fi. If you want my practical take, here are the advantages of VPN for privacy.
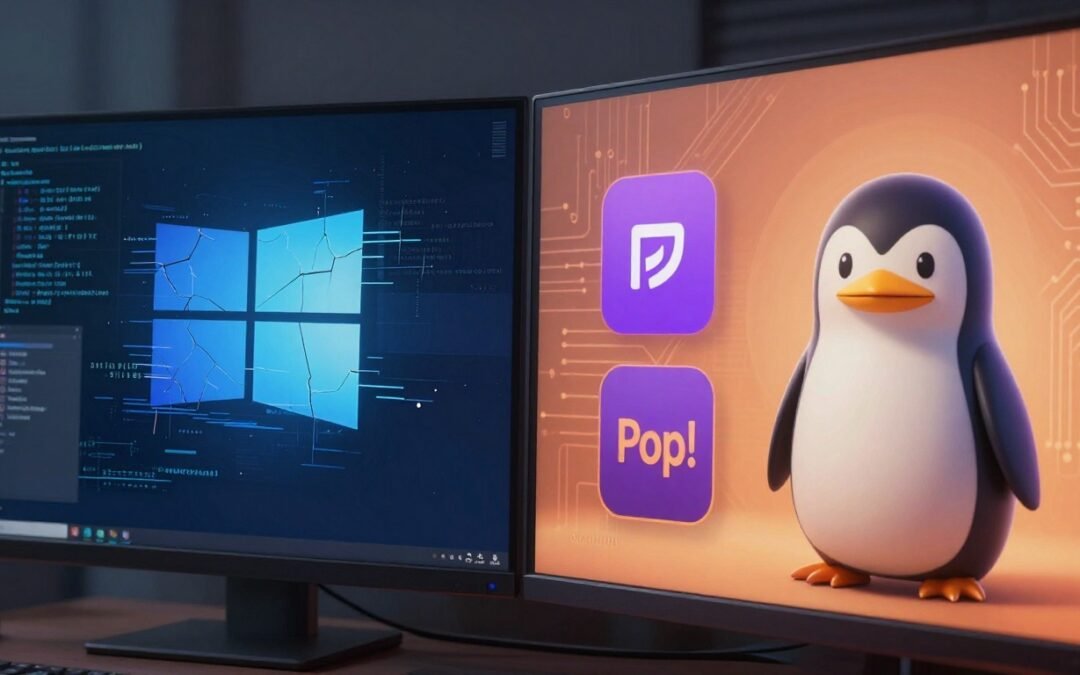
Nobara vs Pop!_OS: How I’m Starting My Journey
Two popular Linux choices side-by-side, one tuned for gaming and one tuned for daily work, created with AI.
I’m treating Nobara and Pop!_OS like two different vehicles. One is a sporty hatchback that’s fun right away. The other is a reliable SUV that starts every morning and doesn’t make my life exciting.
Both are free. Both can be tested from a USB drive without installing. Both are modern enough that you don’t need to be a Linux historian to use them.
The biggest difference, in plain English, is this: Nobara tries to get you gaming faster out of the box, Pop!_OS tries to be a calm, clean daily system that still plays games. Much of this comes down to their desktop environment choices, which affect the visual and functional feel of the system.
Why I’m Looking at Nobara First
Nobarara is Fedora-based and tuned for gaming and streaming. The whole pitch is “less setup, more playing.” That means codecs and tweaks are commonly included, so you aren’t hunting for basic stuff after installation. It often pairs this with KDE Plasma for a gaming-centric interface that suits tinkerers.
The tradeoff is speed. Faster-moving updates can mean you get newer features sooner, but you might also see more surprises than you’d want on a machine you rely on for work deadlines.
If you’re the type who updates drivers on day one and enjoys tinkering, Nobara makes a lot of sense. If your main goal is “I want Steam and my controller to work today,” it’s appealing. For users with older hardware seeking efficiency, options like Xfce exist across Linux distros, but Nobara shines on modern gaming rigs.
If you want the official voice behind the project, their documentation is worth a skim before you commit: Nobara new user guidelines.
Why Pop!_OS Feels Like The Safer Daily Driver
Pop!_OS is Ubuntu-based and built by System76, and it feels like it was designed by people who want your computer to stop bothering you. The UI is clean, the workflow is friendly with its GNOME base, and it’s especially popular on laptops because it tends to behave well with power management and everyday hardware. Users can easily find and install apps via the Software Manager.
Pop!_OS also offers an NVIDIA-friendly path, which matters if you’ve ever been trapped in driver drama. I’m not promising perfection, but I like stacking the odds in my favor. Those seeking a classic Windows-like feel might look to Linux Mint and its Cinnamon desktop instead.
My personal bias is simple: I want my main machine boring and reliable. I don’t want to “babysit” it. So Pop!_OS is my front-runner for the system I use for writing, admin tasks, browsers, and normal life, with gaming as a bonus.
My Low-Risk Migration Plan: Try Linux Without Nuking Your Windows Life
Testing Linux from a USB drive before installing helps keep the process calm and reversible, created with AI.
If Linux curiosity feels like standing at the edge of a pool, my plan is the shallow end first. No drama, no “wipe the drive and pray,” and no weekend-long rebuild unless I’m sure.
I’m also assuming something important: if Windows just burned you with a bad update, your risk tolerance is low. That’s normal. So my migration plan is designed to keep Windows intact until Linux proves itself in my real routine.
There are a couple of gotchas to keep in mind as you plan. Device encryption and BitLocker can complicate resizing partitions. Secure Boot in your UEFI firmware can block some setups depending on BIOS settings. None of this is a deal-breaker, it just means you should go slow and read the prompts instead of clicking through on autopilot.
Step 1: Test Drive on a USB and Check Your Hardware Basics
A live USB is exactly what it sounds like: you boot Linux from a bootable USB drive and try it without installing. It’s the closest thing to a risk-free test. Download the ISO file for your chosen distro, then use Rufus to create the bootable USB drive.
In my first 15 minutes, I check the stuff that ruins daily life if it doesn’t work: Wi-Fi, Bluetooth, audio, mic, webcam, trackpad gestures, sleep and wake, external monitor, and basic printing.
If you game, add GPU sanity checks. Make sure the refresh rate is right, make sure the resolution isn’t weird, and make sure performance isn’t obviously broken. I’m not benchmarking; I’m just looking for red flags.
Step 2: Dual Boot vs Full Install, And Why I’m Not Rushing It
Dual boot means you keep Windows and install Linux alongside it. When you start the PC, you choose which one to run. It’s a safety net, and it’s great for testing during the installation process.
The downside is complexity. You’re managing partitions, boot menus, and two operating systems that both think they deserve the front seat. If you’re not careful, you can make recovery harder, not easier.
A full install is simpler once you’re ready. One system, one update flow, one set of backups. Clean and calm.
My personal rule: I keep Windows until I’ve had two normal weeks on Linux. Not “two exciting weeks.” Two boring weeks where I can work, browse, game a bit, and sleep with the laptop without surprises.
Step 3: Rebuild My Daily Apps the Linux Way (Without Fighting the OS)
The fastest way to hate Linux is trying to treat it exactly like Windows. The better approach is to use the package manager, install trusted packages, and stop hunting random installers on the web.
My realistic app stack looks like this: Office web for certain tasks, LibreOffice for local docs, Thunderbird if I want a desktop mail client, Steam for games, and OBS for recording and streaming.
This is also where I tighten my “don’t download sketchy stuff” rule. Linux malware exists, and bad habits are still bad habits. If you need a reminder of how ugly random downloads can get, especially in the “free software” corners of the internet, here’s my warning label: dangers of using pirated software.
Backups matter more than any OS choice. I want at least one external drive backup plus cloud sync for the stuff that changes often. If an update breaks something, I want the fix to be “restore and move on,” not “rebuild my life from memory.”
Conclusion
KB5074109 didn’t make Windows perfect; it just made Windows feel less predictable than I’m willing to accept. If you’re frustrated with update chaos or privacy nags, or you’ve got older hardware that still deserves a second life, Linux is worth serious consideration right now. If you’re a gamer who’s willing to test your favorites first, or you want more control over your own device, it’s an especially good time to experiment.
If you have must-have Windows-only apps, a locked-down work laptop, or zero bandwidth for troubleshooting, waiting is the smart move. My recommendation is simple: read my Linux switch journal if you’re ready to switch from Windows to Linux, then try a live USB test of your preferred Linux distribution (like Linux Mint for beginners who might find the other options too complex) this weekend and decide based on evidence, not hype.
Microsoft has been pushing harder to connect Windows and Microsoft 365 to its cloud storage services. The latest Windows 11 setup makes that extra obvious, because OneDrive Backup can switch on by default during a clean install, which is why many want to turn off OneDrive backup in Windows 11 right away.
That surprise from the Out of the Box Experience has led to a lot of angry posts online. I get it. If you expect your files in the usual folders and they suddenly aren’t there, it feels like something got taken.
The good news is this: your files usually aren’t gone. They’ve been moved, then synced to OneDrive. And Microsoft quietly improved the “turn it off” process, so getting your files back into local folders is less painful than it used to be.
Where My Files Went (And Why It Looks Worse Than It Is)
When I’m saving locally, my default folders live under my user profile, like:
c:Usersyour_nameDocuments folder
With OneDrive Backup on, the “real” working folders shift to something like:
C:\Users\your_name\OneDrive\Documents
The files still exist on the PC, and the sync process uploads them to OneDrive online. That’s the whole point of the backup.
The confusion comes from what Windows leaves behind. The original Local folders can still appear in File Explorer, but they may be empty. So I click Documents out of habit, and it looks like everything vanished.
It didn’t. The folder target changed.
Why Microsoft Is Doing This (The Helpful Reason And The Annoying One)
There’s a practical upside in Windows 11. Files that only live on a laptop are easy to lose. Theft happens. Drives fail. Ransomware hits. Cloud backup can save people from a bad day turning into a disaster.
There’s also the part that makes people roll their eyes. Pushing files into OneDrive pushes people toward paid storage. If you only get 5GB free, it doesn’t take long to hit the limit with cloud-only files.
From a security angle, this is where the debate gets real. Privacy matters, and so does choice. Some people don’t want personal data tied to their Microsoft account, leaving their device, and that’s valid.
I’ll say it plainly because it’s the heart of the frustration: Control and trust are the core issues. If I don’t want cloud backup, I should be able to say no, and I should be able to undo it without a scavenger hunt.
How OneDrive Backup Works Now When I Turn It Off
Microsoft changed something important recently. In the past, if I disabled OneDrive Backup, Windows would stop syncing and backing up, but my files often stayed stuck in the OneDrive folder. That meant I had to manually move everything back into my local profile folders.
Now, when I turn off OneDrive Backup in OneDrive settings, Windows can offer an option to move files back to local folders as part of the process. It’s still not as clear as it should be, but it’s better.
What follows assumes I’m on Windows 11 (newer releases), signed in with a personal Microsoft account, and OneDrive Backup is currently enabled.
How I Undo OneDrive Backup And Put Files Back In Local Folders
Step 1: Open The Backup Settings
I look for the OneDrive icon in the Taskbar‘s Notification area, right-click the OneDrive icon, then select Help and Settings and the Settings menu. From there, I go to the Sync and backup area and open Manage backup.
I can also open File Explorer, find my OneDrive (Personal) entry in the left pane, right-click it, go to OneDrive, then Settings, and open Manage backup from the Sync and backup section.
On some Windows 11 builds, I get there via Settings>Accounts>Windows Backup, then a button like Manage sync settings.
Either way, I end up on the Manage backup screen showing the folders that are being backed up. I pause here and check which folders are marked as backed up before changing anything.
Step 2: Turn Off Backup For Each Folder
In the manage backup screen, I use the toggle switch to turn off backup for the Documents folder first (then the Pictures folder, then the Desktop folder, if they’re on). Windows will prompt me with choices.
I pick the option that stops backup and lets me choose where files should live, then I choose Only on my PC.
I repeat that for each folder until they all show as not backed up.
One weird behavior I’ve seen is that a folder can flip back to “Ready to back up,” and the switch turns itself back on. If that happens, I close out instead of saving changes, because saving can re-enable backup.
Step 3: Check My Local User Folders
Next, I open File Explorer and type %userprofile% in the address bar. That brings me to my local profile folders.
I open Documents, Pictures, and Desktop and confirm my files are actually there. This matters because I don’t want to delete anything until I know the local copies look right.
Step 4, Confirm The OneDrive Versions Are Empty (Or Move Anything Left Behind)
I open a second File Explorer window and type %userprofile%OneDrive. I also quickly check the Account tab to verify connectivity.
I look inside the OneDrive versions of Documents, Pictures, and Desktop. If those folders are empty, great.
If I still see files there, I manually move them back. I copy them out of the OneDrive folder and paste them into the matching local folder under %userprofile%.
After I confirm everything is back where I want it, I can delete the now-empty duplicate folders inside OneDrive.
How to Stop The “Start Backup” Prompts In File Explorer
Even after I decide I don’t want OneDrive Backup, Windows may keep nudging me with the Start backup message. In File Explorer, I might see a Start backup button when I’m viewing folders like Documents, Pictures, Desktop, Music, or Videos.
I don’t click it!
If I want the nag to go away, I right-click that Start backup button and choose Stop backup from the menu. I may need to do it in each folder where Windows shows the prompt.
How I Turn Off Microsoft 365 Saving New Files To The Cloud
If I’m using a Microsoft 365 build that defaults new Word files to OneDrive, I change it in the app settings.
Inside Word, I go to Options, then I open the Save section. There’s a checkbox like “Create new files in the cloud automatically.” I cleared that checkbox.
Once I do, the option to save to a local location becomes available, and I set my default save location to local folders.
My Bottom Line
OneDrive Backup doesn’t usually delete your files, but the folder move is easy to miss, and that’s what causes the panic. If you want local storage only, you can turn off OneDrive backup in Windows 11 and, in newer Windows 11 versions, but some Windows update in the future might also move your files back for you. 😉
For those who want to completely avoid the service, advanced options include using “Unlink this PC” as a secondary method of disconnection or “Uninstall OneDrive” as a permanent solution. Professional users needing strict control can turn to the “Group Policy Editor” to “Prevent the usage of OneDrive,” while a quick “Stop backup” provides final advice for immediate relief.
Are you interested in a career in cybersecurity? Then you may have heard of the CEH certification. This certification is highly sought after by professionals in the field, and for good reason.
In 2005, the US Department of Defense issued a directive requiring anyone who handles US government IT to have baseline IT certifications, including ethical hacking. This is one of the reasons why cybersecurity professionals pursue the CEH certification. It’s not only an industry standard, but it’s also internationally recognized and valid in IT industries across the world.
Having a CEH certification on your résumé is a valuable asset.
It demonstrates that you understand how hackers think, and with the recent rise in hacking incidents, professionals with this certification are in high demand.
So, who should consider obtaining a CEH certification? If you’re a cybersecurity officer in your company, a penetration tester, an internal or external auditor, a security professional, a standard administrator or consultant site administrator, or even just a tech-savvy home user who wants to know how secure their environment is, then this certification may be right for you.
But what does it take to become a CEH? There are standards to maintain, including skills, values, and ethics from the International Council of E-Commerce Consultants (EC-Council) Code of Ethics. You can find more information about these requirements at https://www.eccouncil.org/code-of-ethics. Some of the critical requirements include privacy, disclosure, area of expertise, unauthorized usage, authorization, project management, knowledge sharing, confidence, legal limits, and underground communities.
Let’s look at each of them in detail.
Privacy: Ethical hackers have access to sensitive information like social security numbers, customer databases, and intellectual property. It is their responsibility to protect this information and not use, steal, modify, change, or destroy it.
Disclosure: Ethical hackers may come across unsettling or uncomfortable information or content, but their duty is to report it to authorities or concerned people. They must disclose everything they discover, regardless of how grave or discomforting it may be.
Area of expertise: Ethical hackers should be honest about their level of knowledge, skill sets, and limitations. They should not misrepresent themselves and should ask for an expert’s help if they lack the necessary experience or training.
Unauthorized usage: Ethical hackers should avoid using illegal or unethically obtained software and hardware. They should also not accept bribes or join in for personal gain if they uncover evidence of unauthorized usage in a company.
Authorization: Ethical hackers must use resources, data, and information in authorized ways. They should let the company know how they intend to use the data and ensure they get consent where necessary.
Disclosure: Ethical hackers should verify with or notify the hardware manufacturer when they discover an issue in hardware or software before going public. If the manufacturer does nothing, they should blow the whistle to save users and share the solution if possible.
Project management: Ethical hackers need to have great management skills to be efficient and manage their projects effectively. They should set clear goals, have a reasonable project timeline, and communicate effectively.
Knowledge sharing: Ethical hackers commit to learning, keeping up with new developments, and creating public awareness by teaching or giving free lectures, spreading information on social media platforms, and enlightening the people they know about securing hardware and software.
Confidence: Ethical hackers should always present themselves in a professional, honest, and competent manner, even when competing with someone else for a project. They should be experienced with any software, tricks, or tools they utilize against a network and not fix issues outside the scope of their project.
Legal limits: Ethical hackers should only accept approved, authorized, and legal projects and follow the code of ethics in making decisions.
Underground communities: Ethical hackers should not engage in black-hat activities or associate with communities of black-hat hackers. They should not aid or help black-hat hackers advance their mission and only engage them to learn what’s new, what they know, what they do, and how they think.
Want to secure your online presence from malicious activities but don’t know what tool you should use to achieve your security on your Android device? Then you have come to the right place 😉 We’re going to break down all the essential information about the best VPNs that can be used to secure your Android device.
Virtual Private Network is an effective security tool that safeguards your online activities on your devices like your Android phone or tablet. VPN helps you get peace of mind and free web browsing securely and privately. You can also hide your identity and location from advertisers and online trackers through a VPN. I’m a big fan of having a VPN for your desktop and laptop, but equally as big of a fan when it comes to mobile devices as well.
Many VPNs are available on the market today. When I started diving in to do more research, I was amazed at how far VPNs for smartphones have really evolved just in the last year alone. Because of that, it is crucial to make a proper and informed decision based on this list that contains the best VPNs for Android in 2022. Luckily, I was able to come to a conclusion on some of the best VPNs for your Android.
What Is A Virtual Private Network (VPN)?
A virtual private network or VPN is a network encryption tool that provides security and privacy to your web browsing. Without VPN, any observer can easily monitor and check your web traffic. VPN helps to hide your identity and location from all online observers.
VPN encrypts all web traffic by sending it to a secure server operated by the company. The crucial thing is that VPN hides the IP address of your Android phone, which keeps away the active snoopers. All these encryption functions are to protect your online activities.
Additionally, some VPNs also provide antivirus support to your android. This feature is not available in all types of VPNs, but those who offer it, ensure you enjoy robust protection from malware attacks.
Why does Your Android Need a VPN?
A VPN has a vital role in Android smartphones because they access and use the internet and cellular internet which can be compromised if not used properly. VPNs help secure your phone’s identity and location to prevent harmful threats.
Best Android VPNs in 2022
The list of the best android VPNs updates every day based on features, services, and ranking. As previously notes, VPNs for smartphones is a growing market, so we wanted to key in on those VPNs that have stood out most recently. The following are the top five Android VPNs today:
NordVPN
NordVPN is one of the best and most reliable brands in the VPN market. The main thing that makes it a unique and trusted brand is its design. The App has a user-friendliness interface and is easy to use, just like their desktop VPN. It offers the following features to its users:
It offers a 30-days free trial to new users
You can connect six devices with this application. If you have a family of Android users, that’s a nice bonus.
It has 5300 plus servers. This is an important feature of VPNs.
NordVPN has about 94 countries included in its server list.
The VPN I personally use is ExpressVPN. It is also considered one of the top and best virtual private networks for your Android. ExpressVPN is super reliable, very fast, and easy to use the VPN tool in the market. And just like its NordVPN competitor, it has a great user interface for desktop and mobile. ExpressVPN offers the following services:
It also offers a 30-day free trial period
ExpressVPN has 60 plus server locations and 3000 plus servers. Not as robust as NordVPN, but still impressive.
SurfsharkVPN is one of the cheapest and most comfortable VPNs today and quickly becoming a favorite of mine. Surfshark VPN does not leave behind when it comes to features. Surfshark is the only VPN that does not put a barricade on the connected devices.
It offers a free trial for 30 days
It has 65 plus server locations and 3200 plus servers
It does not limit connected devices
Includes a kill switch, CleanWeb, end-to-end encryption, Bypasser (so you can still do online banking), and a strict no-logs policy.
ProtonVPN is also considered one of the best VPNs that provide widespread online privacy and is the only option on the list of the free tier. ProtonVPN may not be the best choice if you are looking for a low price and unlimited access to devices.
It has only 1669 servers and 63 locations. Not nearly the number we see with its competitors.
It does not offer a free trial BUT has a Free Tier.
You can use it on ten devices at a time. You don’t get unlimited device use, but this feature is definitely a nice bonus.
This is the Android VPN that is for beginners due to its understandable interface and unique design. If you are looking for precision-tuning, then IPVanish is your Android VPN. It can generate visual graphs of internet activity.
It is a customizable VPN
It has over 75 server locations and 1600 plus servers
How Do I Know If I Need A VPN For My Android Device?
If you’re like most people, you probably use your Android device for a variety of tasks every day. Most people are spending close to 3 hours a day on their smartphones. From checking email and browsing the web to streaming video and sharing photos, your phone is always with you, always providing a constant connection to the outside world. But think about that for a moment, this means ALL of your Android activities are being tracked by your carrier, websites, apps, and even the government. If you’re concerned about your privacy, then you may be wondering if you need a VPN for your Android device.
Remember what a VPN does: it’s a tool that encrypts all of your internet traffic, making it impossible for anyone to snoop on your activities. I love that. It’s like the invisibility cloak Harry Potter wears, but for your Android phone. When you use a VPN, all of your data is routed through an overseas server, making it appear as though you’re located in another country or city. As mentioned above, this has a number of benefits, including bypassing censorship and accessing geo-restricted content. But perhaps the most important benefit is that it keeps your information safe and secure from prying eyes (be it government, hackers, or businesses).
But do you really need a VPN for your Android device? If you’re concerned about privacy or security, then the answer is probably yes. A VPN will encrypt all of your internet traffic and keep your information safe from hackers, government surveillance, and a list of other places keen on collecting your information. But if you’re really not that concerned about your data being hacked or used for marketing or business material, then you probably don’t need one.


 My rule: treat OpenClaw like shadow AI that can touch real systems in your home network, because it can. Testing safely beats being fearless.
 Photo by
 An update gone wrong can turn a normal work setup into a recovery-mode afternoon, created with AI.
 A home setup where Linux can serve both work and play without constant interruptions, created with AI.
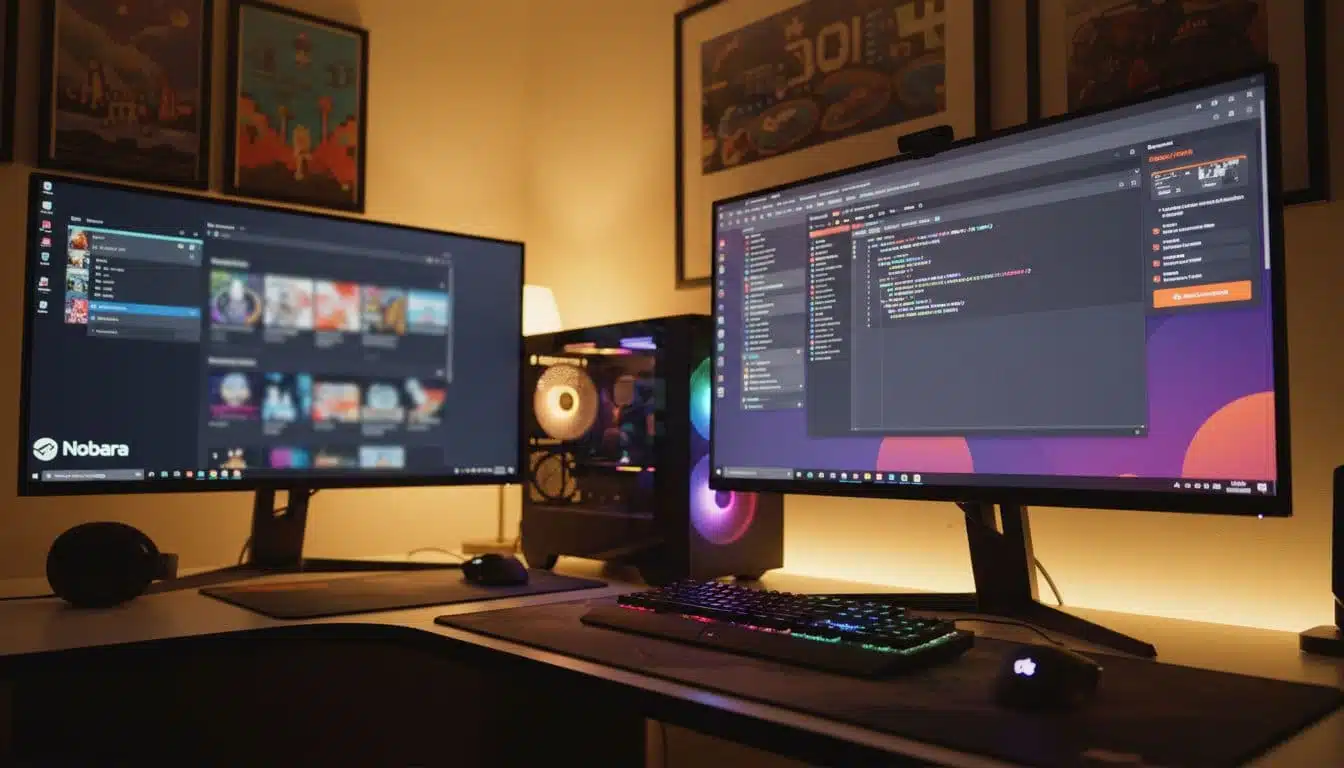 Two popular Linux choices side-by-side, one tuned for gaming and one tuned for daily work, created with AI.
 Testing Linux from a USB drive before installing helps keep the process calm and reversible, created with AI.