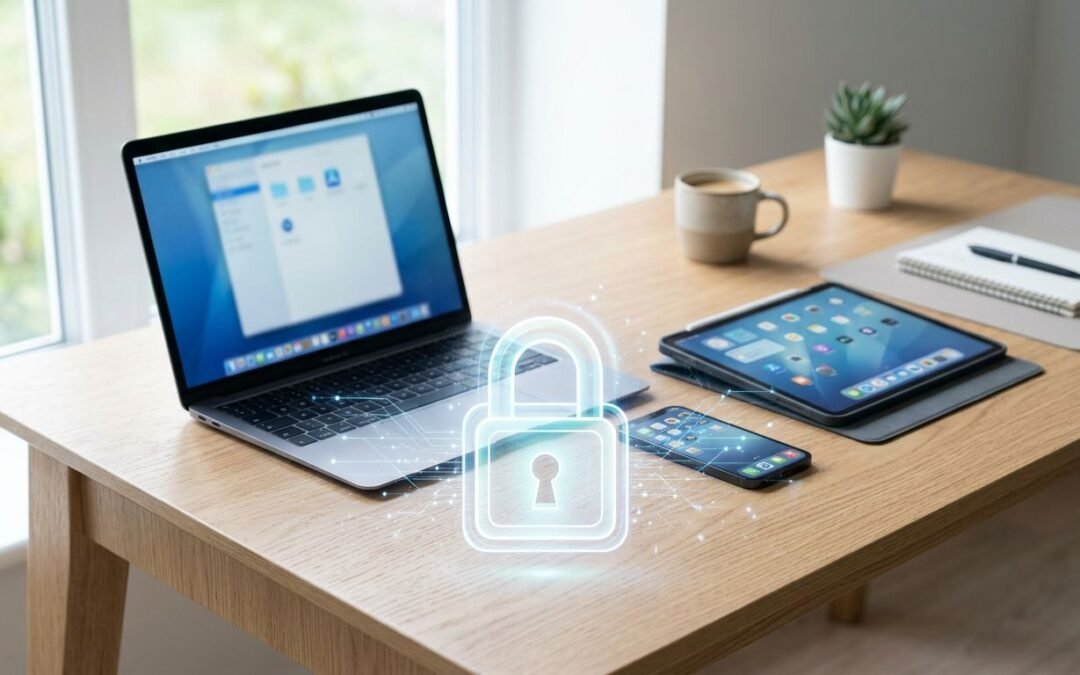
The easiest way to leave a door half-open online is to forget which apps still have a key. When you grant excessive app permissions to third-party services, you create a potential security loophole that lingers long after you stop using the software.
I see this happen all the time. We try a new tool, click Sign in with Google or Continue with Apple, then move on with life while that connection keeps humming along in the background. Taking a moment to evaluate these links is a vital part of maintaining your data privacy in an increasingly connected digital world.
When I review app access in my accounts, I usually find old permissions I forgot I ever granted. The cleanup is simple, and it makes a real difference.
Key Takeaways
Prevent unnecessary exposure: Revoking permissions for apps you no longer use minimizes the 'blast radius' if a third-party service suffers a data breach.
Audit for context: Review your connections regularly to ensure that the permissions granted—such as access to contacts, photos, or email—still align with the app's current purpose.
Proactive cleanup is easy: Deleting an app from your phone is often insufficient; you must explicitly remove the digital 'key' from your Google, Apple, or Microsoft security dashboards.
Adopt a 'zero-trust' mindset: If you don't recognize an app or can't recall why you granted it access, removing it is the safest and most effective course of action.
Why Old App Permissions Deserve a Look
When I talk about app access, I mean the app permissions I grant to a site or service to connect with my Google, Apple, or Microsoft account. Sometimes an application only requires my name and email address. Other times, these third-party apps gain access to far more sensitive data, such as my files, calendar entries, contacts, or photo libraries.
That second category is where things get interesting.
Deleting an app from my phone does not always remove the connection to my account. The software may still maintain valid access until I explicitly revoke permissions. Think of it like handing out spare house keys. One trusted key is fine, but ten forgotten keys floating around in old coat pockets and junk drawers is a different story.
This matters for three main reasons. First, stale app permissions create unnecessary digital clutter, which makes it much harder to spot suspicious activity. Second, a service I trusted two years ago may not deserve that same level of access today. Third, if a connected service suffers a data breach, the blast radius can be significantly wider if it retains access it no longer needs, potentially opening the door for malicious apps to compromise my information.
Regularly auditing your security settings is the best way to ensure these connections are reviewed periodically rather than granted once and ignored forever. If you want a little plain English backup on the Google side, The Verge's walkthrough of disconnecting third-party Google apps is a good visual companion.
If I do not recognize an app, I do not keep debating with myself. I remove it.
One more thing: this is not the same as locking down the account itself. Cleaning up these connections is only one layer of defense. Strong sign-in protection is another. If you want to strengthen that foundation, take a minute to read what two-factor authentication is.
How I Review App Access in Google
Google gives me one of the clearest views of third-party access, which is nice because Google accounts and Google Workspace environments tend to collect a lot of connections over time. Email apps, note apps, browser extensions, AI tools, calendars, and shopping sites are all common culprits. If it ever asked to connect, there is a fair chance it shows up here.
The current flow lines up with Google's help on managing third-party connections:
I go to my Google Account and open Security.
I find Your connections to third-party apps and services.
I click See all connections to open my privacy dashboard.
I use this permission manager to open each app or service and review what it can access.
If I do not want it there, I choose Delete connection or Remove access.
What I like about Google's setup is the filtering. I can sort by apps that use Sign in with Google, linked accounts, or services with access to Google data. That sounds small, but it helps. A login connection is one thing, but OAuth permissions that grant access to Google data, such as Gmail, Drive, or Calendar, represent a much bigger privacy concern.
When I open an app entry, I look for three things. Do I still use it? Does the permission make sense for the app's job? Would I care if this app still had that access next month? If any answer feels off, I disconnect it.
There is one gotcha. Removing access can break features I forgot were tied to that app. Maybe a note app can no longer save to Drive, or a calendar tool stops syncing. That is fine with me, as long as it is a choice. I would rather break an old workflow than keep invisible access hanging around forever. If you are handling an organizational account, you might also need to check the admin console to ensure these settings align with your company policy.
I also do not assume every Google connection is dangerous. Some are normal. Some are useful. The goal is not to strip everything down to zero. The goal is to make every connection intentional.
After I finish a Google cleanup, I usually tighten sign-in protection too. If you are curious about password-free options, I wrote about Google passkeys explained, and it is one of the cleaner upgrades I can make.
How I Check Microsoft and Apple Permissions
Google puts most of this in one place. Microsoft and Apple are a bit different.
Microsoft leans more on a consent page for connected apps and services, powered by the same infrastructure as Microsoft Entra ID. Apple splits things between account sign-in connections and device-level privacy permissions. Once I know that, the cleanup gets a lot easier.
How I Review App Access in a Microsoft Account
For a personal Microsoft account, I navigate to the My Apps portal, sign in, and review the apps and services listed there. Each entry shows me what the app can access, and if I do not like what I see, I can remove those permissions.
This is where I look for old Outlook helpers, file-sync tools, game tie-ins, random productivity apps, and sites I tested once and never touched again. Microsoft accounts can end up attached to more stuff than people realize, especially if OneDrive, Outlook, Xbox, or Office apps are part of the mix.
What I pay attention to is scope. Basic profile access is one thing. Access to mail, files, contacts, or account info gets a much harder look. If the app name feels unfamiliar, or the permission feels too broad for what the app does, I remove it and move on. Any legitimate app can ask again later.
That ask again later point matters. Revoking access is not a permanent punishment. It is just me taking back a permission until I am convinced it still belongs.
How I Review App Access in an Apple Account
Apple is a two-part check for me.
First, I open my Apple Account settings and look for Sign in with Apple. That shows which apps use Apple's sign-in system. If I no longer use the app, or I do not want it tied to my Apple account anymore, I stop using Sign in with Apple for that app.
Second, I check device permissions on the mobile device itself. I open the system settings and navigate to the Privacy & Security section, where I can review access to things like Contacts, Photos, Calendars, location data, and the microphone.
That split matters. An app may not be using Apple sign-in at all, but it may still have permission to read photos, see contacts, or use the camera. That is still app access. It is worth taking the time to configure access properly to keep your data private.
I also like Apple's App Privacy Report when it is available on the device I am using. It gives me a more real-world view of what apps have been reaching for data and sensors recently. That is helpful because memory is unreliable. My phone's record is better than my guess.
What I Remove, What I Keep, and What I Recheck Later
When I perform routine access reviews, I do not turn the process into a complex research project. Instead, I rely on a few simple questions. Do I know what this app is? Do I still use it? Does the access match the app's job? Would I be comfortable if that app suffered a breach tomorrow? If the answers feel shaky, the app is removed.
The biggest red flags for me are old apps, abandoned experiments, and anything requesting permissions beyond its immediate scope. A coupon tool that wants broad account access is a clear "no." However, a calendar app that needs calendar access because I use it daily makes sense. Context always matters.
I am particularly cautious with apps tied to sensitive information. Email, cloud storage, contacts, and photos tell a detailed story about your digital life. Even when an app is legitimate, I view these specific connections with skepticism. Think of this as a form of personal identity and access management. Just as enterprise security teams treat these audits as a standard protocol, I view my own data hygiene as a necessity. By practicing good governance and compliance at home, I ensure that my digital footprint remains lean and secure.
This is where routine becomes essential. I set a calendar reminder every few months to flag any lingering permissions as pending review. I also initiate an extra check whenever I hear about a service breach or stop using a major application. This helps me track items that are pending review so they do not become a security mystery box. By conducting these regular access reviews, I keep my account security in top shape with minimal effort.
Once the permission cleanup is finished, I like to back it up with stronger account security. If your social accounts are part of your daily sign in life, this guide to setting up 2FA on social media accounts is worth the few minutes it takes to complete.
Frequently Asked Questions
Does deleting an app from my phone remove its access to my account?
No, deleting an app only removes the software from your device. The connection to your account remains active on the provider's servers, meaning the app could theoretically continue to access your data until you manually revoke those permissions in your account security settings.
Will removing app access break my other services?
It might. If you revoke access for an app that you still use, certain features—like syncing your calendar or saving files to the cloud—may stop functioning, but you can always re-grant access if you realize you still need it.
How often should I perform an app access audit?
Ideally, you should review your connected apps every few months. Setting a recurring calendar reminder is a great way to ensure this remains a habit rather than an afterthought, and you should also perform an audit immediately if you hear that one of your connected services has suffered a security breach.
Why does an app need access to my sensitive data like files or contacts?
Sometimes an app requires these permissions to provide its core functionality, such as a photo editor needing access to your library to save images. However, if the requested permissions seem overly broad or unrelated to what the app actually does, it is best to err on the side of caution and revoke the access.
Conclusion
Old app permissions are the junk drawer of account security. They are easy to ignore right up until something potentially harmful is hiding in there. Because of this, you should make it a routine habit to review app access across your various accounts.
When I check Google, Microsoft, and Apple for connected services, I almost always find something that no longer deserves access. This process is a vital part of your overall data protection strategy. It does not take long, but it closes one of the most overlooked gaps in everyday account security.
If an app still earns its spot, keep it. If it does not, take the key back. By auditing your third-party apps regularly, you take full control of your account footprint and ensure that your personal information stays private.
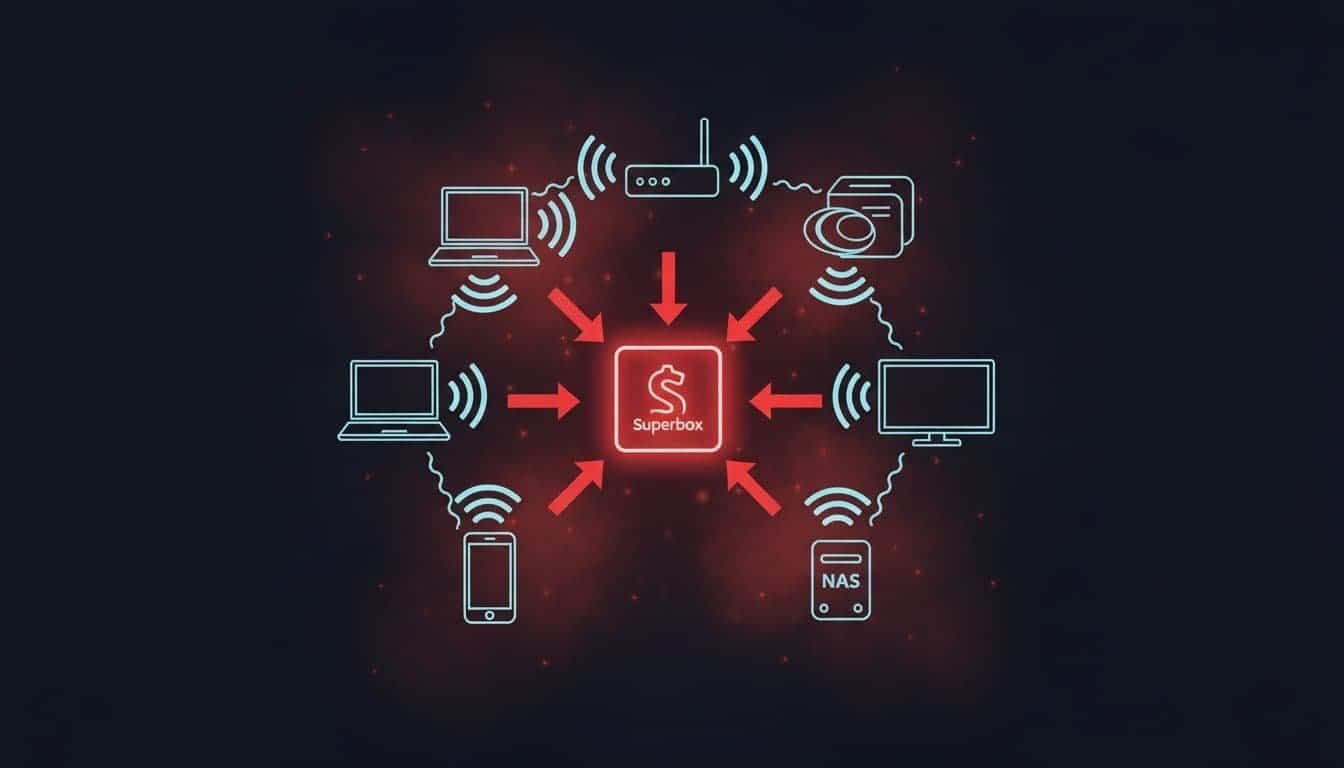
It doesn't take a burglar at the door to put my data at risk. A cheap streaming box on the same Wi-Fi can do plenty of damage all by itself.
That's why I would never think about a device like a Superbox or Megabox, as a TV accessory. I think about it as an untrusted Android computer with internet access, app installs, and the chance that someone else still has a hand on the controls. If I connect one to my home network, my phone, my router, and even my work laptop can end up in the same blast zone.
This is bigger than piracy or sketchy streaming. It's about the security concerns of what the device may be doing behind my TV while I log into work, store passwords, and trust my network to stay private.
Key Takeaways
A Superbox (and devices like it) isn't just a streaming gadget—it's an untrusted Android computer on my Wi-Fi that can expose my phone, laptop, and router to malware, backdoors, and remote control.
Even brand-new, it risks preloaded infections like BADBOX 2.0, botnet recruitment, DNS hijacking, and traffic rerouting that turn my home network into a cybercrime foothold.
It endangers work devices too: lateral attacks on my company laptop or office plug-ins can create incidents, cleanup costs, and policy violations.
These boxes fuel DDoS attacks, ad fraud, and proxy abuse...my IP could get flagged for someone else's crimes, with legal risks from piracy.
If one's on my network, I'd disconnect it now, isolate IoT, change passwords, and check router logs before anything else.
What a Superbox really is, and why it raises security alarms
A Superbox is usually an Android-based streaming device sold as a shortcut to lots of channels, apps, and "free" content for a one-time price. On the surface, it looks harmless. It plugs into HDMI, joins Wi-Fi, and behaves like any other media device.
The problem isn't the TV part. The problem is that the box is still a small internet-connected computer, and in some cases, it's a very low-trust one. It can and has install apps, talk to remote servers, change settings, and pull in software I never meant to trust. Some versions have been sold through major marketplaces, which makes them look normal when they may be anything but. That matters because recent reporting on BADBOX 2.0 infections in consumer Android devices tied millions of streaming devices, including jailbroken and unprotected hardware, to malware infections, suspicious app stores, and abusive traffic. A box can arrive new in the package and still be unsafe the moment it touches my router.
The hidden problem starts before you even finish setting up
This is the part that should make anyone pause. With these types of TV boxes, the trouble starts during setup, not after months of neglect. The device may push me toward third-party apps or unofficial sources instead of official app stores, ask me to disable built-in protections, or fetch software from places I would never trust on my laptop.
Some unsafe Android TV boxes have also been linked to botnet activity, ad fraud, and proxy abuse. So "brand new" doesn't mean "clean." It can mean the malware is already there, or that the setup flow is designed to bring it in.
If I treat that box like a normal Roku or Apple TV, I miss the point. A normal streamer is a closed product with guardrails. A questionable Android box can be more like handing a mystery laptop a permanent seat on my home network.
How a Superbox can take over my network
The scary part is not that the box might misbehave once. It's that it may have enough access to keep doing it, over and over, while I think I'm only using it to watch TV.
A Superbox comes with broad system permissions, hidden remote-control features, and software tools that don't belong on a simple living room device. Reports tied to these boxes described remote app installs, forced updates, app removal, and even what amounts to a remote kill switch, meaning someone else may be able to change how the device behaves or shut parts of it down from afar.
Backdoors mean someone else may still have the keys
A backdoor is a secret way in. Simple as that. If a box has one, then I may not be the only person with control over it.
That can mean remote parties gain unauthorized access to install new apps without asking, remove apps I do want, change settings, or route traffic in directions I never approved, all while exposing network vulnerabilities. If the device checks in with outside servers and obeys commands, then my ownership starts to look fake. I paid for the hardware, but someone else may still have admin rights in practice.
A Superbox stops being "just a streaming box" the moment someone else can change it after I plug it in.
That loss of control is the real issue. I can't make safe choices on a device if the device is still taking orders from somewhere else.
A risky box doesn't stay in one lane
Once that box is on my home network, it shares space with everything else. My phone. My laptop. My smart speakers. My cameras. Maybe a network drive full of family photos or tax documents. If I also work from home, it shares air with my company laptop too.
This is where things get ugly. Some investigations into Superbox behavior described tools like Tcpdump and Netcat, plus traffic tricks such as ARP poisoning, DNS hijacking, and proxy routing. Cyber Hub's write-up on the Superbox botnet threat explains the cybersecurity concerns behind why that's such a bad mix, especially as these tools position devices for recruitment into botnets. Those tools can inspect traffic, relay traffic for strangers, or help redirect where devices on my home network think they're going.
I don't need the box to "hack" every device directly for this to matter. If it can watch traffic patterns, impersonate another device on my network, or act like a middleman, it becomes a foothold. And footholds are how a small problem turns into a house-wide one.
Why taking one to work could turn a personal mistake into a company incident
The part people miss is how easily this jumps from personal risk to business risk. I can make one bad call in my living room and drag my employer into it without meaning to.
My work laptop is only as safe as the network around it
A managed work laptop helps, but it doesn't make the home network magically clean. If my laptop and a compromised Superbox are on the same flat network, an attacker with root access on the Superbox may use the weaker device to look for the stronger one. That's lateral movement in plain English, using one flimsy door to test the rest of the house.
Even when traffic is encrypted, a poisoned local network can still cause trouble. DNS tampering can send me to the wrong place. Scans can map what devices are online. Session tokens, internal tools, or corporate logins can become targets if the attacker gets the right angle. If my router has no guest network or IoT separation, I have made that job easier.
Plugging it into an office network could trigger a much bigger mess
Now picture someone bringing a Superbox into work for a break room TV or conference room display. That sounds harmless, right up until the device starts making strange outbound connections, degrading network performance, talking to servers IT doesn't recognize, or relaying third-party traffic through company internet.
At that point, it isn't a quirky gadget. It's a vector for cybercrime against the employer's infrastructure. Security teams may have to isolate ports, pull logs, inspect endpoints, and figure out whether anything sensitive was exposed. Even if nothing was stolen, the response work costs time and money. And if the device violates company policy, the cleanup gets even more painful.
These boxes have been pulled into botnets and DDoS attacks
This is where the story stops sounding like a weird edge case. In 2025, Android TV boxes and similar low-cost streaming devices, often used for illegal streaming services and unauthorized streaming of premium content or pirated content, were tied to massive botnet activity, including BADBOX 2.0. The FBI issued a warning regarding the BADBOX 2.0 infections, with Google's lawsuit describing more than 10 million compromised Android devices. Krebs on Security's reporting on BADBOX 2.0 tracked how these boxes fit into a larger criminal system built on infected consumer hardware.
How criminals turn streaming devices into attack tools
A botnet is a pile of infected devices that criminals control together. A DDoS attack is when those devices all flood a target with traffic at once until the target slows down or falls over.
That means the box in my living room, bought as a shortcut for premium content through pirated sources, can become part of an attack on someone else's business, app, or network, even if I never touch the settings again. Beyond DDoS, these devices have been used for proxy abuse, ad fraud, credential stuffing, and web scraping. Kimwolf also surfaced in late 2025 as part of the same ugly pattern, showing how fast these Android-based device networks can be repurposed.
Why this matters even if I never notice a problem at home
I may not see flashing warnings or dramatic signs. What I may get is slower internet, weird ISP notices, account trouble, or security complaints tied to traffic that came from my home connection. If bad traffic is traced back to my IP first, I'm the one standing in the headlights, plus potential legal risks from copyright violations tied to the device's use for illegal streaming services.
By early 2026, the pattern was already clear. These weren't small hobby attacks. They were larger, more aggressive campaigns using infected consumer devices as cheap infrastructure. The BADBOX 2.0 and Vo1d botnet analysis shows why that matters: a compromised Android TV box isn't dead weight on a shelf, it's a working node in someone else's network.
Frequently Asked Questions
Is a brand new Superbox safe to plug into my home Wi-Fi?
No, trouble often starts during setup with pushes for shady apps, disabled protections, or malware fetches from untrusted sources. Reports like BADBOX 2.0 show millions of new Android streamers arrive infected or primed for botnets. I treat it like a mystery laptop, not a clean TV accessory.
How can a Superbox compromise my entire network?
It shares my flat home Wi-Fi with everything—phones, laptops, cameras, and packs tools like ARP poisoning, DNS hijacking, and proxy routing to inspect, impersonate, or relay traffic. That creates a foothold for attackers to scan devices or reroute connections without me noticing.
Does a Superbox risk my work laptop or office setup?
Absolutely, on home Wi-Fi, it enables lateral movement to probe my managed laptop via scans or tampered DNS, exposing sessions or tokens. Bringing it to work turns it into a break room threat: odd traffic, performance hits, and IT headaches. I notify my team before plugging personal devices near company gear again.
What should I do if I already have a Superbox connected?
Disconnect it immediately, change all exposed passwords, and scan router logs for weird outbound connections. If it's touched work systems, loop in IT right away.
The move I'd make if a Superbox is on my network
If I have a Superbox connected right now, one that cord-cutters turn to for streaming, I wouldn't shrug this off as "maybe shady streaming." I'd treat it like a device I can't trust. That means disconnecting it, burn it, then crush it with a hammer.
If there's even a chance that box has touched work systems, I'd tell IT before plugging anything personal into the office again. That's not overreacting. That's damage control, especially with the legal risks involved.
The warning I keep coming back to is simple: if a TV box can install malicious software, hog internet bandwidth, reroute traffic, and answer to someone else, then it isn't entertainment gear anymore. It's a stranger sitting on my network.
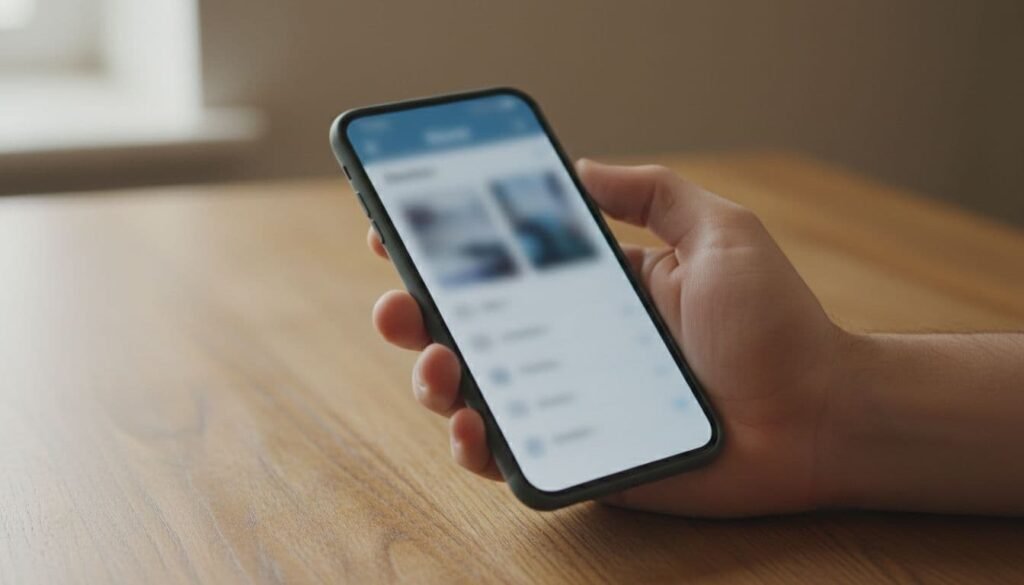
Old phones and laptops can stick to an account like spare keys in a junk drawer. I clean them out on a regular basis because unused devices can still trigger sign-in prompts, sync confusion, and security worries.
I see this most after phone upgrades, hand-me-down tablets, and retired work PCs. The good news is that it only takes a few minutes to remove old devices from the big three accounts, and the payoff is immediate.
What I Check Before I Remove a Device
Before I remove anything, I confirm what I'm looking at. Device names can be vague, and an old phone may show up with a model number instead of the nickname I gave it.
First, I check the device activity. If a device hasn't shown activity in months and I no longer own it, it goes. If I sold it, traded it in, or reset it, I remove it even faster.
I also pay attention to where I'm signed in. If I'm cleaning up accounts while traveling, I avoid public Wi-Fi because fake login pages are still a real risk. Dale's write-up on public Wi-Fi login page risks is a solid reminder to do account work on a trusted network.
If I spot an unrecognized device, I remove it first, then change your password and review account activity.
That simple habit keeps a small mess from turning into a bigger one.
How I Remove Old Devices From My Google Account
On Google, the path is still simple in March 2026. I open my Google Account Settings, choose Security, scroll to Your devices, and select manage devices. Then I pick the old device and hit Sign out.
On Android, I can do the same thing inside the Google app. I tap my profile photo, open Manage your Google Account for Google account management, choose Security, and then open the Google account list.
Google often says "sign out" instead of "remove," but the sign out of device process gives the result I want. The old device loses account access. If something looks odd, I change my password right after or move to a stronger sign-in option. This recent Google account cleanup walkthrough matches the flow I'm seeing now.
One small gotcha matters here. A factory-reset device can still appear for a while due to a backend delay. If I know it's mine and it's inactive, I sign it out anyway and move on.
How I Remove Old Devices From My Apple Account
Apple is a little trickier because its menus feature two similar device lists. One shows devices signed in to my Apple Account. Another can show devices associated with purchases. That overlap trips up a lot of people.
For the main account list, I sign in to my Apple Account page, scroll to Devices, click the old device, and choose remove from list. If I'm using a newer Apple device, passkey sign-in makes that part pretty painless.
If the device is lost and not simply old, I don't rush to remove it. I use Find My Device first (and if it's actually stolen, the option to erase the device), because removal can cut off some tracking and recovery options. Apple explains that clearly in its device list support page.
I also remember that purchase-linked devices can behave differently in apps like Apple Music or Apple TV. So if a Mac or iPhone still appears after I clean up the main list, I check whether it's tied to purchases rather than still signed in. Apple's setup feels polished, but this is one place where polished and obvious are not the same thing.
How I Remove Old Devices From My Microsoft Account
Microsoft keeps this direct. I open the Microsoft devices page to view my connected devices, sign in, find the device, open the details menu, and click the remove button or Sign out. After I confirm, the device drops off my list and loses that account tie.
In 2026, the Microsoft your devices page does a better job showing activity details, which helps when I'm trying to decide whether a random Windows laptop is mine or a ghost from years back. The official Microsoft support steps for device removal match what I'm seeing now.
I also remember that this remote sign out improves account security, but removing a device can affect OneDrive sync, Outlook sign-in, and other Microsoft services on that machine. That's usually the point, but I like to know the splash zone before I click. If it's a work or school device, I check with IT first because managed systems can follow different rules.
What I Do Right After Cleanup
Once I purge old devices, I don't stop at the device list. I treat cleanup like locking the door after I bring the spare keys back inside.
First, I review recent account activity and security settings on each account. Then I update my password if anything felt off. Better yet, I move to stronger sign-in methods when I can. Dale's breakdown of passkeys vs traditional passwords is worth reading if I want fewer password problems across Google, Apple, and Microsoft.
I also sign out of browser sessions I no longer use, especially on shared family computers. Then, as part of my routine Security Checkup, I do a security check to make sure my recovery email, phone number, and trusted devices are current. Otherwise, I can lock myself out while trying to be safer, which is peak tech irony.
A Five-Minute Habit That Pays Off
A stale device list is like that junk drawer from the opening, harmless until I need something fast and can't trust what's inside. A quick cleanup to remove old devices and deactivate a device makes my accounts easier to read and much easier to trust.
If I haven't checked your devices lists on Google, Apple, and Microsoft in the last few months, now's a good time. How many unknown devices are still riding along in my accounts, instead of keeping an approved list?
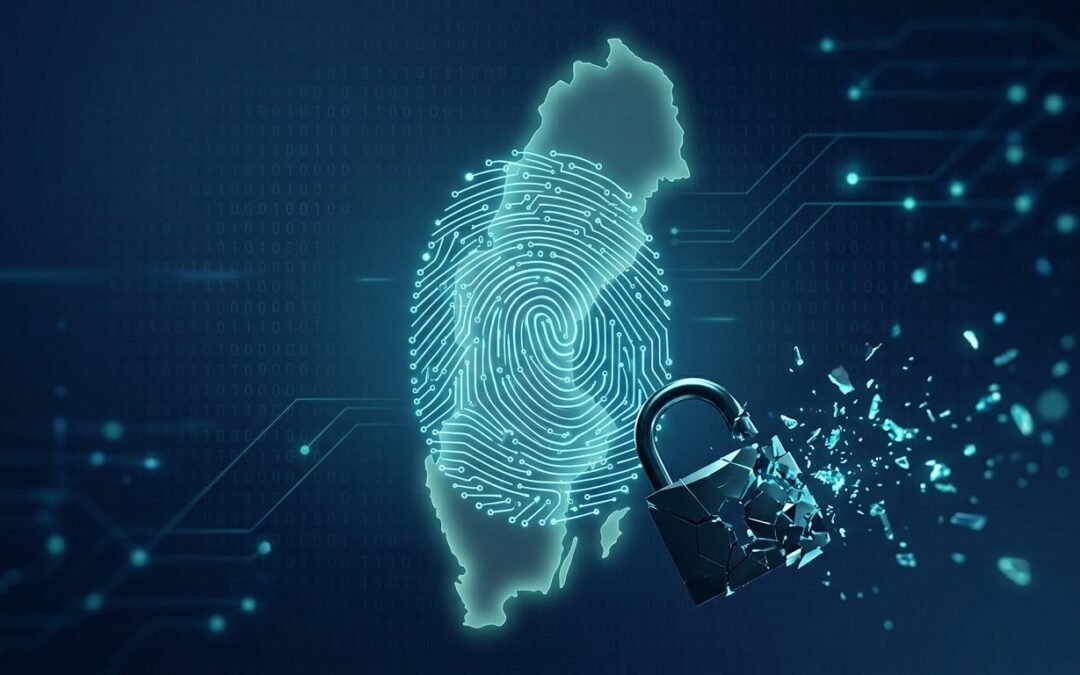
When I read the report about a hacking group called ByteToBreach claiming access to systems tied to Sweden's BankID e-government platform, my first thought wasn't "wow, hackers." It was, "this is what happens when identity gets centralized, outsourced, and treated like a convenience feature."
In plain terms, the attacker claimed a source code leak, grabbing things like source code, configuration files, and staff related data including personnummer, plus materials connected to electronic signing and identity verification. CGI (the vendor in the story) disputed the scope and said the incident involved limited test servers, not live systems. Sweden's government also confirmed there was a leak, and the incident response team (CERT-SE) is investigating.
That push and pull matters, because the bigger lesson doesn't depend on who wins the PR argument. The lesson is simple: biometrics don't belong in government sized databases, or in contractor ecosystems that eventually feed them.
If a password leaks, I change it. If my face or fingerprints leak, I'm stuck with them.
This Story Really Tells Me About Digital Trust
Here's the 8th grade version of what I took from the CGI Sweden story on digital identity. A big contractor that supports government digital services allegedly got hit, and data that helps run those services may have been exposed. Some sources describe it as e-government platform source code and related documentation. CGI says it was limited and isolated. Sweden says it's real enough to investigate.
That's not a niche problem. It's the most normal kind of problem we have now: supply chain risk.
"Supply chain" in security doesn't mean trucks and warehouses. It means trusted helpers. A vendor builds the platform. Another vendor hosts it. A third vendor manages logins and identity verification. A fourth handles electronic signatures. If one helper gets compromised, everyone downstream can feel it.
Reporting around this incident highlights the concern that even "just" source code and configs can be a roadmap for attackers later. If you want context on what was reportedly involved and how Sweden responded publicly, this summary is a decent starting point: Sweden probes reported leak of e-government platform source code.
And since BankID sits in the same neighborhood of digital trust governed by the eIDAS regulation, people naturally asked the scary question: "Was BankID breached?" Several writeups stress that BankID itself wasn't directly attacked. Still, the ecosystem around identity matters because attackers don't always punch the front door. They look for a side door.
Even If BankID Wasn't Breached, The Ecosystem Still Got Weaker
A modern digital identity system is like a theme park wristband. You tap it at the gate, the ride, the snack bar, and the locker. That's convenient for fraud prevention, until someone figures out how the wristbands are made, validated, or reset.
Even if the "main system" stays intact, leaked source code and configuration details can help attackers in three practical ways:
First, they can study how the platform is supposed to work, then look for mistakes that weren't obvious before. Second, they can craft scams that sound real because they know the internal language, the file names, and the workflow for services like remote onboarding. Third, they can hunt for similar systems that were deployed with the same settings, because reuse happens everywhere.
Biometrics Aren't Like Passwords, Once They Leak, You're Stuck With Them
When people say "biometrics," they usually mean biometric verification with face scans, fingerprints, and sometimes iris scans. The pitch is always the same: it's quick, it's easy, and it's "more secure."
Sometimes it is more secure, but only in a narrow sense. A fingerprint is harder to guess than "Password123." That's true. The trade is that your fingerprint is also not replaceable.
I'm fine using biometrics on my own device when they stay on my device, especially with multi-factor authentication. That's one reason passkeys are interesting. With passkeys, your face or fingerprint acts as an unlock button for a cryptographic key stored locally. That's very different from sending a reusable biometric token into a large system like Estonia e-ID. I broke that down in my post on passwordless passkeys using biometrics, and it's a distinction I wish more policies made clearer, particularly for identity verification.
A national ID system that trends toward face matching raises the stakes. It turns "proof of you" into "a permanent identifier that might get copied, stolen, or repurposed."
A password is a coat you can change. A biometric identifier is your skin. Treat them differently.
Why I Don't Want My Biometrics Stored Or Normalized By Any Government Entity
I'm not anti-ID. I travel. I show my ID. I'm not trying to make an officer's job harder.
My line is simpler: I don't want my face to become the default ticket to move through public life via identity verification at checkpoints. Once we normalize digital identity programs like that, it spreads. It spreads because it's "efficient," because a vendor already has the cameras, because budgets are easier than policy debates, and because most people don't want to argue at a checkpoint.
The problem is that government digital identity programs using biometrics tend to attract four forces that don't care about my preferences:
Permanence. Biometrics don't rotate like passwords, so any breach exposing personally identifiable information has a long tail.
Purpose creep. A system built "just for travel" starts showing up in other places, like mobile driver's license apps. That's not a conspiracy, it's how budgets get justified.
Contractor sprawl. Even if the government writes good rules, it still relies on vendors, subcontractors, and integration partners. The Sweden story with agencies like Bolagsverket and Skatteverket is a reminder that the weakest link might not be the agency itself.
Chilling effects. When facial recognition with liveness detection becomes automatic, people change how they behave. It's subtle, but real.
I also don't accept "trust us" as a security plan. Agencies can promise deletion timelines and narrow use cases. Policies can also change. Leadership changes. Laws change. Contractors change. Meanwhile, the database keeps existing.
"Temporary" Programs Have a Habit of Becoming Permanent
The most common pattern I see is the "optional first" rollout.
It starts at a handful of locations. Then it expands. Then the signage gets vague. Then the staff gets trained to keep the line moving, not to explain choices. After a while, opting out feels like you're asking for a favor.
Some traveler advocacy groups say that's already happening with TSA airport face scans, mainly because people aren't clearly told they can refuse. The Algorithmic Justice League has been collecting traveler experiences and pushing the message that you still have a choice. Their campaign page is here: You can opt out of TSA face scans.
Centralized Identity Plus Biometrics Raises the Stakes for Everyone
A single login for many services sounds great until you picture failure modes.
If identity is used for banking, benefits, healthcare portals, travel, and document signing, then one breach is no longer "just" one breach. It's the key ring.
That's also why vendor incidents bother me more than one-off hacks. When contractors build shared plumbing for many agencies, the blast radius grows. Even if the leaked system is "just a test environment," people reuse patterns, code, and settings. Attackers know that.
So when I hear "it's only for convenience," I translate it to, "we're building a reusable mechanism to identify you everywhere." Convenience is real, but so is the risk.
I Opt Out at Airports and Customs, and You Can Too (In the US)
This is the section I wish someone had handed me years ago.
When a camera shows up at the TSA checkpoint and an agent gestures for me to look at it for facial recognition, I opt out. I do it politely. I do it every time. I do it even when I'm tired, because practice is the whole point.
Here's what I'm trying to avoid: a world where facial recognition becomes the default, and opting out becomes suspicious behavior. I'd rather make opting out normal while it's still allowed and relatively easy. This keeps me away from biometric verification altogether.
I also plan extra time. TSA manual lanes can take longer during rush periods. That's not a punishment, it's just reality when most people flow through the automated path, complete with liveness checks and QR code scanning for phone-based boarding passes.
And while this post focuses on the US, the principle travels well: you don't have to hand over more identity data than the situation requires. An ID check is one thing. A reusable biometric record is another.
One extra travel tip while we're here: airports are a perfect place for digital scams too. If you're killing time on public Wi-Fi, read my guide on captive portal attacks on airport Wi-Fi. Identity and connectivity risks love the same crowded spaces.
What I Say, Word for Word, When They Ask for a Face Scan
I keep it short. I don't debate. I don't explain my politics. I just state a preference.
Here are the exact phrases I use:
"I'd like to opt out of biometric screening, please."
"I prefer a manual ID check."
If the agent asks "why," I don't take the bait. I just repeat the request. In most cases, the TSA process shifts to the standard manual identity verification, my physical ID, my boarding pass if needed, and the officer looking at my face like we've done for decades.
If They Pressure Me, Here's How I Hold the Line Without Escalating
Pressure usually looks like speed, not threats. The line is moving, the agent sounds annoyed, and you feel like you're holding everyone up. That's the moment most people comply.
When that happens, I do three things:
I slow my voice down and stay calm. Tension feeds tension.
I repeat the same sentence. Short and boring wins: "I'd like to opt out and do a manual check."
If needed, I ask for a supervisor. I keep it neutral: "Can you call a supervisor to help me with the TSA opt-out process?"
I don't argue about facial recognition accuracy, bias, or policy at the podium. That's not the time. The point is to complete travel and keep your boundary.
Opting out isn't about causing a scene. It's about refusing to make biometric collection the default.
The UK's 2025 Digital ID Push Shows Resistance Works, and Opting Out Is a Form of It
People sometimes tell me, "It's inevitable." I don't buy that.
A good counterexample is the UK's 2025 digital identity push that heated up in 2025. The plan connected to GOV.UK services and the One Login program, and it triggered a familiar set of concerns: privacy, security, governance driven by KYC AML compliance, and what "optional" would really mean in practice.
The key point for me is this: public skepticism slowed things down. It forced consultation. It made officials explain limits instead of rushing a mandate.
As of March 2026, the UK government is still publishing consultation materials about digital identity, which signals this hasn't become a simple, settled rollout focused on identity verification to make public services work for citizens. You can see that framing in their own words here: Making public services work with your digital identity.
### When Enough People Say "No," Mandatory Plans Turn Into "Optional" Ones
Public pressure doesn't always kill a proposal. Sometimes it reshapes it.
That reshaping matters. It can mean longer timelines, tighter rules on beneficial ownership and governance, clearer opt-outs, or stronger oversight. It can also mean a change in messaging, because the "we're doing this for fraud prevention and to fight identity theft" pitch often lands badly. Governments then pivot to "convenience," like digital wallets or initiatives such as Secure Start, because convenience is easier to sell.
In other words, resistance works even when you don't get a dramatic headline, much like the challenges seen in large-scale biometric ID systems such as India's Aadhaar program.
Opting out at airports is the same kind of resistance, just quieter. Every opt-out is a signal that people want an alternative lane that respects privacy.
My Goal Isn't to Avoid ID Checks, It's to Avoid Permanent Biometric Tracking
I want to be crystal clear: I'm not trying to evade identity checks. I'm trying to avoid turning my face into a reusable key that gets scanned, logged, stored, or shared beyond the moment.
The Sweden incident claim (and CGI's response) is a reminder that even wealthy countries with mature infrastructure still deal with leaks and vendor risk. When those systems include biometric identifiers, the cost of failure isn't just high. It's personal.
So I draw a line where it counts: I'll prove who I am, but I won't help normalize biometric collection as the default.
Conclusion
The CGI Sweden leak claim involving BankID and e-government services is a warning about how messy digital identity ecosystems get when vendors, code, and electronic signature workflows stack up. Add biometrics to that mix, and every breach becomes harder to recover from, because you can't replace your face like a password.
In the US, opting out of airport face scans is a real choice many travelers still have, so I use it. Next time you fly, try it politely, plan a little extra time, and tell one other person they can opt out too. If enough of us keep choosing privacy, "scan first" won't quietly become the new normal.
These phishing scams use fake pop-ups that are getting better at acting like your computer is screaming for help. One minute you're reading the news, the next you're staring at a "virus detected" pop-up warning that feels way too real.
Here's the bottom line: fake security alerts are built to rush you. They want a click, a call, or a payment before you slow down and think. In this guide, I'll show you the tells I look for on Windows and macOS, plus what I do the moment one shows up (without turning it into a bigger mess).
What Fake Security Alerts Are Really Trying to Do
A legit security alert helps you make a safe choice. A scam alert tries to make the choice for you, right now, while you're stressed, using scare tactics.
Most fake security alerts fall into a few buckets:
Browser pop-ups, such as fake antivirus alerts, that pretend to be Microsoft, Apple, or "your antivirus."
Push notifications you accidentally allowed from a sketchy website.
Email or SMS warnings claiming your account was hacked or billed.
"Cleaner" apps that show scary results, then demand payment to "fix" them.
In March 2026, I'm still seeing the classic tech support pop-up scam where a page claims your PC is infected with scary-sounding malware names, then shows a phone number and tries to keep you trapped in the tab. Some even fake a "command prompt" style scan to look official. Guardio has a clear breakdown of the pattern and safe next steps in their write-up on the tech support pop-up scam warning signs.
These scams rely on social engineering, the psychological manipulation that powers such traps. If you want a simple definition to share with a parent or a coworker, Savi Security's glossary entry on what a fake alert is nails the idea: it's fear as a user interface.
A real alert gives you options. A fake warning gives you urgency.
Common Signs of Fake Antivirus Alerts on Windows
Windows is the most impersonated target, mostly because the "Microsoft support" storyline still works on a lot of people.
Here's what makes me label a Windows warning as fake warnings fast:
First, it's inside the browser. The page may go full-screen with a system scan animation, flash, beep, or block right-click. That's theater. Microsoft Defender does not need a random webpage to do its job.
Next, I watch for the "call now" move. Any pop-up that includes a tech support number for "Windows Support" is almost always a scam.
Also, the language gives it away. Scam alerts love phrases like "your computer is blocked" or "network breach detected," plus countdown timers. Real Windows security messages tend to be calmer, and they don't threaten you like a movie villain.
Finally, pay attention to what it asks you to do. A scam often pushes one of these actions:
Call a number.
Download a "security tool."
Allow notifications.
Pay to remove threats.
If you want a deeper scam-adjacent example, fake alerts often show up on hostile Wi-Fi too, when a bad network injects junk pages from malicious websites or redirects through suspicious links. That overlaps with the same instincts I use to spot fake Wi-Fi login pages when I'm traveling.
Red Flags on macOS That I Don't Ignore
Mac users get hit with fake security alerts too, just packaged differently. These fake antivirus alerts usually pretend your Mac has a "virus infection" and your "Apple security" subscription is expiring, then it pushes you to call or pay.
Here are the macOS tells I rely on:
A big one is the wrong app source. If the pop-up warnings appear in Safari or Chrome, it's not a macOS system alert. It's a website doing impressions.
Another clue is the "virus found" notification that wants money fast. macOS does have built-in protections, but it doesn't pop up and demand $5.99 to save you.
I also look for weird wording and generic branding. Scam pages mix "Apple," "iCloud," and "MacOS" in ways Apple never does. They aim to steal your personal information and may also claim your "IP has been hacked," which is a phrase that sounds technical but means nothing useful.
If you want to see how common this panic is, there's a very real thread on the Apple forums where a user asks about recognising fake virus notifications on a MacBook. The details change, but the emotion stays the same: fear, urgency, and a payment prompt.
What I Do Right Away When a Fake Alert Pops Up
Panic makes people click. My goal is to break the spell and get back in control.
Here's my routine, in order, because order matters:
Don't click inside the alert. Not "OK," not "Cancel," not the phone number.
Force-close the browser/app. On Windows, I use Task Manager. On macOS, I use Force Quit.
Reopen the browser while holding safe habits. If the same tab tries to restore, I refuse it. I start a fresh session instead.
Check for notification permission abuse. If a site can send notifications, I remove it right away in browser settings, and I verify that the pop-up blocker is enabled.
Run a real scan. On Windows, I use security software like Microsoft Defender. On macOS, I check Applications and browser extensions for anything I didn't install.
If the alert wants you to call someone, it's almost never real support. It's a trap door.
If I Already Clicked or Called, I Switch to Damage Control
If you clicked a download, entered personal information like a password, or called the number, don't spiral. Act like you spilled something on the keyboard: stop the spread, then clean up.
If you gave remote access (ScreenConnect, AnyDesk, TeamViewer, "Quick Assist"), disconnect from the internet first. Then remove the remote tool, reboot, and change passwords from a different device you trust.
If money or financial information got involved, treat it like fraud, because it is. The next steps overlap with my general advice on how to avoid online money scams, including calling your bank and disputing charges fast.
Security Hero also documents how these pop-ups work and why calling is where the real damage starts in their guide on tech support scams.
How I Prevent Fake Security Alerts From Coming Back
Once you've seen one scam pop-up, you start noticing how often the web tries to "ask permission" for stuff it doesn't need.
I start with browser housekeeping through smart browser settings. I clear suspicious site data, remove extensions I don't recognize, stay on top of software updates, and shut down notification permissions for anything that isn't a site I trust.
Next, I make my logins harder to steal. A lot of these scams don't need malware at all; they just target credential theft and account hijacking, which can lead to full identity theft. That's why I'm a fan of passkeys, because they're tough to use on look-alike sites, and I follow up with multi-factor authentication plus email authentication for extra protection. If you want the practical version, I put it all in my guide to phishing-resistant passkeys explained.
Finally, I teach one simple rule at home: if a screen claims "call now" or "pay now," you stop and ask a human you trust. Scammers hate speed bumps. Even a 30-second pause ruins their plan. These habits build lasting digital safety.
Conclusion
Fake pop-ups work because they feel urgent, not because they're smart. When I spot fake security alerts, I focus on the source (browser vs system), the ask (call, pay, download), and the tone (threats and timers) typical of fake warnings. If you take one habit from this, make it this: close the app safely and verify using real tools, not the scary window in front of you. The next time your screen "yells," you'll know how to tell if it's a real smoke alarm or a phishing scams sound effect.
OpenClaw (formerly Clawbot and Moltbot) keeps popping up in my DMs. Friends, family, parents in my neighborhood, and security folks I work with all ask the same thing: "Is it safe to run an AI assistant that can actually do stuff?" Here's my honest take on OpenClaw security and secure deployment: OpenClaw is impressive because it is an autonomous AI agent that turns a chat message into real actions. But anything that can touch files, browsers, and commands deserves grown-up security. "Convenience is great until it becomes an open door".
So in this post, I'm going to share how I test OpenClaw in a way that keeps it off the public internet. I'm also going to explain why I personally like Twingate for this, because it lets me keep ports closed while still getting secure remote access.
What OpenClaw Is Great At, And Why That Also Makes It Risky
OpenClaw is a self-hosted AI agent. In plain English, that means it's a "do-er," not just a "talker." You chat with it in an app, and it can run skills that perform real tasks, like updating files, calling APIs, or automating a browser session.
When I say "agent," I mean software that can take a goal, plan steps, and then act. When I say "skills," I mean plug-in abilities you enable, like file access or shell commands. If you want a deeper, plain-language rundown of what agents are and why they matter, I wrote AI Agents Explained for 2025 Workflows.
That power is also the risk, especially when considering OpenClaw security and secure deployment.
If OpenClaw can run tools, then a bad prompt, a poisoned skill, or a stolen key can turn "helpful assistant" into "tiny intern with admin access and no fear." The most common threats aren't sci-fi. They're the same boring problems we've always had, just with better automation and added runtime risk:
Prompt injection: Trick the agent into ignoring your rules and doing something unsafe via untrusted input.
Prompt injection through authentication bypass: An attacker crafts input to override safeguards and access restricted actions.
Stolen API keys: If someone gets your model tokens, they can burn money or pull data.
Unvetted skills: A skill can be buggy, over-permissioned, or flat-out malicious, enabling remote code execution or data exfiltration.
Accidental exposure: One port-forward, one rushed firewall rule, and you have exposed instances vulnerable on the internet.
My rule: treat OpenClaw like shadow AI that can touch real systems in your home network, because it can. Testing safely beats being fearless.
The Two Ways People Get Burned: Public Exposure And Over-Permissioned Tools
Most "I got wrecked" stories fall into two buckets.
First, public exposure. Someone opens an inbound port for convenience. Maybe it's SSH, a dashboard, or the OpenClaw gateway itself. The thought process is always the same: "It's just for a day." Then life happens, the port stays open, and scanners find it.
Second, over-permissioned tools. People enable the scary skills because they're fun. Shell access, full disk read and write, browser control, and broad network reach. Then they install a skill they didn't review, or they paste something into chat that the agent interprets in a surprising way.
Here's the cause and effect in one sentence: the internet will eventually talk to your agent, and your agent will eventually do what it's allowed to do.
If you want to see how the broader community is thinking about hardening, I've skimmed a few guides, and the most practical one I've seen is OpenClaw hardening steps. I don't agree with every choice, but the defensive mindset is right.
My "Safe Sandbox" Setup For Playing With OpenClaw
When I test OpenClaw (or, for that matter, any new tool), I focus on security and secure deployment. I build in a sandbox mode that assumes something will go wrong. Not because I'm pessimistic, but because it's cheaper than cleaning up later.
My baseline looks like this:
I run OpenClaw on a spare machine, a VM, or a container. I keep it away from my personal laptop files, family photos, password vault exports, and work credentials. "If I wouldn't hand it to a stranger at a coffee shop, I don't mount it into the agent environment". This setup works well for ecosystem components like OpenClaw.
Next, I keep the OpenClaw gateway bound to localhost. That's a big one. Localhost means it only listens to itself, not your whole network, and definitely not the internet. If a service must be reachable, I want it reachable through an access layer, not by opening a port and hoping for the best.
I also keep persistent memory and logs locally while I'm learning. I don't push agent logs into random cloud dashboards on day one. Logs can contain prompts, tokens, filenames, and other "oops" data you did not mean to share.
Containment First: VM Or Container, Limited File Access, And No "God Mode" Accounts
Containment is me asking, "If OpenClaw gets tricked, what's the blast radius?"
So I start with virtual machine isolation or a container and a dedicated non-admin user. I avoid running anything as root unless I have a clear reason. For file access, I prefer narrow mounts. If the agent needs a folder, it gets one folder, not my whole home directory.
I also keep risky tools disabled at first. Shell execution, shell commands, broad file search, and browser automation are powerful, but they're also easy to misuse. I turn them on only when I need them, and I turn them back off when I'm done testing that feature.
Gotcha: the "cool demo" permissions are almost never the "safe default" permissions.
Credential Hygiene: API Keys, Tokens, And Skill Review Without Paranoia
Secrets are where most lab setups get sloppy.
I don't hardcode API keys, SSH keys, or OAuth credentials in plain-text files next to the app. Instead, I use environment variables, or a secrets manager if the setup warrants it. I also keep separate keys for lab vs production. That way, if my test box gets popped, the attacker doesn't inherit my real-world access.
Rotation matters too. If I've been experimenting for a week and sharing screenshots, I assume a key might have leaked. Then I rotate it and move on.
Skills get a quick review with the Skill Scanner (https://clawned.io/), especially those pulled from ClawHub. I'm not doing a full code audit every time, but I do skim for obvious red flags: surprise network calls, broad file permissions, and anything that shells out without guardrails. Info-stealers love config folders, so I treat that directory like it's sensitive.
For a more "setup-focused" angle (especially if you're still learning the moving parts), this OpenClaw setup guide is useful background reading.
How I Secure Remote Access With Twingate, So I Don't Need Public Ports Or A VPN
At some point, you'll want to use OpenClaw when you're not at home. That's where people get tempted to punch a hole in the firewall.
I don't do that!
Instead, I use Twingate (https://www.twingate.com/) as my preferred way to reach internal resources without exposing them, ensuring OpenClaw security and secure deployment. The core idea is simple: authenticate and authorize every connection, and keep the private service private. From my perspective, the big win is no inbound firewall rules. The connector makes outbound connections, providing network isolation so I'm not publishing a new target to the world.
This is also why I don't start with a traditional VPN like ExpressVPN for this use case. VPNs can be fine, but they often feel like giving someone a wristband for the whole venue. For a more general comparison, I've got thoughts on that in best VPNs for secure remote access, but my OpenClaw stance is tighter access, smaller blast radius.
The Simple Mental Model:Localhost Gateway, Outbound Connector, And Policy-Based Access
I think about it like a locked door with a guest list.
OpenClaw stays on localhost with gateway binding (for example, 127.0.0.1:18789, but use whatever your OpenClaw config sets.) A Twingate Connector sits inside my network and phones out. My devices use the Twingate Client, and I only allow access to the specific resource and port I choose, leveraging this gateway binding for secure localhost exposure.
In Twingate terms, I'm working with a few building blocks:
Connector: The piece that lives in my network and creates outbound connectivity.
Client: The app on my phone or laptop that proves it's me.
Resources: The internal things I want to reach, like the OpenClaw gateway that implements the Model Context Protocol for agent communication.
Policies: The guest list, which says who can access what, and under what conditions.
Because nothing has to listen on the public internet, scanning bots can't even knock.
The Policies I Use: Groups, MFA For Anything Serious, And Logging I Actually Review
Policies are where the safety really shows up.
I assign access by group instead of building one-off exceptions, effectively creating an allow-list. For anything tied to sensitive data, I require MFA. If OpenClaw is allowed to touch even mildly important systems, MFA is non-negotiable. Even with this setup, remote access doesn't solve issues with untrusted input.
Then I turn on logging and actually look at it. I'm not staring at dashboards all day, but I do check for weird access patterns, like odd hours, unknown devices, or repeated connection attempts that don't match my habits. I also monitor Connector health, because availability signals can double as security signals. If the Connector flaps, I want to know why.
If I'm going to run an AI agent, I want receipts!
Conclusion
OpenClaw is a powerful autonomous AI agent, which is why I treat it as a tool that can interact with real systems. My three guardrails stay the same: isolate the environment, minimize permissions and credentials to prevent risks like credential dumping, and avoid public exposure by using Zero Trust access (Twingate is my go-to for that).
This guide on OpenClaw security and secure deployment emphasizes starting small, keeping risky skills off at first, and proving your setup is safe before you expand it. If you're running OpenClaw already, I'd love to hear what you're using it for, and what part you want to lock down next.


 My rule: treat OpenClaw like shadow AI that can touch real systems in your home network, because it can. Testing safely beats being fearless.
 Photo by