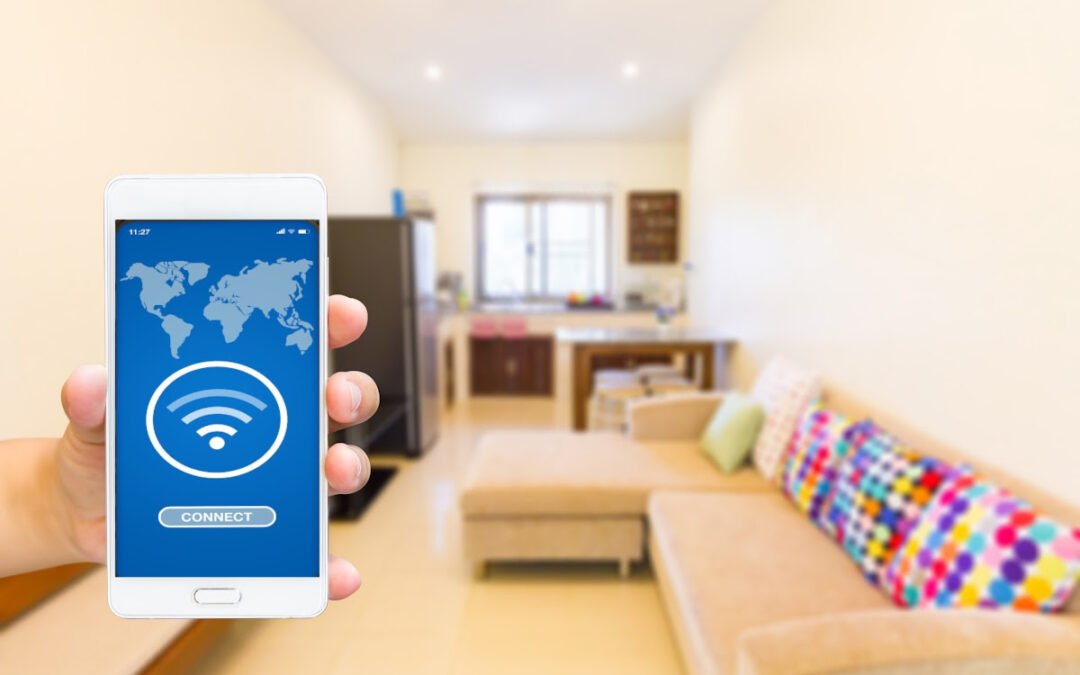
Guest wifi networks can be a lifesaver when you have guests over and don’t want them to use up all your bandwidth, don’t want them to know the password to your main network, or when you need a separate network for your printer or other devices. In this guide, we’ll show you how to set up a guest wifi network on your wifi router. We’ll also give you some tips on securing your guest network so that your guests can’t access your main network’s files and devices.
Setting Up a Guest Network On Your Wifi
In this digitally connected world, everyone wants to stay updated, be it at the home, office, or a friend’s house. It’s hard to say no to someone visiting your home when sharing a WiFi password. Sharing a network leads to slowdowns, network disruptions, and security issues. However, setting up a guest network on your WiFi helps overcome these issues. Depending on the router, you can also do some cool things like (slow the bandwidth of your guest network). One of my biggest pet peeves is when someone gets immediate access to my network only to upload photos to cloud storage or update all their apps on their smartphone.
A guest network benefits the network owner in so many ways. Guest networks enhance internet coverage, decrease the slowdown ratio, and eliminate potential security issues.
What Is A Guest Wifi Network?
A guest network is separate from a person’s primary internet connection. It restricts and prohibits the connected devices from accessing the main network. All devices connected to the guest network cannot access the main network.
The guest network has its SSID that differs from the SSID of the main network. Sometimes the devices connected to a guest network are infected (despite the device’s owner knowing or not). If set up properly, these infected devices most likely can’t infect your personal devices on your main network. Guest networks leverage network owners to keep their devices secure from any malware or malfunction activity.
Setting up a guest network on Wifi is easy. It simply depends upon the router settings. Most routers allow an additional network by routinely logging in as administrators. Some routers require manual settings to access the guest network. However, most of the routers follow the same settings. What is listed below are general instructions on how to set up a guest network. Depending on the router you have, these steps might slightly differ.
Step 1: Access Router’s Admin Dashboard
This is actually easier than one might think. Open any browser of your choice. Type IP address in the address bar. Now press Enter to proceed further. From there you’ll want to enter the admin login information. If you’ve accessed this before, use those credentials. If not, they’re most likely listed on your router.
Step 2: Go To Wifi Settings
When you enter the IP address and press Enter to proceed further, you will see the router’s admin panel. Click on the option of Advanced (or something similar) to access additional settings.
Step 3: Access Guest Network Settings
Click on wireless settings and select the Multiple SSID option (or something similar) from the drop-down menu.
Step 4: Setup Guest Wifi
Setup guest Wifi by following these general steps:
Guest network options are usually switched off by default. Enable the guest network from the status field and Turn it on (or enable).
Now name your guest network. Type any name you like in the SSID field and press Enter. This will be what the public sees when trying to connect to your wifi.
The Access Control will open a drop-down menu. Choose the option of WAN. This option restricts the guest users from accessing any file from the network. This is really important. And if someone wants their network storage accessible to everyone, they should choose the option of LAN-WAN.
Step 5: Secure Guest Network
Security of the guest network is vital to restrict any malfunction. One of the biggest mistakes I see when folks set up a guest wifi is they keep it open for anyone to access without security measures (password). To secure your guest wifi network, follow these steps:
Choose the option of WPA/ WPA2-PSK from the drop-down menu of Authentication Type.
Create a strong password and remember it for future use.
Click on the option of Save to save all the settings.
A little tip: Remember this area in your admin dashboard because it is a home network security best practice to change your guest wifi regularly (at least once a month).
Network security is one of the key reasons to create a guest network. The ones who have access to the password on your main home network may also have access to all potential devices connected to the internet. Smart speakers, WiFi cameras, streaming devices, and printers are all connected to the same network. A guest wifi network prohibits access to all devices connected to the router. There are major security benefits of implementing guest wifi.
And it’s not to say that people you want to share your wifi password with at home do not pose any security harm or threat to others, because 99% of the time they don’t (at least maliciously). But…sometimes, their devices are infected with some malfunctioning activity that passes the security threat to other users. I’m sorry, but you can’t control what others do on their own devices on other networks. And when they connect to your main wifi network, it could present a potential security danger. In such a case, a guest network builds a security wall, restricts access to the main network, and ensures minimal security risk.
Data safety is the priority of everyone. Once you have successfully created a guest network, the next step is to secure your network from external threats. Make sure all of your IoT devices are secured by following these steps:
Monitor Internet Usage
Some routers provide statistical information about bandwidth usage. This allows network owners to check who is currently using the Internet and for how long. I can also block certain websites and types of content they access. This again depends on the type of router you have.
Limit The Use Of Bandwidth
Set limit on bandwidth use with wifi guest access management. This enables the owner to keep a check on excessive bandwidth usage activities. As mentioned above, my biggest pet peeve is when a guest gets access to our network (guest wifi or not) and immediately starts the downloading party.
Opt For The Most Advanced Encryption
While installing wifi, you will see security options named WPA, WPA2, and WPA3. WP3 is considered the most advanced security option to encrypt wifi signals, but it is only available in newly released routers. WPA2 is readily available and considered the best option. As for your guest wifi, to make it secure you want to have the best option. Start with WP3. If that isn’t available then try WPA2 and so forth.
Keep Your Guests Connected With A Guest Wifi Network
A guest network enables network owners to share the bandwidth with others without sacrificing the integrity of their network security. This maintains a secure connection and ensures that the devices are not prone to threats. Setting up a guest network provides convenient and smooth internet access and reduces interference with sensitive data. Guest wifi networks are a great way to keep your guests connected and also help you secure your own network. All you need is a spare router and about 10 minutes of your time!
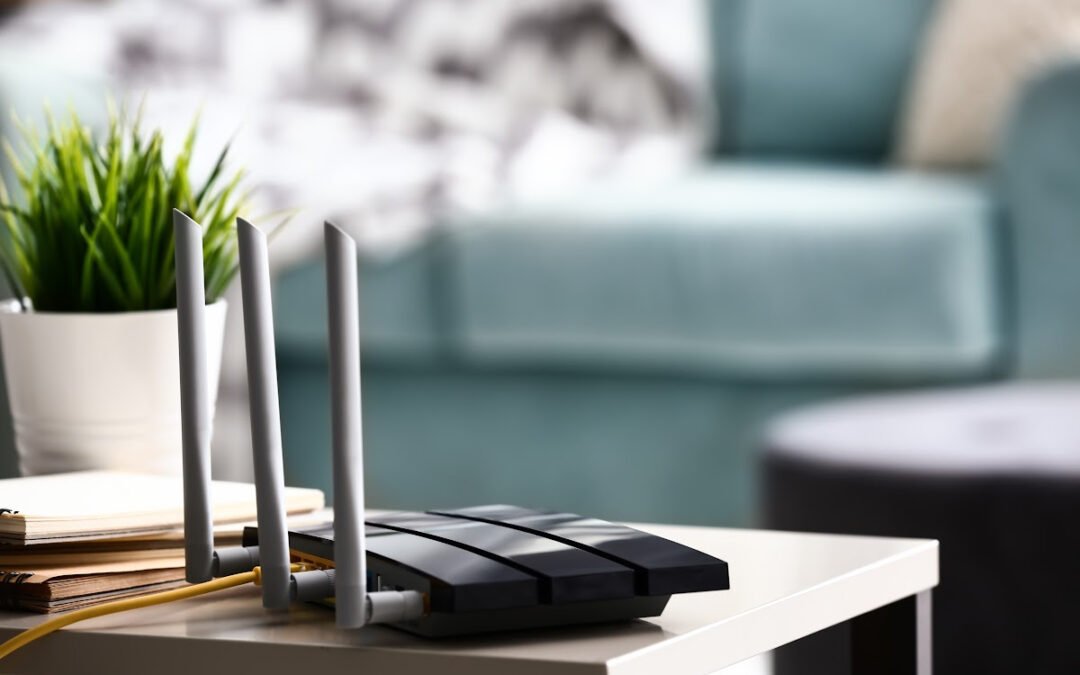
We all know that we need to have a router in order to get online, but not everyone knows exactly where to put it. Do you put it in the living room? The bedroom? The kitchen? I’ve seen some routers put in the weirdest places that often have me scratching my head and asking, “But why?” We’re going to break down some of the best places to put your router so that you can get the best possible signal and connectivity. We also have some pointers on how to improve your router’s range if you’re having trouble getting a good signal in certain parts of your home.
Finding the place to put your router to get the best output can be tricky. People buy the most expensive routers with multiple antennas to get incredible signals all around the house. But even that doesn’t always work. In many cases, the problem is not the router but its placement. Here’s what you need to keep in mind to find the best place to put your router.
Finding Best Place for A Router
Here are some tips to keep in mind while deciding the place for your router. We get it, finding the best place for your router isn’t always easy. And let’s face it, they don’t build homes around getting the best wifi signals.
1. Place it in an Open Area
Back in the old days, old routers were hefty in size, which led many to decide on a location that could hide it easily. The latest models of routers are pretty sleek, which means there is no more need to hide them. And some of them actually look really good in your home. However, be aware that too many electronic items near the router, especially baby monitors, cordless phones, and other devices, can also impact the performance of Wi-Fi signals. So choosing a location that is not obscured by a wall or any furniture is the best bet to get unhinged broadband quality.
Kitchens are generally the busiest and most high-temperature areas in a house. Also, there is always the risk of spilling something on the router. Kitchens are filled with electronic appliances that disrupt the signals a router device needs to work. There’s probably more metal in your kitchen than in any other room in the home. And it is by far the room in the home with the most potential interference. Quite honestly, the kitchen is just not the best place for your router.
3. Placing it in the Center
Routers transmit signals in all directions. Imagine a 360-degree output signal from the router. Placing the router in the center of a house or a room is the right way to distribute signals equally and provide the best coverage possible. Many modern routers have a strong range to cover a moderate area if placed centrally completely. This is one reason why I LOVE Wifi mesh routers because the technology can broadcast a wide net of a signal for your home.
4. Get Your Router Off the Floor
A wall-mount or a shelf is generally the best place to put a router on as it helps emit signals more efficiently than a floor and makes it more secure. A floor’s foundation covered in carpet can also eat up the coverage bubble of the router when placed on it. And if your router can’t breathe, you’ll get about half the life out of it AND it will affect its performance. While covering a two-story house, placing it near the first floor’s ceiling would be the best way to get coverage on both floors. And please avoid the basement. If you place our Wifi router in the basement, you’ll lose quite a bit of distance as the concrete walls are not very thin! Concrete will act as a damper for your signals. In fact, in my house, I lost almost 50% of my signal when I tried it as an experiment. For those of you living in basement apartments…you really want to look at those mesh routers!
Many routers come with adjustable antennas. Tweaking it a little can help boost the coverage of the router. Placing the antennas upwards results in better horizontal reach while turning it sideways can boost signals upstairs. Again…this all depends on where you put your router.
6. Avoid Mirrors
Mirrors and fish tanks near the router impact the signals negatively. Water inhibits Wi-Fi signals, lowering the radio frequency of a router. On the other hand, mirrors reflect the signals by scattering their performance. Whenever I tell people this, they think I’m joking, but you seriously want to avoid mirrors.
A Few More Router Placement Thoughts…
Experimenting with the different locations is the key to getting the best router results. Keeping the points mentioned above in mind can get you the perfect spot for the router. Selecting the latest Router model available can also help in boosting Wi-Fi signals. So what can you do to make sure you choose the right router for your home? This is a question that many people ask me, but there is no easy answer. Honestly, it depends on your needs.
There are a few different factors to consider when choosing a wifi router. One important consideration is the size of your home. If you have a large home, you’ll need a router with a strong signal that can reach all corners of your house. Another important factor to consider is the number of devices that will be connected to your wifi network. If you have a lot of devices, you’ll need a router with a high capacity to handle all of the traffic. And finally, you’ll also want to consider the features that are important to you. Some routers come with built-in parental controls or guest networking features, for example. When it comes to choosing the best wifi router for your home, there is no one-size-fits-all solution. However, by considering your needs and wants, you can narrow down your options and choose the best router for your situation. Below are reviews we’re written on a few Wifi routers that we highly recommend. Each one is different and you’ll need to determine which features are important and the right fit for your home.
If you’re like me, you probably have a ton of devices that need to be connected to the internet. And if you’re also like me, you probably don’t want to spend your whole day wiring them all together. That’s where network switches come in! We wanted to explain in a simplified way what network switches are, how they work, and whether or not you really need one.
There is not a single piece of equipment that can function without a network in today’s world. You want to be aware of political events, celebrity news, business news, financial news, and economic trends to pool your investment and connect with your team members to brainstorm business ideas; all of this would need the assistance of a robust network.
To use a network, you’ll need a network switch and an understanding of how it works and why you need it. Why bear the weight alone when you can enlist the assistance of someone with knowledge in switching and innovation? Read on to learn what a network switch is and why you should have it.
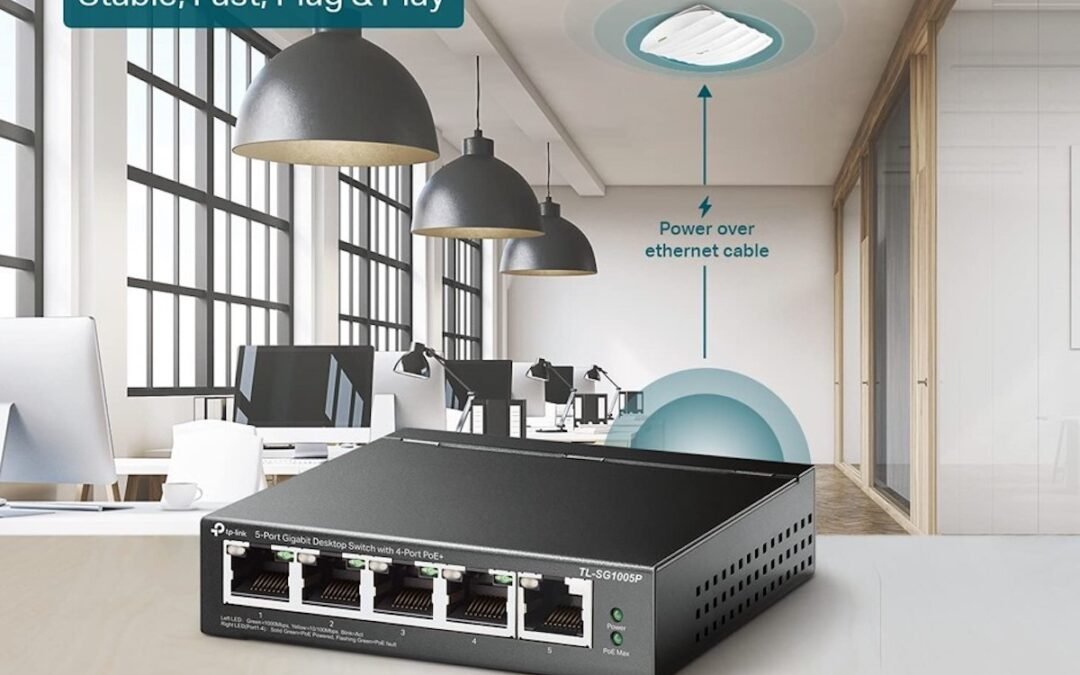
What Is a Network Switch?
How are people using the internet these days? Most people use the internet through their Wi-Fi router. We rarely see wired connections in homes, but this does not imply that the wired system has been replaced or is no longer in use. Most households do not require a network switch, but it is handy if your router does not have enough Ethernet connections. Most home routers provide three or four Ethernet ports. You need a network switch to connect more devices.
A network switch is a device that connects to your home router to provide additional Ethernet connections. Consider it similar to a USB hub, but for networking. There are certain areas with many connected devices in one place, such as a real estate office’s sales or marketing department, where you can use wires to increase your speeds or reduce wireless disturbance.
Pros of Using Network Switches
Before you decide on whether you need a network switch or not, let’s first check out what value can use a network switch add to your business:
Enables More Device Connections to the Local Network
You obtain extra LAN ports when connecting a network switch to your local network. Each LAN port can accommodate an additional device, increasing the number of devices connected to a single network.
Has a Faster Speed Than a Wireless Network
This is my #1 reason to use a wired connection over WiFi. A network switch may provide speeds of up to 10 Gbps or more. In comparison, the highest potential Wi-Fi speed is roughly 9.6 Gbps, and in fact, you’ll seldom receive speeds beyond 1 Gbps. This means that wired network connections are often significantly quicker than wireless ones.
When you transfer network data via a wireless network, it gets distributed to all linked devices, which causes traffic congestion. Switches are way more intelligent than Wi-Fi in this case. They maintain track of all connected devices’ unique MAC addresses, so it routes most network communication to the intended receiver rather than being exposed to everyone.
Ensures a Steady Internet Connection
Because Wi-Fi transmissions are susceptible to interference, they are not 100% reliable. Signals don’t always navigate their way through barriers and obstacles. Most people use their Wi-Fi connections close to their router; this produces a lot of interference from other networks and other devices. While using a network switch to connect PCs eliminates these concerns, your network speeds will stay consistent.
Network Switches Safeguard Against Cyber Threats
Since their beginning, wireless networks have been hampered by security challenges. The wireless transfer of data opens up additional cyber-attack avenues. Your Wi-Fi network password can be stolen, providing hostile individuals access to sensitive information in the region. Furthermore, you might have someone in your family share passwords with neighbors and friends.
You may use a network switch to link all your computers to eliminate attack risk. An attacker would have to obtain physical access to your premises to hack it for the wired network. Any intruder will need to access your network through a wired cable if you use a switch, which can only become possible through direct access.
You are the only one who can decide the requirement for a network switch. If you own a business and want to stay ahead of the competition by preventing a hacker from accessing your data, a network switch is a way to go.
Furthermore, keep in mind that installing a network switch might be more expensive than using a wireless network because having a cyber-attack-free network for your company comes at a cost. So, using a network switch is a smart option.
Network Switches Are A Solid Investment For Your Home or Business Network
As previously stated, a network switch provides a variety of advantages. However, if you believe that you require this sort of network at your house in addition to a business, you may easily set it up. You can readily analyze the benefits and downsides of employing a network switch. If these advantages offset the high expense of using the network switch strategy, you may be able to save the day by keeping your data safe and your network working smoothly.
These days, Alexa can be found just about everywhere. This all-knowing voice assistant is being embedded into our smart speakers, thermostats, streaming gadgets, and kitchen appliances in surprising and novel ways. Each successive version of Alexa brings additional features and choices for involvement. We wanted to take a look at some of the top Alexa-enabled speakers, displays, lights, plugs, and thermostats. Smart locks and cameras are also included. I often get asked which Alexa-enabled devices are the best, so I wanted to teach you how to get started with an Alexa-enabled home and make your life a little bit simpler.
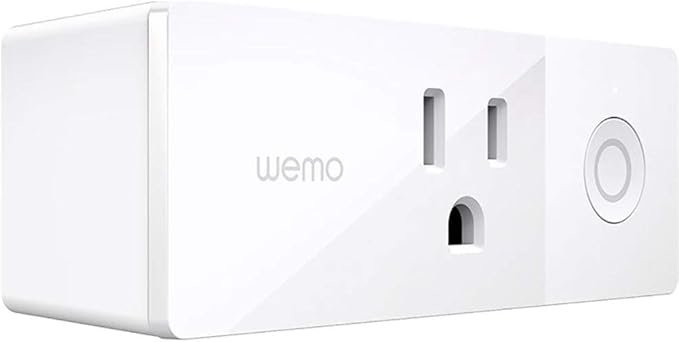
Best Alexa Compatible Smart Plugs
Smart plugs are excellent for enabling remote control of previously unconnected items. Any lamp or coffee maker with an out-of-reach or broken switch may be turned on or off by a connected plug. The same goes for your coffee machine. You don’t have to get out of your chair to switch on your reading light thanks to Alexa compatibility.
I love the Belkin Wemo Mini smart plugs per outlet thin design. Using the app’s scheduler and If This Then That functionality, you may extend its functionality even further. There are a lot of cool things you can do with a smart plug. We highly recommend getting a few of these to start so you get comfortable with the technology and its functionality. If you opt-in for an energy monitoring plug from Belkin, it will display you how much power your space heater (or any other appliance) is consuming, which is a really cool feature.
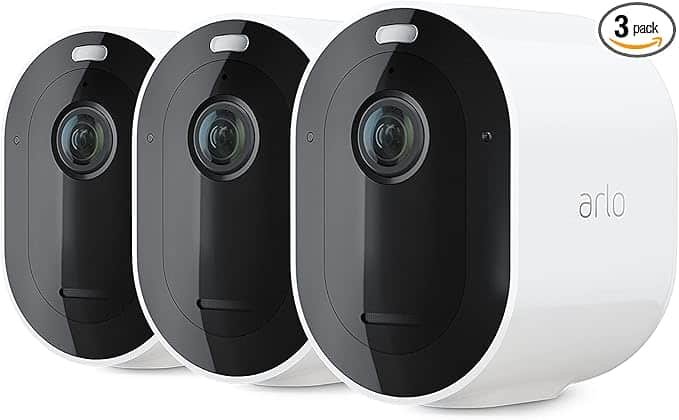
There is no lack of security cameras that allow you to perform your own monitoring of your property, which is a major reason why people are starting to purchase smart gadgets for their homes. With the new Echo Shows, you can now see live feeds from your home’s security cameras. Home security has never been easier to operate and easier to afford than now.
In addition to 30 days of cloud recording, night vision, weatherproof choices, and wireless installation, the Arlo Pro 4 camera provides excellent security. In addition, the video feed is shown on the screen since Arlo is one of the brands that work really well with the Amazon devices mentioned above.
This is also possible with a few of our other top-rated security cameras. The Zmodo outdoor security camera bundle is an excellent choice for more professional purposes, while the Blink Mini is an excellent interior alternative with two-way audio.
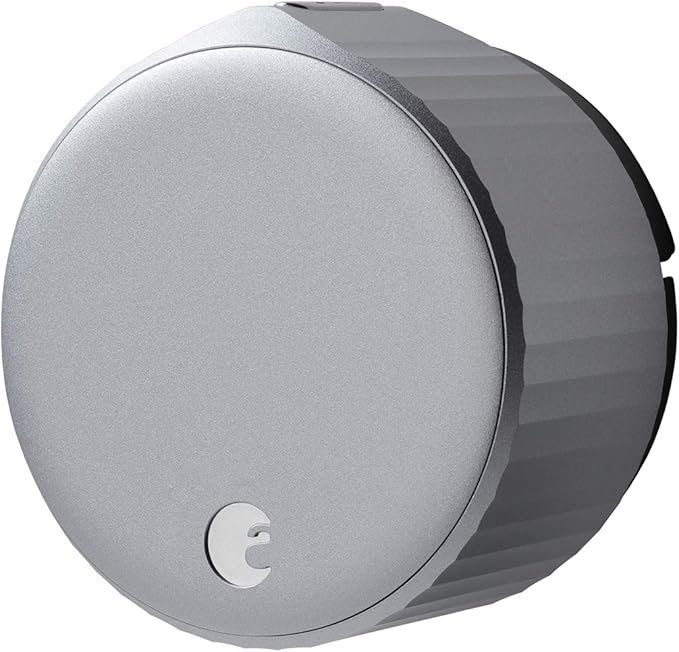
Smart locks are great for things like allowing your dog walker in while you’re not home, seeing who’s at the door when you’re away, and just having a general feel on who is coming into your home, but they’re also a source of concern for some people. Renters with landlords who want access to their apartments, maybe you’re on vacation for a while and need to let a neighbor in to feed pets…there’s a bevy of more serious (and smart) reasons for having a smart lock. One of our favorites to consider is the August Smart Lock (winner of multiple awards), which works with your current lock and pairs nicely with Alexa. They claim it can be installed in minutes, but I wouldn’t rush this (it’s home security by the way). Another one to consider is the Schlage Connect Smart Deadbolt for a more classic smart lock look, which works really well with Alexa.
By connecting to Alexa, you’ll be able to use voice commands to check the lock’s status, lock it, or unlock it. An audibly spoken pin is required in order to open her door, so it’s definitely not the best idea to yell at your speaker from outside. Prior to having a smart lock, I didn’t think it was necessary since I already had a Ring system, but some of the features both of these smart locks provide have really beefed up the security and just the general feel-good safety feelings for our home. We know if a door is left open, we know if a door is closed. If it’s locked or unlocked. And to have that notification and alert is super awesome.
Why It’s Smart To Get An Alexa Echo Device With These Smart Devices
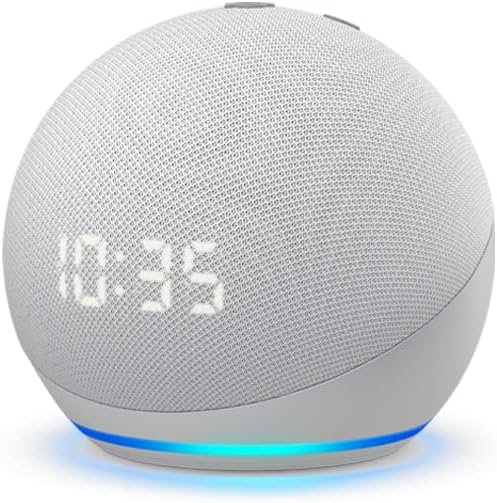
All of the devices listed above can be operated through the Alexa app. But we highly recommend getting an Amazon Echo device to really unlock these Alexa-enabled smart devices. They’re all fantastic products as well. The Amazon Echo Dot with Clock is our favorite Alexa speaker out of the bunch. Aside from making the Echo Dot’s sound richer, its spherical design also makes the screen simpler to see than the previous model’s. The Echo Dot with Clock’s display can do more than simply tell the time, it can also display the current temperature and serve as a timer.
Aside from just an all-around great Alexa speaker, there are two other Amazon Echo-themed products you’re home will benefit from. If you are getting one of the home security cameras listed above, I highly recommend the Amazon Echo Show. The product on its own is phenomenal, but it will enhance your home security experience. You can immediately drop in on movements around your property in seconds with one of these. And the other is the simple yet effective Amazon Echo Dot. We have a handful of these scattered throughout our home and they pair really well with the Alexa-enabled tech we highlighted throughout this article.
If you haven’t already embraced smart devices in your home, you’re really missing out. A smart device whether it be a speaker, plug, smart lock, Ring camera, or whatever is a must-have for any modern home. Besides just being cool and fun, smart devices make your life easier. With a smart device, you can control your lights, heating, and even your security system with just a few taps on your phone. No more fumbling around for switches in the dark or having to remember to set the alarm before you go to bed. You can automate a lot of your life, save time, and just make life a little bit easier. Smart devices can also help you save money. By being able to control your energy use with a smart device, you can make sure that you’re not wasting any electricity. That means lower bills for you and less impact on the environment.
There are oodles and oodles of reasons why you need to begin incorporating smart devices in your home. Here’s the best part: you can start small. You don’t have to break the bank and go all-in with a smart home. There are some people I know that spent around $3K for a robust smart home and love it. I know some that spent about $1K for smart home technology and hate it. My advice: if you’re unsure, start small. Don’t invest heavily until you feel comfortable with how everything works. Start with smart plugs, work your way up to an Amazon Alexa Echo, then maybe get a Ring camera. There’s no pressure to get everything all at once. But…I highly recommend you start now and truly unlock some cool tech for your home.
Eero Pro is a new type of mesh WiFi router that promises to blanket your home with fast, reliable Internet. We put it to the test to see if it lives up to the hype. Spoiler alert: It does! The Eero Pro is hands-down, one of the best mesh WiFi routers we’ve ever used. If you’re in the market for a new router, or even if you’re not, this is one piece of tech worth checking out.
EERO was a start-up that got money from venture capitalists. It sold mesh Wi-Fi networks through many stores, like Amazon and Best Buy. Fast forward a little bit and now Amazon owns EERO. Extending your Wi-Fi network throughout your home or office with the EERO Pro Mesh Wi-Fi system is a fantastic option for improved speeds anywhere in your home. This device connects to your wireless network using a base station router and beacons. EERO Pro routers can be used together, or you can use a single EERO router with many beacons or any combination of these. If you want to buy this product, a few things have been tried and should be kept in mind. Read on for our full review of the Eero Pro mesh WiFi router.
Sleek Design + Easy To Match with Other Decor
With its sleek design and smaller size than most routers, the EERO Pro is a great device. Even more simple: There are no antennas on this one. There are just two Ethernet ports. It wasn’t as big of a feature in the past, but more and more consumers want their technology to look good, especially in their living areas. We don’t want these big, bulky technological eyesores right in the middle of the living room and kitchen. This is why I love the idea of beacons and waypoints. All you need is an outlet and they’re very discreet.
Installation Process: Setup Is Easier Than You Ever Imagined
Assuming you have a basic understanding of WiFi and routers, the eero Pro is actually quite easy to install. Simply follow the directions that come with the product and you should be up and running in no time! Plus, if you have any trouble, their customer support is excellent. If using a mesh network or setting up your own wireless network seemed too complex in the past, and you avoided it, then the EERO Pro will change your mind. We’ve never seen anything quite as simple as this, and it’s accomplished using a Smartphone app that guides you through each step. As we’ve talked about before in the past with other reviews, the amount of time and energy these hardware companies are pouring into their app development and design is manifesting itself with incredible ease of use and functionality. I don’t think integrated apps have EVER worked as well as they do now across the board. I only expect it to get better as time progresses.
Best Locations & Customized Suggestions for The Best Places To Go
With EERO Pro and beacons, you are free to place them wherever you want, but with the app, you can find the best spots in your living area. You can use the app to see suggestions that are specific to your home by telling it how many floors it has and selecting a floor plan that resembles yours. This simple feature is one of the most innovative functions for those who are unsure where to put beacons for the best signal through their living area.
Mesh WiFi routers are becoming increasingly popular due to their ability to create a strong and reliable network by using multiple routers. The more routers you have in your mesh network, the stronger and more reliable your network will be.
One of the benefits of using a mesh WiFi router is that it can provide better connectivity in areas of your home or office where traditional routers struggle to reach. Additionally, mesh WiFi routers are often easier to set up and manage than traditional routers.
With the EERO Pro, it comes with WiFi 6. This type is the latest version of WiFi and it provides faster speeds and improved reliability. It’s backward compatible with previous versions of WiFi, so you don’t have to worry about compatibility issues.
WiFi 6 is also known as 802.11ax and it offers several improvements over older versions of WiFi. For example, it can handle more devices at once without experiencing a slowdown, and it’s better equipped to handle interference from other devices in your home or office.
The Pro version can cover up to 2,000 square feet for one unit and can support speeds up to a gigabit. The standard 6 version can get you speeds of up to 900Mbps.
On your iPhone or Android phone, you can download the EERO Smartphone app. When you start the network, you need the app to do it. You also need the app to keep the network running after you set it up. You can tell EERO has put a lot of ingenuity and innovation into the app platform. Simplicity is a theme we noticed throughout every aspect of EERO Pro.
Easy To Use
There is no web interface for managing EERO Pro, but don’t worry. Most routers have an app for management. I personally prefer the accessibility of using an app vs a web interface. The app is the only way to manage your router. I can see how that might steer someone away from getting one of these, but it shouldn’t. It’s the 2020s and it’s time to ditch your landline. Time to ditch your flip phone and get an upgrade.
Robust Parental Controls + Advance Features
If you’ve read anything we’ve posted about parental controls in the technology in our homes, you’d know it’s a high priority. The EERO checks the box on just about every parental control feature you’d want. Robust parental controls are built-in in EERO Pro, and you can control them through an app on your phone or tablet. In order to use it, you have to set up profiles for everyone in your family and assign devices to them. If you don’t want your kids to be online during homework time or at night, or if they don’t want to be online when it’s time for them to do homework, you can set up parental controls and internet pauses for them. This takes a little bit of time initially setting up and is relatively easy to do so, BUT…an ounce of prevention is worth a pound of cure (or so the saying goes). Taking that time upfront to set up the parental features and advanced settings is worth it.
Pros and Cons
Pros
It’s easy to set up with a phone app.
You won’t have Wi-Fi “dead zones”, especially if you get a beacon or two. Something that you can experience with mesh routers.
Parents are all in charge.
Easily expandable
With no prior experience, it is easy to set up.
Fast wired and wireless speeds
Leverage the power of Wifi 6
Cons
There are only two Ethernet ports in the whole house (not a deal-breaker, but has been noted by some users that this is a pain point).
It is a little bit costly IF you don’t take advantage of all the amazing features.
There is no way to put devices or traffic first.
Concluding Thoughts On The EERO Pro
If you’re in the market for a new mesh wifi router, we highly recommend checking out EEOR Pro. It’s super easy to set up, comes with great parental controls, and has amazing connectivity and speeds. Plus, it comes packed with features that make it perfect for any home. There are a lot of different wifi routers on the market, and it can be tough to decide which one is right for you. If you’re looking for a router that will provide fast and reliable internet coverage throughout your entire home, then the Eero Pro mesh wifi router is a great option. Just remember: when it comes to tech if you buy cheap, you usually get cheap.
Do you want to be able to talk to your kids from another floor of the house without having to scream? I’m raising my hand real high right now! Do you want to be able to easily communicate with them when they’re home alone, or when you’re out and about and need to run an errand? What about notifying everyone that dinner is done? If so, a smart home intercom system might be the perfect solution for you! You can set one up for less than $100 and it’ll make communicating with your family a breeze. We’re going to dish on some valuable information on what a smart home intercom system is and how it works. You might be surprised at just how helpful they can be!
Intercom Systems 101
For starters, let’s briefly break down how intercom systems work. An intercom is a two-way communication system that allows people to talk to each other from different locations. They can be used in homes, businesses, schools, and other places where people need to communicate with each other. Intercom systems can be wired or wireless, and they come in a variety of different designs and sizes.
Intercom systems are most commonly used in schools and businesses to allow teachers or employees to talk to students or customers from different locations. They’re not used as much as they once were because we have devices, email, and apps where a lot of communication takes place. But intercom systems can still be used in homes to allow parents to talk to their children when they’re upstairs or downstairs, or to allow grandparents to keep an eye on their grandchildren when they’re home alone. Intercom systems are also popular for use in security applications because they can help monitor staff. You might think they are outdated or obsolete because of technological advances, but they’re really not.
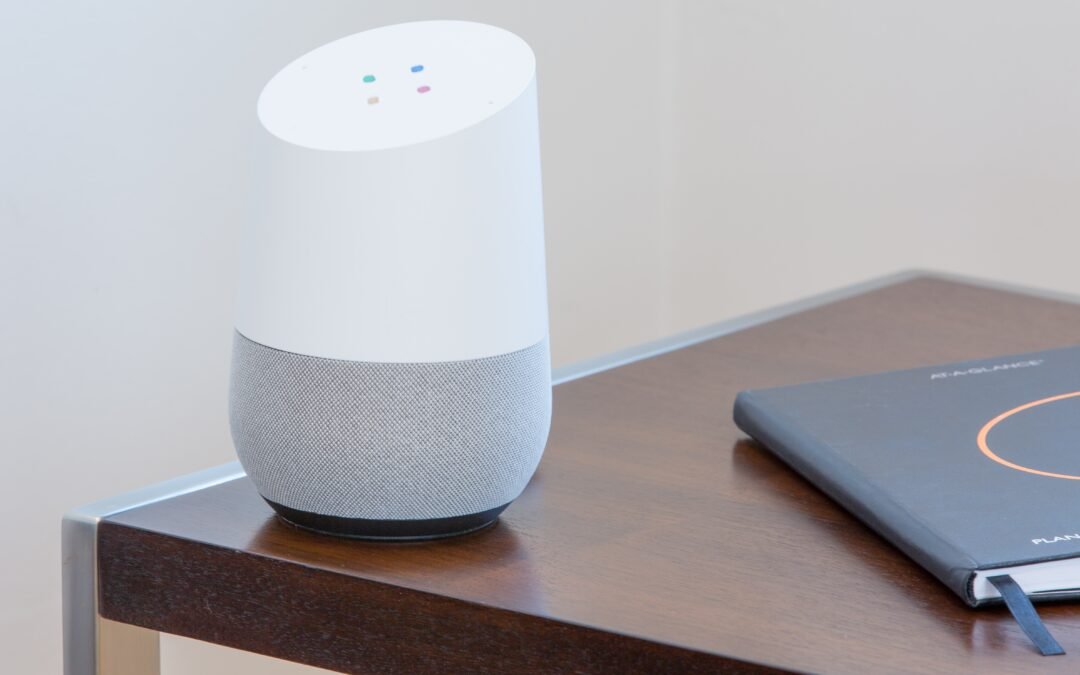
So what’s the big difference between a regular intercom system and a smart home intercom system? The biggest differentiator is that you are leveraging smart devices (in this case Google Minis, Google Nest Audio, or even Amazon Echo Dots) to create a customized smart home intercom experience. Quite frankly, I’m not sure the regular intercom systems are applicable to home anymore. Maybe businesses and schools, but with the rise in smart home automation systems…they’re all but obsolete.
How To Install Your Smart Home Intercom System
Here’s what you’re going to need. And as we said above, you can do this for less than $100! You’re going to need to get your hands on a handful of Google Minis. As far as I can, this setup will work with all generations of Google Mini. The best place we’ve found to buy Google Mini’s is eBay. I’ve bought used or refurbished Google Mini’s in the past from eBay and have never had any issue. You can also buy the latest generation directly from Google or a store like Walmart here in the USA.. You won’t find them on Amazon though (huh, I wonder why? Kind of like I can’t buy an iPhone at a Microsoft store 😉 ). Not to play conspiracy theorist, but from a business perspective, I can see why Amazon wouldn’t have these devices pop up in Amazon searches. In fact, if you do try to search for these, you’ll get bombarded with Amazon devices.
How many Google Mini’s do you need? Depending on home size, I’d start with four. You can still get four of these for under $100. You’re also going to need to download the Google Home app once you get them. You will need it for setup. Where should you place each unit? I’d start with one in the kitchen, one in the living area (commons area, preferably the basement), one in the master bedroom, and one in a central location where kids or most people congregate. Think high hangout or high foot traffic areas. Each smart device will need an outlet so that’s something to consider. For a handful of our Google Mini’s, we bought these wall mount holders which are super convenient and useful. Personally, I have one in the hallway upstairs, the master bedroom, each kid has one in their rooms, the kitchen, the basement hangout, and the garage.
Once you’ve mapped out where you want each smart home speaker going, plug each one in (one at a time is easiest), follow the setup instructions in the Google Home app, and then you’re set. It’s that easy. To broadcast to the whole system is equally as easy. If your smart home speaker is in listening range, simple command, “Hey (or Okay) Google broadcast”. It’ll then ask you what you want to say and you say it. Easy. You can also open your Google Home app or enable “Hey Google” on your smartphone to do the same thing. In fact, you can do this when you’re not home. I use my phone all the time to broadcast at home something for my family “Gabe I’m 5 mins out, I’ll take you to practice, grab me a Diet Coke”…and like magic a 15 year old boy is waiting at the end of the driveway with a Diet Coke in hand when I pull up. It’s almost magic!
Amazon Echo Dot Smart Home Intercom Setup
The same principles you used with Google smart speakers apply to setting up a smart home intercom with Alexa devices. I love using the Echo Dot for this. Get the desired amount of devices, download the app, place them where you want in the home, and finish the setup. They’re still around $50 so getting four devices is going to be around $200. That’s still relatively cheap compared to basic intercom models. We use ours enough in the home where I’d still probably pay around $300 to $400 to have a smart intercom system in our home.
First off, I didn’t even know I wanted to set up an intercom system in my home until I started experimenting with home automation products. They are so handy! If you want a basic smart home automation system (one with speakers, smart outlets, smart lights, smart doorbell, etc), spend an extra $200-$300 and you’ll be surprised just how practical they are and how much more efficient you can be in your daily tasks with one. We highly recommend smart home automation.
What makes this setup we outlined above “smart” is you can still get other features from these smart devices that 99% of intercom systems can’t deliver. We did some basic comp analysis and some of the base models for intercom systems can run you as high as $2,000! Yikes! For that kind of cheddar, you can get an amazing smart home automation system with smart thermostats, video conferencing, ring cameras, internal and external security cameras, and more! With a basic smart home intercom setup, each device is still smart and can do some fun and practical things. Google Assistant has an array of commands and benefits. Amazon’s Alexa devices are equally, if not more, impressive as well. Essentially, you get an intercom system and then a lot more when you set it up this way.
Another incredible benefit of having a smart home intercom system organized this way (and we alluded to it earlier) is that you get the basic foundational layer of a smart home automation system in your home. Down the road, if you want to experiment with smart outlets…it’s set up for that. Maybe you want to get the Ring camera. It’s an easy add-on. You can gradually build out a smart home and go with what you feel comfortable with.
What I Love About This Smart Home Intercom Setup
There are seriously dozens of reasons why I like setting up a smart home intercom system this way. Here are a handful of reasons:
I can target individual smart speakers so I don’t have to broadcast a message to the entire smart intercom setup. For example, I can say “Broadcast to Susie’s speaker” and send a message that only gets delivered to her device.
Love to be able to communicate at a moment’s notice. I can immediately broadcast a message without touching a single device or opening a phone.
I can broadcast while away from the home. This is a great feature when no one is answering their phones or my text messages.
Communication is easy and seamless. You can communicate through the Google Home app on your devices or communicate directly to your smart home device. The ease of use is flawless with this setup. I also love to be driving home or leaving a location and send a broadcast to the family that I’m on my home (I think the dogs like it too).
It’s simple to use, but if I wanted to get into some complex functions, I can do that as well. This setup is versatile which is why I love it.
I can easily add video conferencing in the rooms I want with a Google Nest Hub.
I could list more and more reasons why I love setting up a smart home intercom system this way, but chief among them is this setup is how I introduced smart home automation to family members (especially the technically disadvantaged family members). I noticed that once they were comfortable with this setup, they naturally wanted to know if they could install a Ring camera. Then came another external security camera, then smart lights, then the next thing. This is a great introductory process for getting into the smart home game without being inundated with a ton of technology all at once.
If you’re looking for a great way to add some extra convenience and security to your home, a smart home intercom system is the perfect solution. And, you can get one for less than $100! They’re easy to install, come packed with more features than normal intercom systems, and come with some of the benefits you get with basic home automation.