In this digital age, we’re all searching for that ideal photo storage solution. Google Photos, for many, has been a trustworthy companion, yet its limitations often spark a quest for alternatives. So, let’s examine a potential challenger, the Amber X, priced at $249, and see if it ticks all the right boxes.
A Journey into Amber X
Setting up a Network Attached Storage (NAS) device can feel like wandering into a labyrinth. I personally run a Synology (https://synology.com) NAS with a crap load of drives for not just my photos, but all kinds of data storage and services (virtual machines, docker machines, basically a bunch of nerd stuff). But that setup cost me well over $2,000 for my 35TB of digital hoarding. (We’ll be looking at their Pro device in another post…I’m kind of giddy thinking about it).
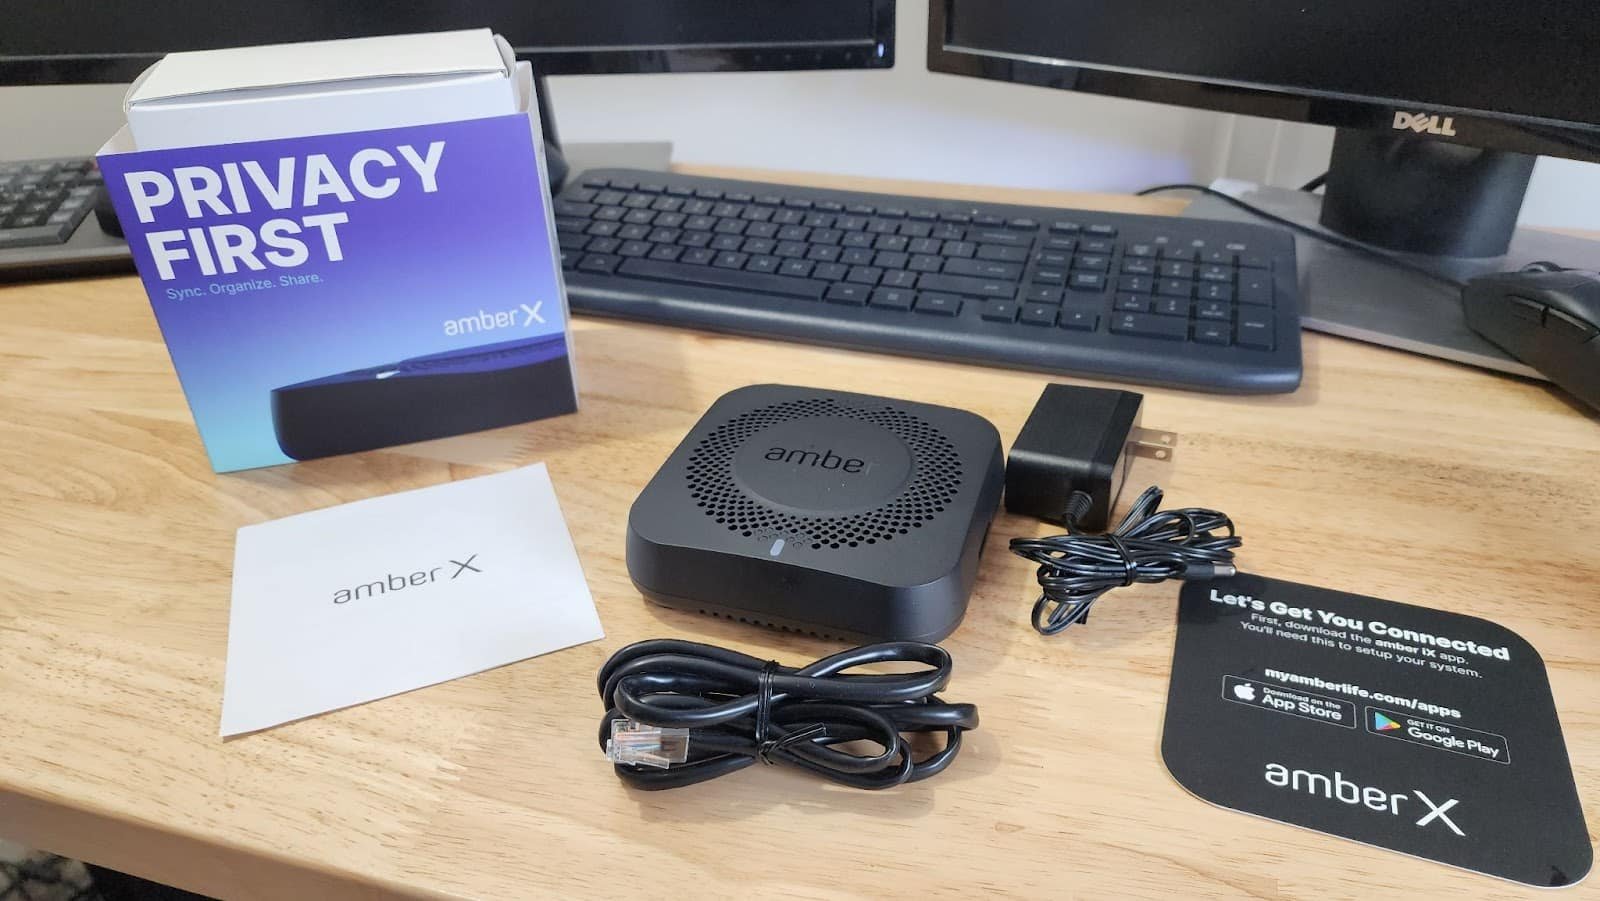
But here’s the game-changer: Amber X. This device emphasizes user-friendliness and simplicity, shedding the complex layers that usually accompany such setups. Now I should specify that LatticeWorks did reach out to me and sent me these units for free. But if you all know me, you know I won’t pull any punches. My personal pet peeve is reading reviews that are afraid to just be upfront and honest about the product. So, here we go.
Getting started with Amber X involves four straightforward elements: a power cord, a Bluetooth connection, a WiFi connection, and your mobile device. Now, get ready to be guided through the whole setup process by the super user-friendly Amber iX app. Whether you’re team iPhone, Android, Windows, or Mac, it’s got you covered. So sit back, relax, and let Amber iX lead the way, turning the installation journey into a piece of cake!
Like all reviews, we have to cover what’s under the hood, strap in because we’re diving into the nuts and bolts of this bad boy. Trust me; these specs are impressive!
Ports? More like Porty Party!
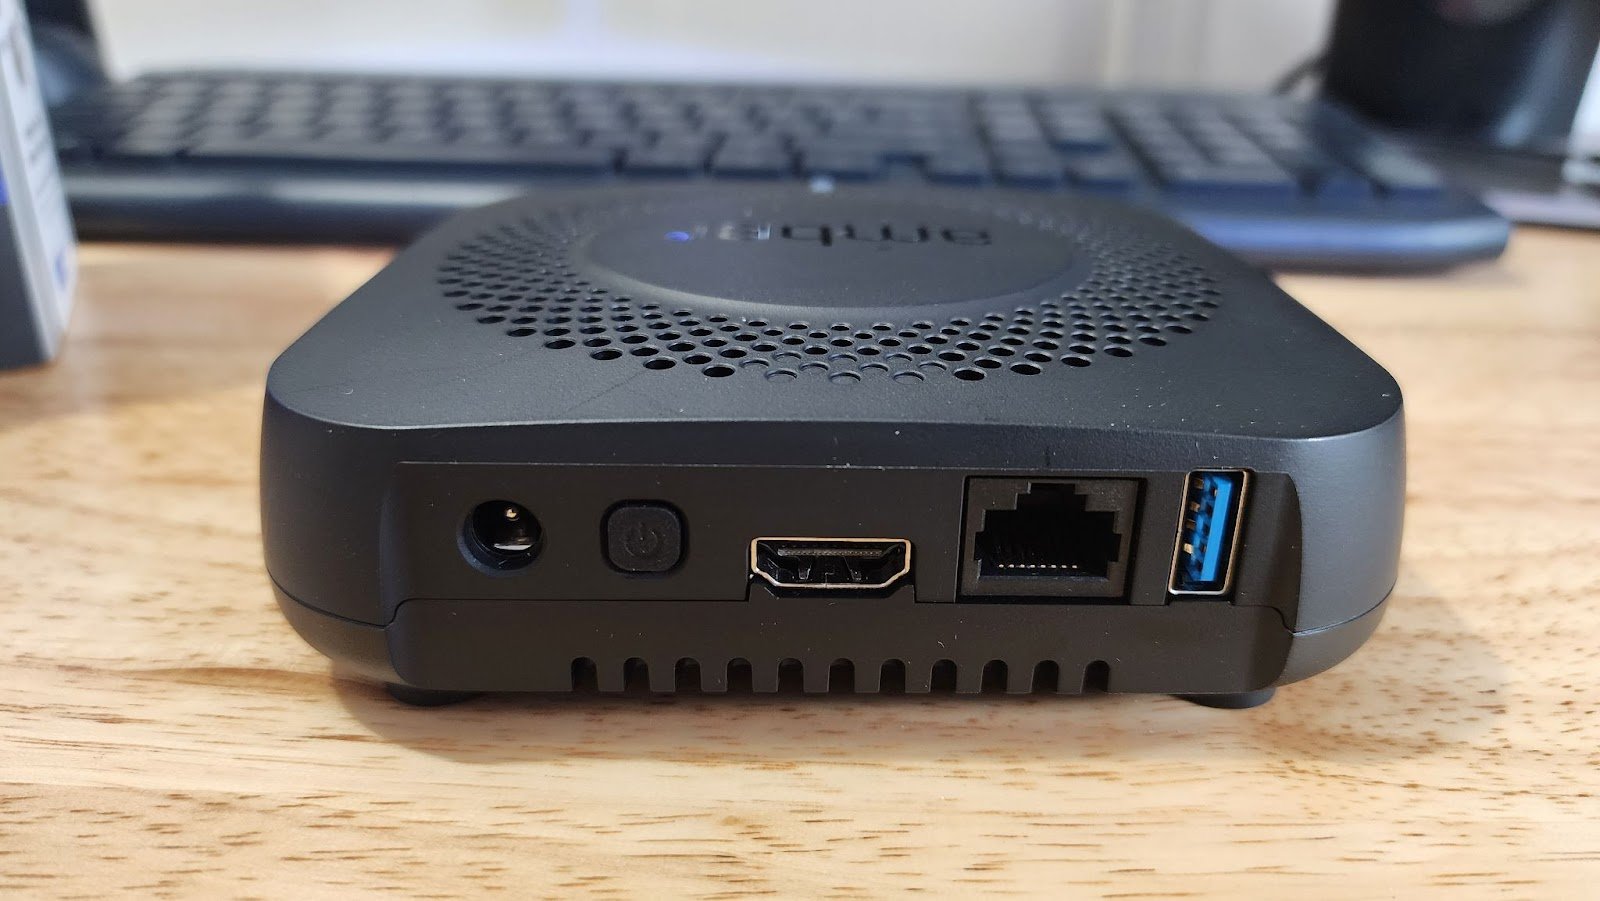
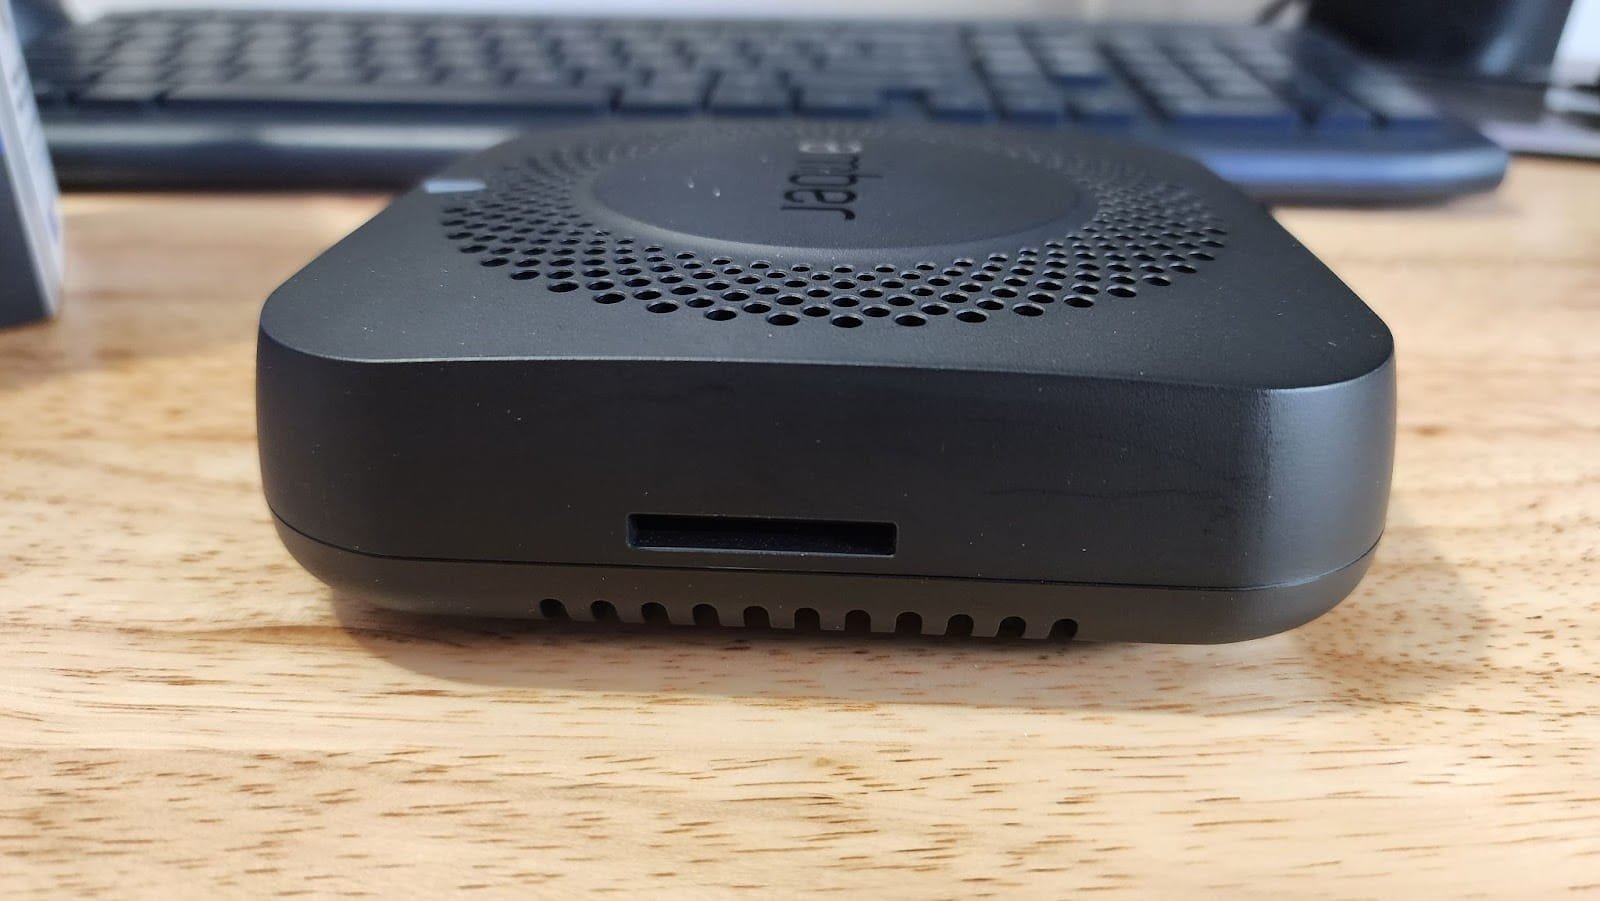
Amber X comes loaded with multiple port options. You have an SD Card Reader for all your photo offloading needs. There’s also an HDMI 2.0 4K Output for when you want to showcase your media in high resolution. Your Amber X is also equipped with a Gigabit Ethernet Port, a USB 3.1 Gen 1 Type-A port for those of us who still love our USBs, and a 12V/2A DC Power port to keep the party going.
Wireless Wonder
Amber X rocks the wireless world with 802.11ac 2×2 WiFi and Bluetooth for System Setup. No more cable spaghetti and the 2×2 means that it has two antennas supporting two data streams.
Storage, Storage, and More Storage
With a whopping 512GB High-Speed SSD Internal storage, Amber X is like a digital treasure chest. And guess what? You can expand this with USB 3.1 drive! It supports (hang on to your hats, folks) 2TB via SSD and up to 12TB via an external hard drive (like this one here on Amazon https://amzn.to/3oY4yfL). That’s what I call generous!
Processor and Memory? Lightning Fast!
The Amber X comes armed with a 64-Bit 6-Core ARM® Cortex® Processor and 2 GB DDR4 RAM. Dumbed down, Amber X is a lean, mean, speed machine.
Size and Weight
At 4.9 in x 4.91 in x 1.5 in and weighing just 0.66 lbs, Amber X is compact and super portable. It’s like carrying a feather that holds half your digital life!
Software and Security
Amber X is powered by its very own Amber OS. Your data is locked tight with Encrypted Data Transfer / Transport using TLSv1.3 and OpenSSL 1.1. It also offers Configurable Disk Encryption with dm-crypt AES-XTS cipher. Basically, Amber X is a freakin Fort Knox for your data.
Media Output – The Power of Three
Here’s where it gets interesting. Amber X supports Chromecast Output, Chromecast Ultra Output, and DLNA Output. The video formats supported include .avi, .mkv, .mov, and .mp4. In terms of video codecs, it supports H.264, VP8, and even H.265, VP9 for Chromecast Ultra and DLNA Output.
You can view image formats like .bmp, .gif, .jpeg, .png, and .webp. For you audiophiles, it supports .aac, .mp3, .mp4, .wav, and .webm formats. And here’s the cherry on top: you get bit rates of 5Mb/s with 2.4Ghz WiFi and a whopping 30 Mb/s with 5Ghz WiFi. That’s a lot of horsepower under Amber X’s sleek hood!
So, that’s the lowdown on Amber X’s specs. It’s pretty clear that Amber X isn’t just a pretty face; it’s a power-packed performer that can take on anything you throw at it!
There are so many features that we’re going to have to do several articles in the future.
Setup: Easy Peasy, Lemon Squeezy
Let’s get your shiny new device up and running without breaking a sweat! Sidebar: I’ll be using an Android device for my screenshots.
To start the setup, you’ll need to first download the Amber iX app from your app store.
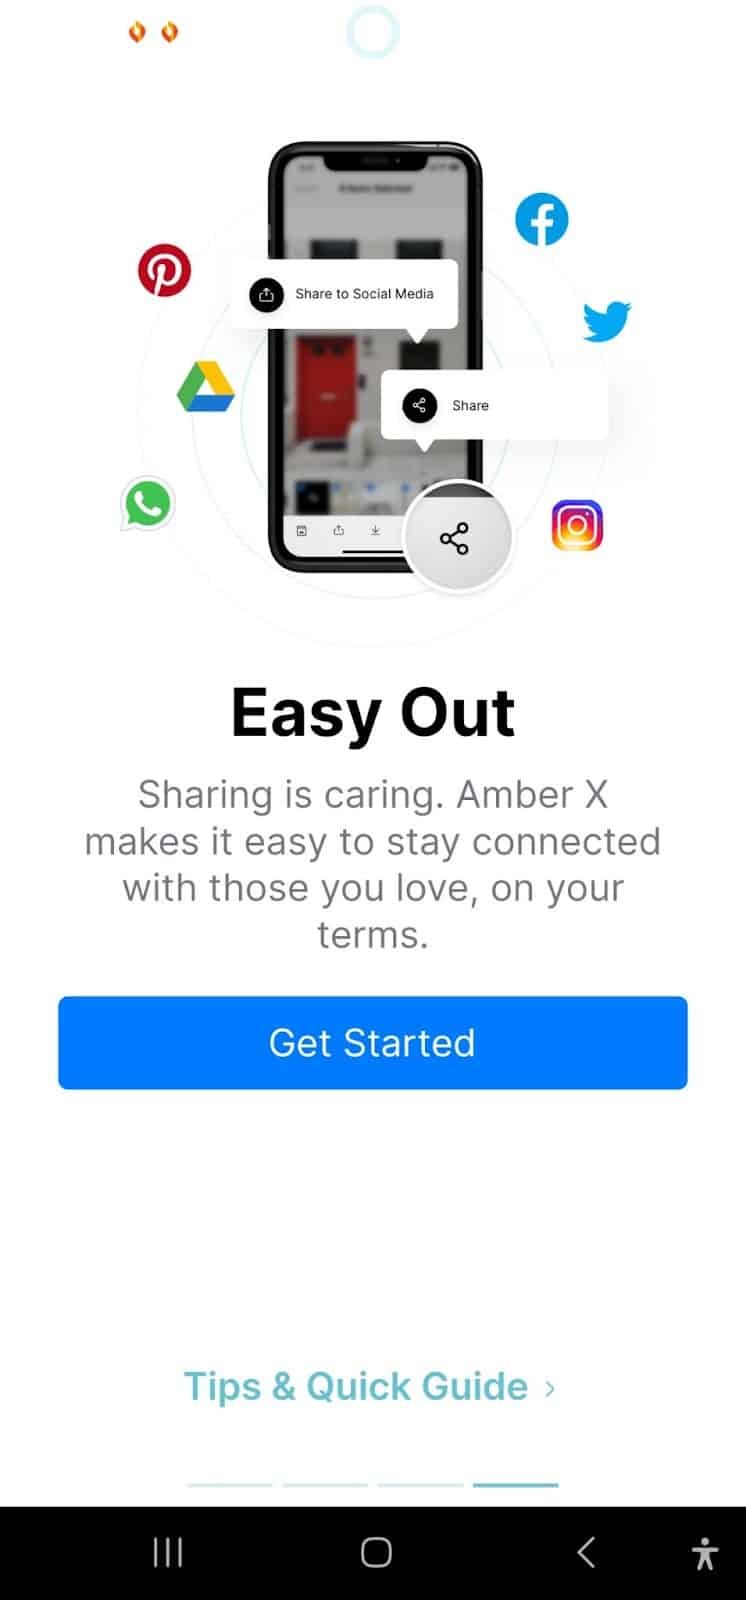
You’ll then be presented with a couple of feature screens to remind you how awesome this device is.
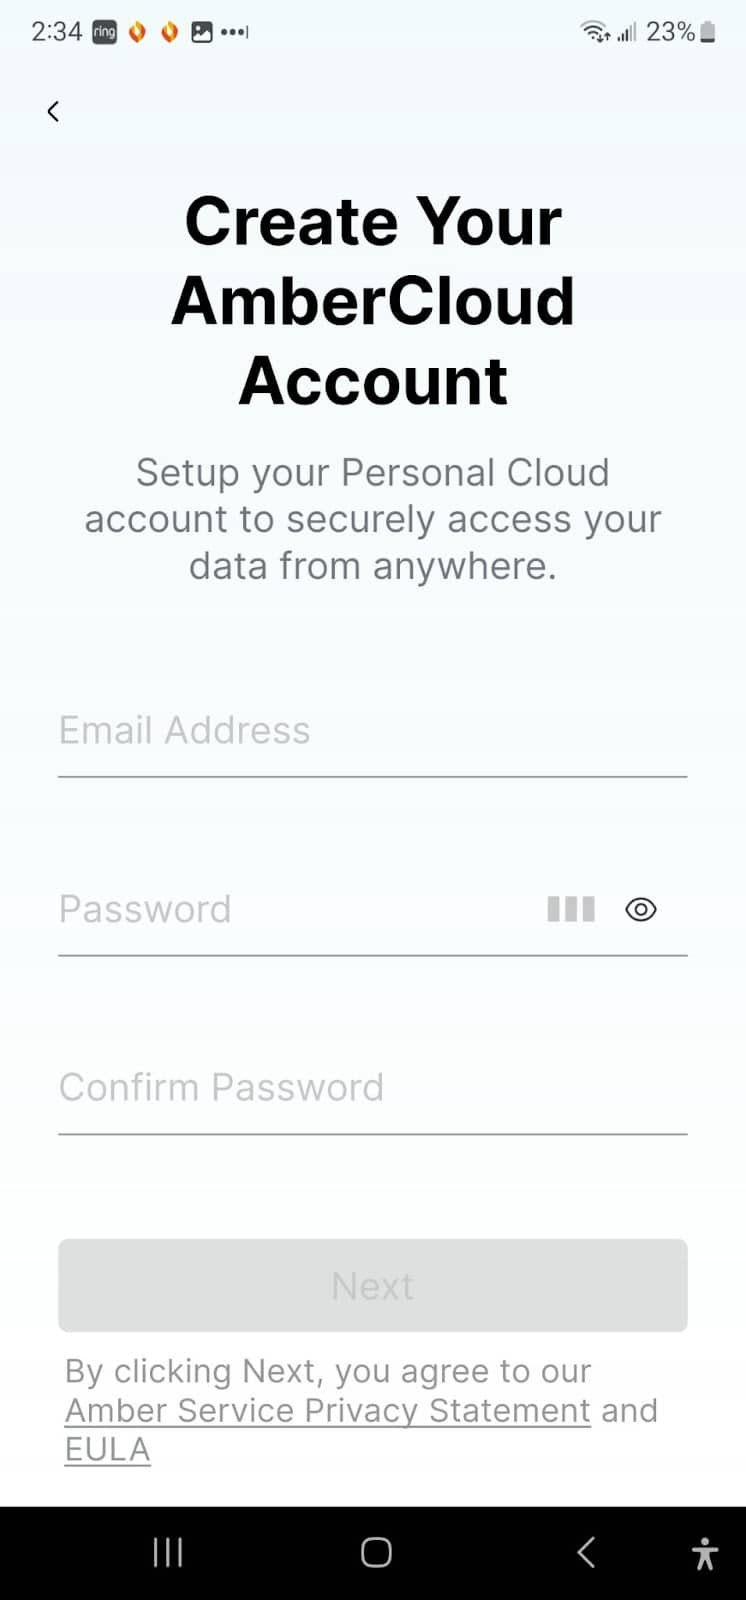
Joining the AmberCloud Family
If you’re new around here, you’ll need to create an AmberCloud account. Already part of the family? Then just log into your existing AmberCloud account. For the newbies, a special code will be zipping its way to your email inbox. If it takes longer than a coffee break (about 5-10 minutes), it might be playing hide-and-seek in your Spam folder.
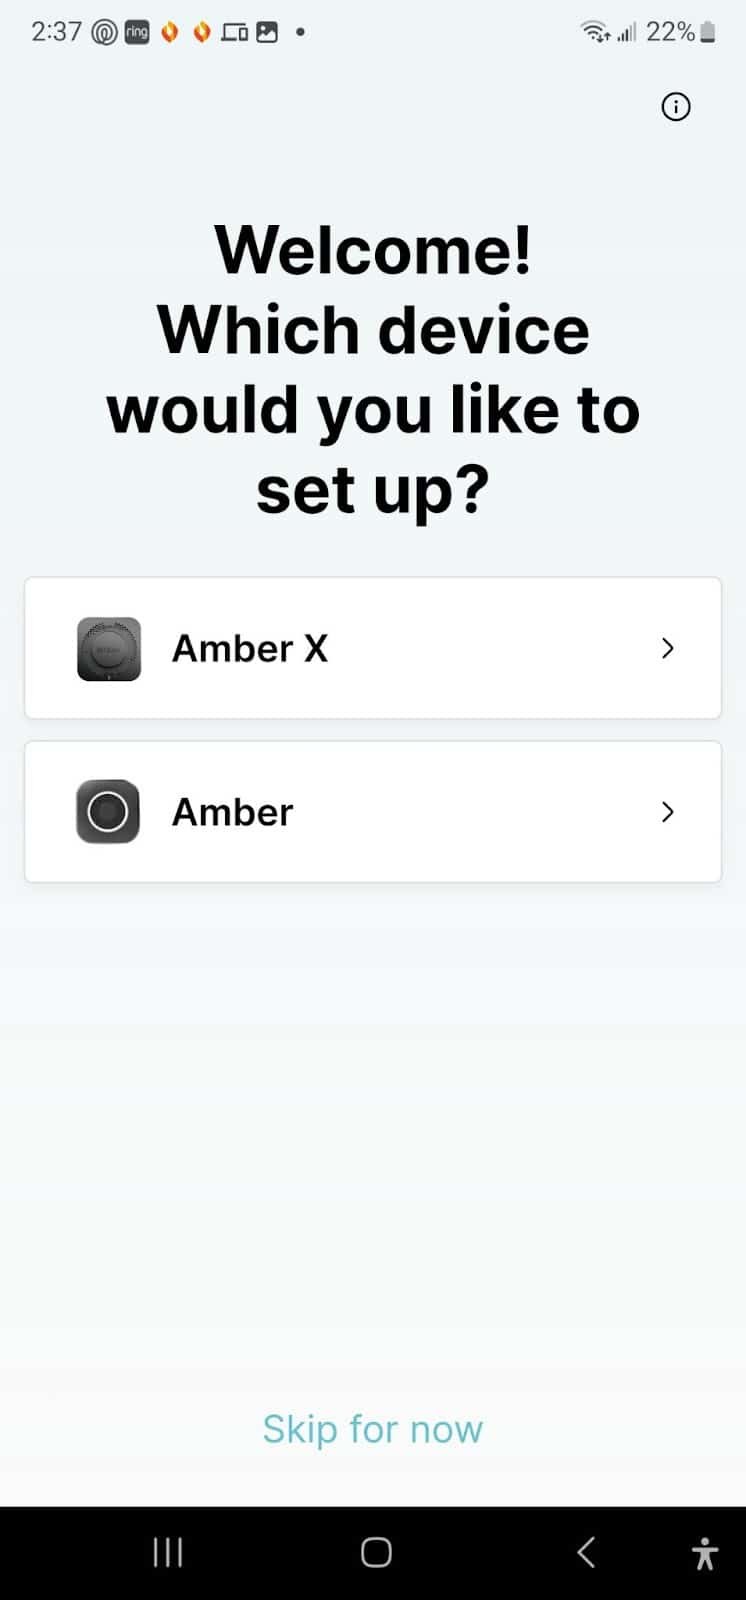
Which Amber?
Next, you’ll have to choose which Amber device you have. Here’s a hint, Look at the images on your screen and then look at the device on your table. See, I told you this was easy!
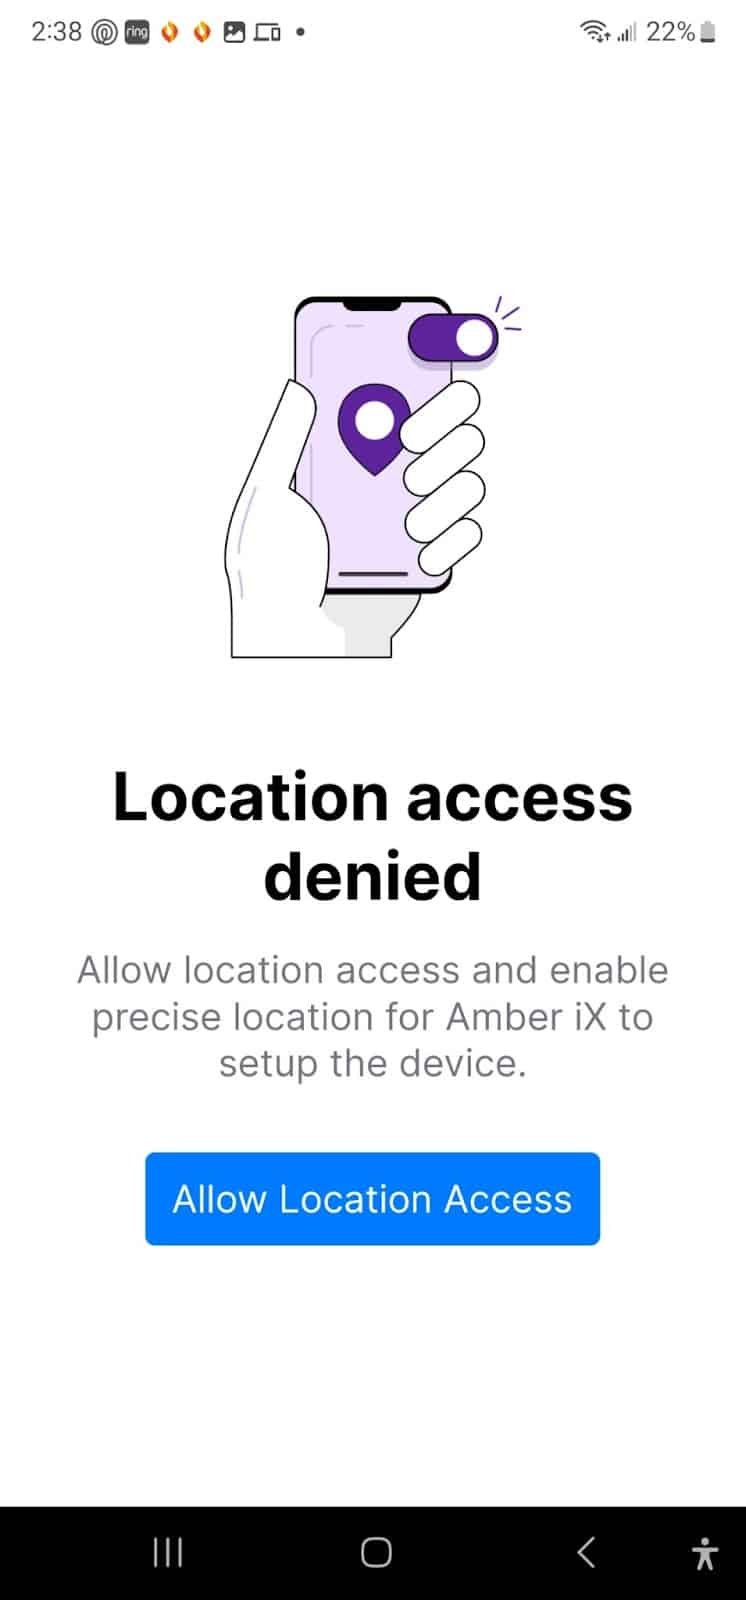
Now if you’re GPS settings are turned off, the setup will detect that, and you’ll see the following screen. Location access is required during setup so the app can find and identify the Amber device. You can turn it off after setup if you want.
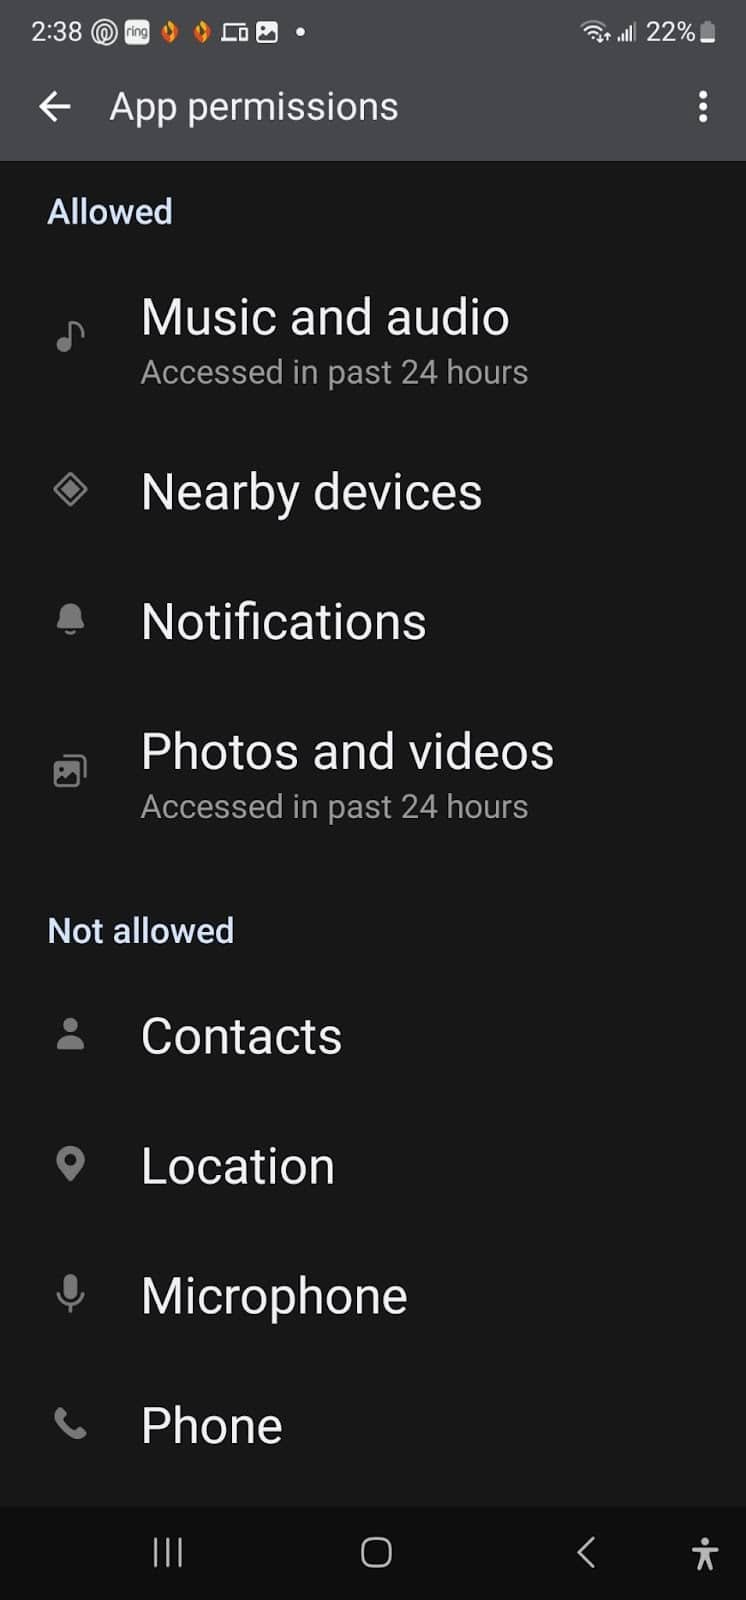
Permissions, Permission, Permission
The app also needs some permissions on your device to make it’s features work correctly. Nothing tricky here, if you want to backup your photos…then you’ll have to allow Amber access to your photos, right?!
BOOM! Found You!
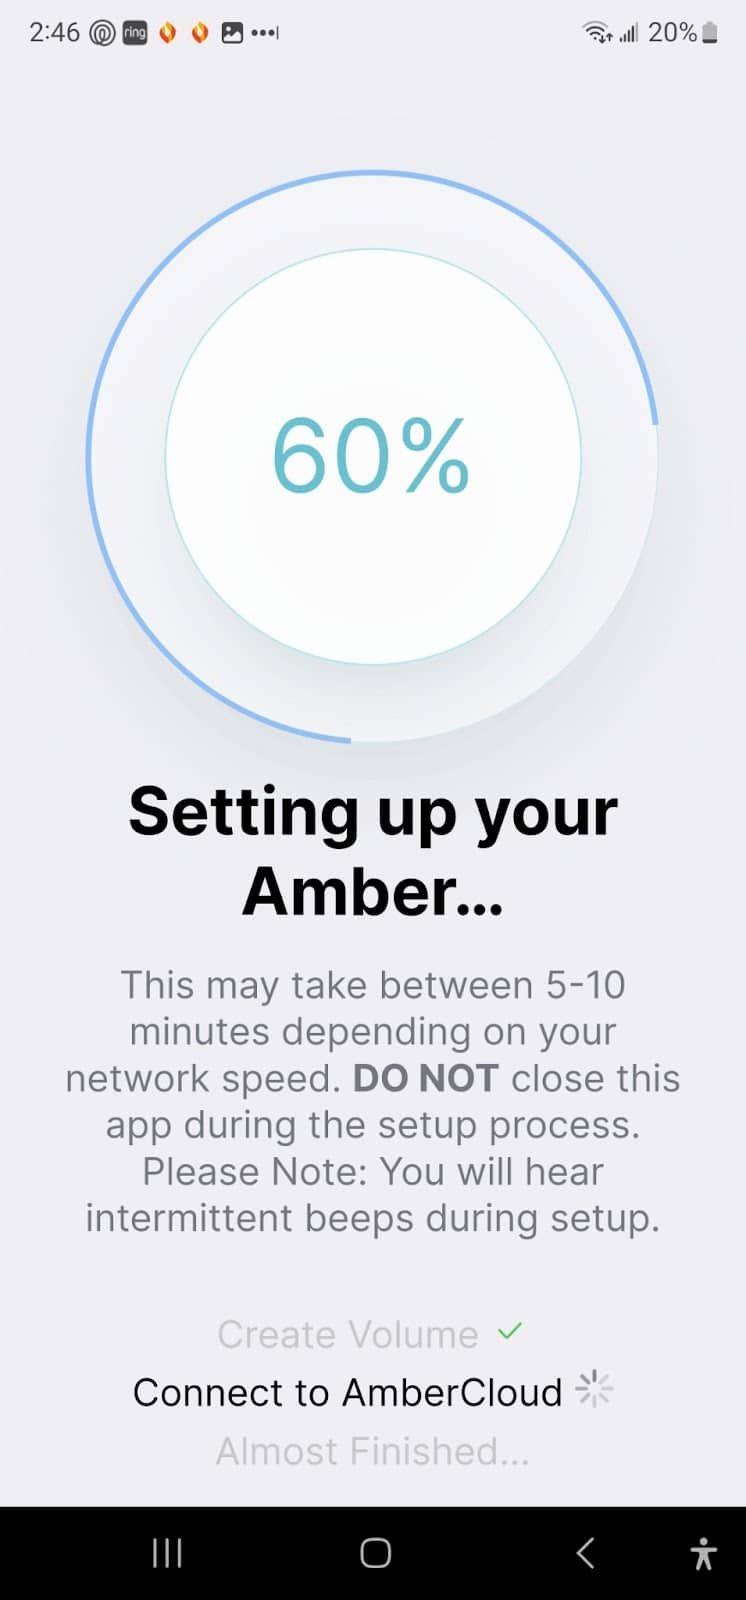
If all goes well, the app will find your Amber device and begin to configure it. This might be a good time to go get an energy drink or grab a bite to eat, cause it might take a few minutes to finish the setup, and yes, they aren’t joking about hearing a couple of beeps during the setup!
WiFi Wonders
Now, let’s make some digital connections. Setting up WiFi is our next step. You’ll be presented with a configuration screen for your WiFi settings. Even if you’re an Ethernet enthusiast. Trust me, it’s worth it. Now one bug I discovered here is that the Amber X will pickup which WiFi network your phone is connected to and won’t let you change it until after the setup is complete. I’ve reported this bug to their support folks, and I bet they’ll patch that, but just be aware of this.
What’s in a Name?
Time for a little personalization! You can give your Amber X a name. If you’re drawing a blank, don’t worry. Accept the default name for now. You can always change it when inspiration strikes.
It’s ALIVE!
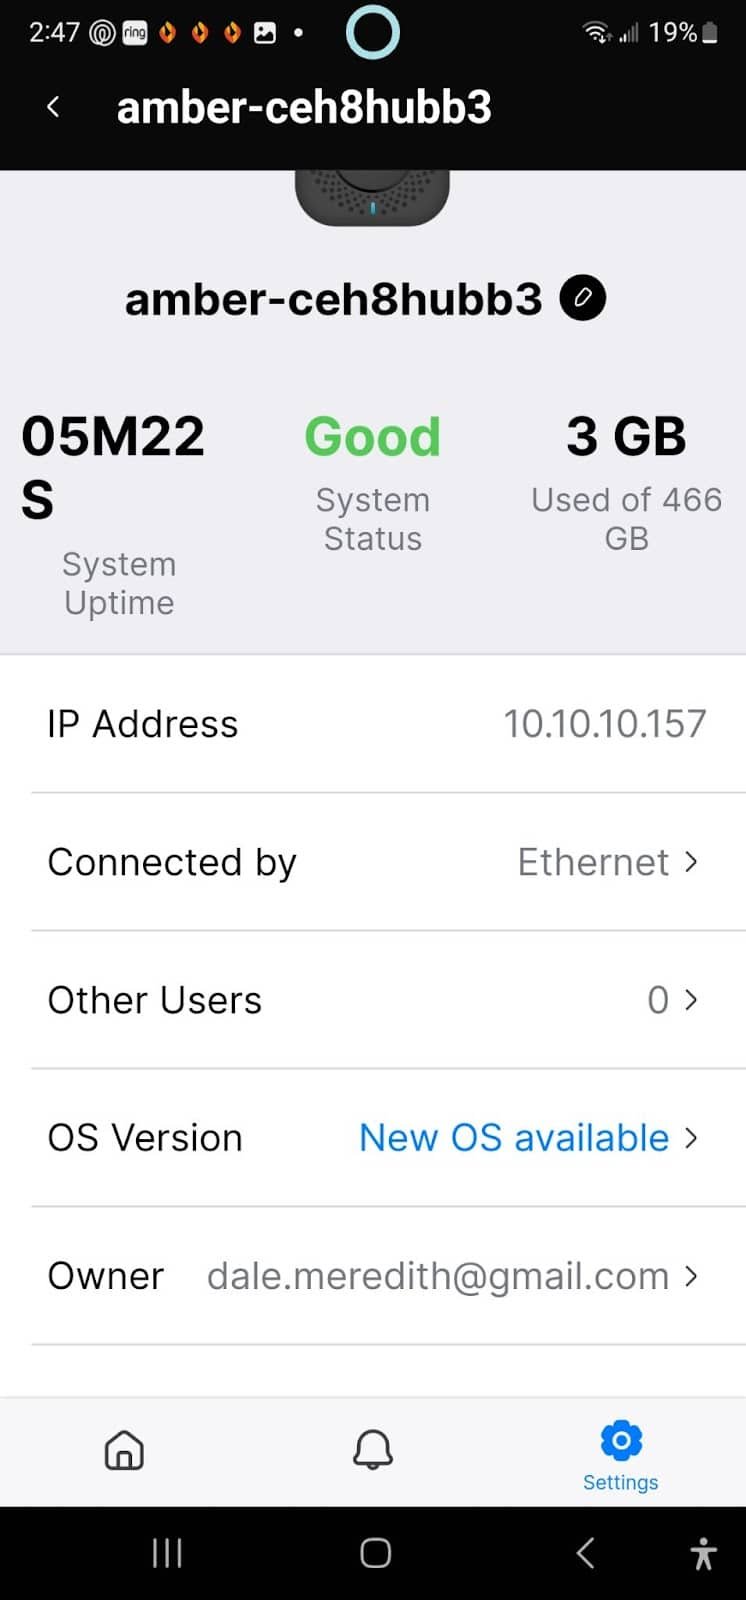
After it finishes, you’ll see your dashboard. You’ll see your Amber X appear. Now the first thing I’d do is apply any updates since there’s a good chance things have changed since your Amber came off the factory line.
And just like that, you’re all set! But remember, your journey with Amber X is just starting.
The Real Magic of Amber X
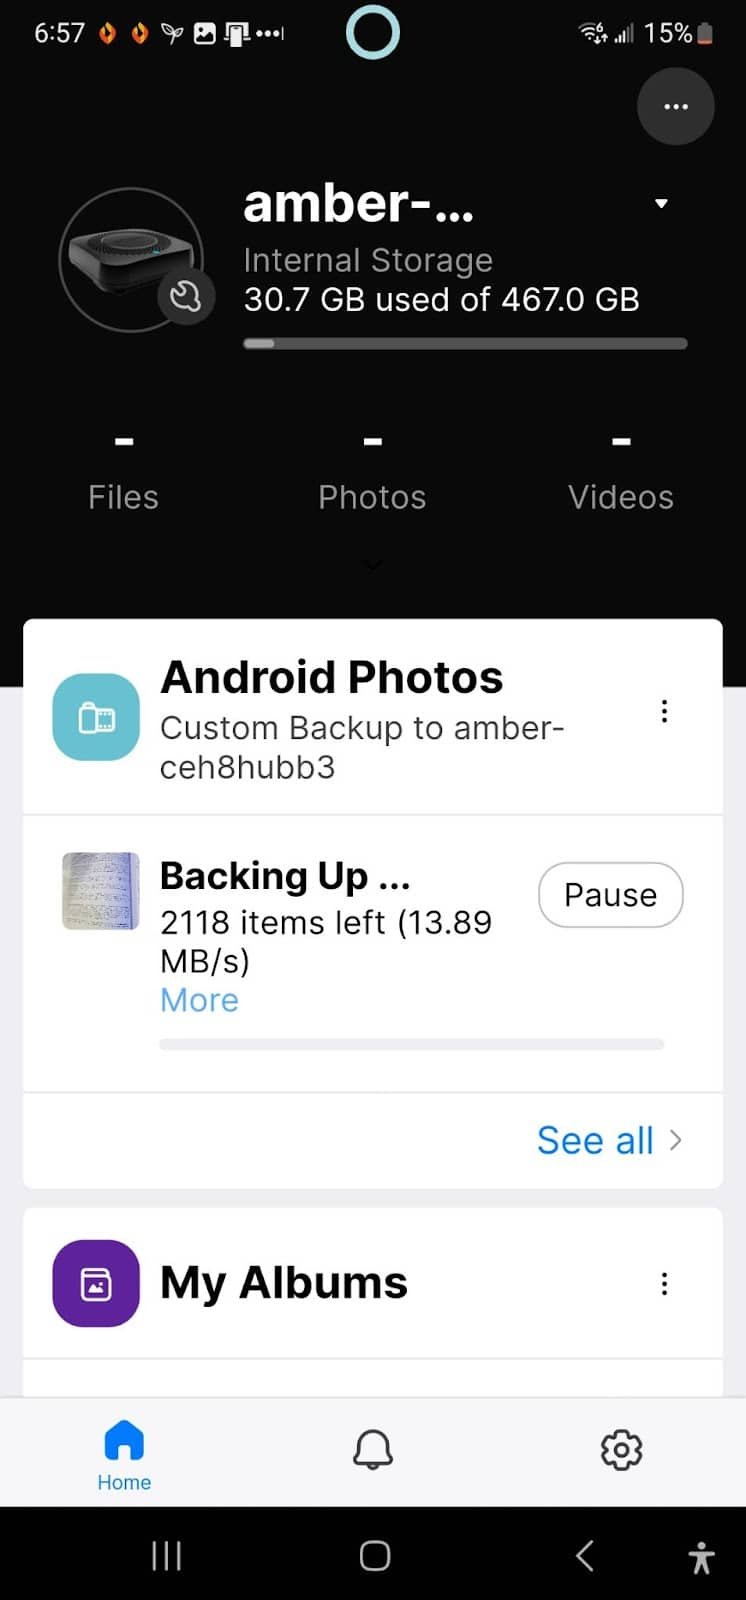
Once the setup is complete, the wizard will walk you through backing up all your photos/videos off your phone/device. And when I say “all your photos”, I mean photos and videos you’ve taken with your phone, from Tik-Tok, Twitter, Slack, Instagram, WhatsApp, heck, even Google Maps! Basically, any app on your device that utilizes photos or videos can be tagged. Now I did a custom backup because I don’t care about photos from some of these services, but I still had over 4,000 photos/videos that the Amber device picked up. But it’s cool because the Amber iX app works in the background, and after about an hour, all my images were backed up. Here’s what’s really cool. The app has an option to “clean up” your phone…which means to delete the photos/videos that have backed up off of your phone. Now you don’t have to worry about running out of space on your phone when you’re taking photos. I can always open the Amber iX app and look at all my photos/videos, plus i can share them with folks too!
Oh and if you’re wondering, my 4,000+ photos and video only took up 70GB. That’s just over 14% of what I can store on this bad boy. Now if you want more space, you can (as I mentioned earlier) add an external drive, or you might want to think about looking at the Amber Pro, which I’ll be looking at in my next post.
Artificial Intelligence, Say WHAT!
Okay, everyone, brace yourselves for the real game-changer: Amber’s AI-powered photo organization feature! As if Amber wasn’t already impressive enough, they’ve managed to incorporate AI technology to make it an even more powerful tool in our digital lives.
This feature is nothing short of magic, folks. Imagine, you’ve got thousands of photos stored – a typical scenario for most of us. But you’re trying to find that one particular shot from your summer vacation three years ago, or the sweet picture of your niece at her first birthday party. Normally, you’d be scrolling endlessly, right? But here’s where Amber’s AI comes into play.
Their sophisticated AI system has face-detection capabilities. Yes, you heard it right! It can identify faces, making it super easy to find pictures of specific people. But wait, it gets better. This AI doesn’t just stop at recognizing faces, it can also identify objects and locations. So whether you’re searching for a sunset picture taken at the Grand Canyon or photos of your beloved pet, Amber’s AI has got you covered.
Now, I know what you’re thinking. ‘Isn’t that a bit creepy? Could this mean my personal data is at risk?’ Rest assured, your data privacy is a top priority for Amber. The amazing part of this all-in-one smart storage platform is that while it leverages advanced AI technology, it does so with the utmost respect for your privacy. Your data stays your data, not shared with anyone else. So you can enjoy the convenience of advanced AI photo organization, without the usual privacy concerns.
In a nutshell, Amber’s AI gives you the power of an advanced photo search engine, all while ensuring your precious memories remain safely under your control. It’s like having your very own, private Google Photos, WITHOUT the yearly fees!
It’s Not Just about Photos/Videos!
Digging deeper, the true magic of Amber X reveals itself in the Backup feature. This feature vigilantly tracks changes in specific folders (and the files inside), automatically initiating a backup with each modification. It’s a lifesaver for those of us who forget to backup our files regularly – an effortless alternative to running a full drive backup each time a new file appears. It’s basically like your own Dropbox!
Securing Your Data with Amber X
When it comes to security, Amber X stands its ground. The device leverages two distinct layers of encryption: TLSv1.3 and the dm-crypt AES-XTS cipher, adding robust protection against unauthorized access. So whether it’s photos & videos or important documents, Amber X has your back. With its powerful combination of automation and security, it’s easy to see why tech-savvy users are looking closely at this solution.
Something You Can’t Put a Dollar Figure On
Oh, and folks, we can’t wrap up without talking about Amber’s exceptional customer service. It’s like a cherry on top of their already impressive product. Let me share my personal experience with you.
Like many of us, I’ve had my fair share of less-than-stellar customer service experiences. We’ve all been there, right? But when I faced a small hiccup with my Amber device, I decided to give their customer service a try. I initiated a chat session, fully prepared to be tossed from one representative to another. But to my pleasant surprise, the exact opposite happened!
Not only did the representative – shoutout to the fantastic Michael – stay with me throughout the session, he helped me resolve the issue without any hint of rushing. His patience was truly commendable, and his level of dedication to ensuring my issue was fully resolved blew me away.
And guess what the best part was? This top-tier service didn’t cost me a penny. It’s truly refreshing to see a company standing by its product without hidden fees for customer support. Far too often, we purchase a product, only to be slammed with support charges when we need help. But with Amber, it’s a whole different story – a story of commitment, quality service, and customer satisfaction.
So kudos to Michael and the entire Amber customer service team. Your dedication is appreciated and certainly doesn’t go unnoticed. They’ve set the bar high, folks, and it’s about time other companies take a leaf out of their book!
The Verdict: Is Amber X Worth It?
If you’ve been pondering, “Is Google Photos really the best photo storage option?” then the arrival of Amber X might tip the scales. With its streamlined setup, abundant storage capacity, and interface that champions user-friendliness, no monthly/yearly fees and no compression of your photos, Amber X redefines personal cloud storage.
The device shines whether you’re transitioning to a new phone or decluttering your hard drive. While there are minor differences in the user experience between the desktop and mobile apps, the Amber X is largely an efficient and versatile device.
So, should you invest in an Amber X? If you appreciate the ease of use, and storage flexibility, and you’re in the market for a reliable Google Photos alternative, then Amber X is certainly worth exploring. While no solution is flawless, the Amber X presents a compelling case as a comprehensive and user-friendly alternative to mainstream cloud storage options. I’ll be recommending this device to my family and friends.
I know many of you may be using Google Assistant, but wouldn’t it be even better to use the new Google Assistant tips in your life or work to make life easier? What if you’re looking for something new to say instead of “Hey Google!” or “Okay, Google” to start a Google Assistant command? There’s this cool little feature with Google Assistants called Quick Phrases that is one of my new favorite things. And when it comes to smart home automation, using quick phrases is going to help you inch closer and closer to optimal efficiency.
This relatively new Google Assistant tip will help you eliminate having to say that Google prompt phrase every time. You can speed up your interactions with Google Assistant by using pre-set commands through this feature as well. We cover everything you need to know about enabling quick phrases on Google Assistant. If you have a Pixel 6 or newer Pixel Phone then just go to your Google Assistant and Enable Quick Phrases on Google Assistant, which simplifies the interaction for things like incoming calls, alarms, and timers, instead of typing on keyboards. And makes your life a little more efficient without saying “Hey Google”.
Until now, whenever you wanted the help of Google Assistant, you had to say “Hey Google” or “OK Google” at the start. Like “Hey Google, Set an alarm for 8:00 am” or “Okay Google, shut down my smart home.” But now you don’t need to say “Hey Google” all the time because of this time-saving feature of Google Assistant. With quick phrases, asking Google for help just got easier than ever while also staying secure. Setting an alarm, turning lights off and on, adjusting the smart thermostat temperature, changing the mood lighting in your bedroom, or setting a timer all become a little bit easier.
Suppose, if you are washing your hands or doing some kitchen work and you have a phone call then you can simply say “Answer” or also “Decline”. It’s that easy. Or you can also say “Silence” to silence your ringer. You can thank quick phrases for such an efficient feature.
Enabling quick phrases on Google Assistant is super slick and super easy. Here’s how…
Simply open the Google Home App.
At the top right corner, here you’ll see your Account, tap it.
Go to Settings.
And then click on Assistant Settings and tap Quick Phrases.
Just scroll Quick Phrases and tap Add + the quick phrases which you want.
Quick Tip: I would start with adding 3-5 quick phrases just to get used to the process. From there once you feel comfortable, begin adding more quick phrases to your regimen. I’d also start with the ones you use the most. If there’s some obscure Google Assistant command that you hardly use, I wouldn’t add it yet.
Once you have the phrases you want set up, you don’t need to say “Ok Google”. Simply say the phrase to your Google Assistant to use a quick phrase you’ve added. For example, if you want to set a timer using quick phrases, then say: “Set a timer for 10 minutes”.
Or if you want to stop the alarm then you don’t need to tap the stop button. You can easily say: “Stop” or “Stop the Alarm”. That means you can say it naturally and can add specific details to it, these are acceptable phrases. You can turn on voice match so that these quick phrases are only accessible only to you.
In recent years, the smart home revolution has taken the world by storm. From thermostats to security systems to lights, there are countless ways to make your home smarter and more efficient. One of the most popular methods is using devices that are compatible with Amazon’s Alexa digital assistant.
What Is Amazon Alexa?
Amazon Alexa is a digital assistant developed by Amazon for use on compatible devices. With Alexa, you can control many aspects of your home through voice commands. This includes adjusting the thermostat, managing the lights, playing music from streaming services, and more. It even has integration with popular third-party services like Uber and Dominos Pizza. All you have to do is say “Alexa,” followed by your command or question, and she’ll respond accordingly.
Philips Hue lighting is an excellent way to bring some automation into your home lighting system. The bulbs connect directly to your Wi-Fi network and can be controlled via voice commands with Alexa or through the accompanying app. You can even set up routines so that your lights will turn on at a certain time each day or when you come home from work.
Why I Love Philips Hue Smart Lighting? I have had a smart home setup for a few years now and my favorite addition to it has been the Philips Hue smart lighting system. With custom timers, color-changing LEDs, remote access, away-from-home dimming and so much more, smart lighting makes my house feel luxurious and modern every time I switch it on. What I love most about this smart lighting system is how easily programmable it is. Whether I want the lights to turn off after a certain time or if I’m feeling creative with my lighting moods, I can customize all that quickly and easily through the app.
The Ecobee thermostat is one of the best available smart thermostats on the market today. It connects directly to your Wi-Fi network and allows you to adjust temperatures in your home via voice commands with Alexa or through the accompanying app. It also features motion sensors that detect when someone is in a room and adjusts temperatures accordingly for maximum energy efficiency.
I love the smart thermostats are the perfect way to smarten up your home! If you program it right, you’ll never have to come home to a cold house again, since you can operate and manage it right from your smart device. And with its sophisticated smart sensors, Ecobee can automatically adjust the temperature so you always stay comfortable without wasting energy. What’s more, is adding an Ecobee smart thermostat is easier than ever before!
The Wyze security system is an affordable yet powerful way to protect your home from intruders or other threats. The system comes equipped with motion detectors, window/door sensors, and much more which can all be monitored remotely via voice commands with Alexa or through the app on your smartphone device. You can also receive notifications whenever motion is detected in any part of your home for added peace of mind.
If you are looking for a reliable, economic, and easy-to-install home security system, then Wyze fits all of these needs. Not only is Wyze dependable, but it has a wide range of features that make it stand out from others in its category. It gives users the peace of mind that their homes and family are protected. Wyze also provides excellent customer service, responding quickly to any inquiries. With Wyze Security System, you can now sleep without as much worry knowing your home is safer and more secure.
The Nest Learning Thermostat is another great option if you’re looking for a smart thermostat that works with Alexa-compatible devices. This thermostat learns from your behaviors over time so it can automatically adjust temperatures based on when people are in different parts of the house or away from home altogether. Plus, it offers remote access so you can adjust temperatures even when you’re away from home using just your phone or tablet device.
Nest Learning Thermostat has been a game changer for the heating and cooling industry. Not only has it made life so much easier (and smarter), but we don’t have to worry about manual adjustments to heating and cooling. Don’t like the family messing with the temperature? You can lock the thermostat! What I love most about Nest (and smart thermostats in general) is that Nest makes it incredibly effortless to save energy and save money. Nest also brings extra style to my home, with its sleek tech design taking center stage against our living room wall. In short, the Nest Thermostat is an absolute must-have for anyone looking to add some tech convenience and style to their living space!
Your Smart Home With Alexa Awaits
Smart technology has completely revolutionized how we interact with our homes today and Amazon’s Alexa digital assistant is no exception! By connecting compatible devices like Philips Hue lighting or Nest learning thermostats directly to your Wi-Fi network, you can use voice commands to control various aspects of your living space from anywhere in the world! Regardless of what type of smart device you choose for use with Amazon’s digital assistant platform, there are endless possibilities waiting for you just around the corner!
They say technology has made our lives easier and I certainly agree. Most of those reading this right now have a pretty good idea of what Alexa is and does. For the rest of you who are reading this out of curiosity, then I want to assure you that these easy-to-do hacks will turn you into an ultimate Alexa fan!
Alexa Account Hacks Everyone Should Know
Few people know that their virtual assistant Alexa can provide individualized experiences to people in the home. In fact, most people I know who have an Alexa assistant are unaware of these little tricks to help enhance their smart home experience. Amazon is always creating new capabilities to expand on these themes. It’s one of the innovative traits I love about the company. Here are some of my favorite, easy-to-do Alexa hacks that will improve your user experience!
Did you know you can set up multiple accounts using a feature available with Alexa? Okay, okay. I think most people know this feature exists, but it would shock you how many just have one account set up. Using the built-in “Household Profiles” feature, you may effectively have many users, each with their own profiles, whom you can switch between as necessary on your Amazon Echo device.
The Alexa app allows the device’s registered owner to add numerous profiles of other family members to the household profile. However, you must first enter your password before anybody else may sign in or change profiles. Each profile owner can access customized content libraries, including playlists and shopping.
It’s crucial to remember that only the device’s registered owner may make new profiles. You may do this if it applies to you by selecting Household Profile under Settings in the Alexa app and inputting your password. After completing this step, you may link the accounts by having the other users log in on the same computer.
Parental Control
As a parent, you are responsible for monitoring what your child is watching. Let’s be honest, you cannot supervise them 24/7 and so Amazon has a solution for you. You can always use parental control to see what kind of videos and shows are being watched by your children.
Amazon’s FreeTime program is also accessible via Alexa. It allows you to establish parental controls, such as restrictions on certain materials, shopping features, and use hours. To activate this service, you must choose which device to limit.
Alexa Voice Profiles
Alexa Voice Profiles are a fantastic feature. It’s another one of those often overlooked things that can impact user experience. Your Alexa can be trained to identify your voice through a simple exercise involving the repetition of words. In my opinion, I think the best sound engineers are working for Amazon.
To get Alexa to recognize your voice, the first phrase is displayed on the screen for you to pronounce. When you say the word, Alexa will automatically display the next word.
Continue speaking until you’ve used every term Alexa has to offer. You’ll be asked to repeat a phrase if Alexa doesn’t comprehend it the first time. Alexa notifies you that your Voice ID has been created once you have completed the process.
While Amazon Music and Spotify are treated similarly in the Alexa experience, Amazon’s own service benefits from voice match. I really like Spotify as a music service, but we’ve talked about issues with Spotify when it comes to your family having access to it.
Furthermore, shopping becomes easier with the help of the voice match feature. If you’ve never bought anything via Alexa using your voice, you should try it. It’s kinda cool. And don’t worry…if you buy something accidentally, you can go into your Amazon account and get a refund. Training your voice will enable you to confirm purchases using only your voice and prevent children from adding one hundred unicorns to your shopping cart.
Find your iPhone
Have you ever misplaced your iPhone or Android and absolutely panicked because of what that would mean? Your personal info, maybe financial data, and other privacy-related data could all be on there (and your personal photos). What would happen if it had actually gotten lost? With Alexa and the Find Your Phone features, there’s no reason to worry about this issue.
Alexa can assist you in resolving this all-too-common problem. Once you save/confirm your number in the app, it gives you the option to have Alexa contact it when you ask her to “find my phone.” You’ll have to connect the Find My Phone Alexa Skill to your account, but it’s well worth it.
The 7-Minute Workout
This is one of my favorite Alexa tips. It’s one thing to say you’re going to work out, but quite another to really do it when you’re working from home or spending the weekend relaxing.
7 minutes of bodyweight high-intensity exercise can reportedly improve your muscular strength, V02 max, and insulin sensitivity, which is why many people prefer to do it.
Even if the 7-Minute Workout won’t completely undo the damage your weekend of eating burgers and fries did to your waistline, it’s still preferable to doing nothing at all. This is another feature that you’ll have to connect as an Alexa Skill.
Your favorite AI will initiate the 7-Minute Workout when you tell her what music you want to listen to. You can then have a satisfying workout while your preferred workout music plays in the background.
Create a Routine
If you routinely give Alexa the same set of instructions (for example, “turn on the lights,” “turn on the TV,” and “read the news”), you may build up a “morning” routine to have her carry out the instructions automatically. They work very similarly to Google Routines
To create a routine with Alexa, here are some steps you need to follow:
Open the app and select Settings.
Go to the Routines section, followed by the plus (“+”) symbol.
Enter the trigger phrase.
Click “When this happens,” then “When you say something.”
You can create a routine for basically any smart home device connected to your Alexa.
If you have an Alexa account and are looking for some hacks to improve your experience, what I mentioned above is a great start. Your homework assignment: Go and try at least one of these Alexa account hacks right now. Oftentimes, I find that if I start small with just one and then build on it, get comfortable with it, then adding more and more are a breeze.
Philips Hue is a smart lighting system that uses your existing wireless network. It has WiFi light bulbs, LED lights, and a bridge that connects them to the network. It’s innovative, but the setup can be complicated especially for newbies to the smart home ecosystem.
We wanted to dive a little bit into the process to set up Philips Hue without Bridge; to simplify it because we’ve seen a handful of users complain about the difficulty of using Philips smart bulbs without the bridge. Certain options (if you know what you’re looking for), such as Bluetooth or Dimmer Switch, can help you complete the Philips Hue Smart lighting setup without a bridge.
Philips Hue Bluetooth bulbs are a great addition to any room. With these bulbs, you can forgo the option of not needing to use the Hub at all and just use the Bluetooth connection to sync the bulbs. I’m not the biggest fans of hubs. I’ll use them where I absolutely have to, but leveraging Bluetooth for connectivity is simple and effective. Previously, the Philips BT App used this feature, but now the Bluetooth feature is also included in the Hue app.
Although Philips Bluetooth is a great feature, it has a few limitations. For example, you’re limited to using only 10 bulbs without any provided remote control by the company. Not a deal-breaker, but if you want to go nuts and really light your smart home this might cause some frustration. Third-party app integrations are not supported for integration. Also, the connection is a bit weak for creating large groups of bulbs at the farthest ends of a house. With this option, the grouping wouldn’t be available with these bulbs either. However, technically, one can create groups within a room, so there is a slight workaround in that regard. This can give you free rein over the aesthetics and dynamics of the room. Overall, the Philips Hue bulb is a great addition to any house and the Google Seamless setup can be integrated to make them work without using a Hue bridge.
The Hue Dimmer Switch controls the Hue Bulb when you buy the two together. What’s nice is you don’t have to go through the hustle of connecting the two because they are linked together. The dimmer switch operates via a battery.
You can put the bulb in the socket and turn it on with the dimmer switch. Super easy. The switch allows turning the bulb on or off and controlling the intensity of light. It does not control the change of the light color in the bulb. For that, you’ll have to use the hue bridge. I wish (if you make dimmer switches here’s one of my free tips for innovation) these switches were multi-dimensional, which would give you the option of controlling the intensity of light along with the color (at least warm vs soft light which shouldn’t be that difficult to program).
A dimmer switch works like the switch of a light bulb and it supports up to 10 bulbs. It comes with a connected LED light which is synced with the bulb to confirm the establishment of a connection between the two. It is one of the easiest ways to set up Philips hue lights without a bridge. For the extreme novice user of these smart bulbs, it’s the route I’d recommend.
Philip Setup With Amazon Echo Hub
Philips Hue Bulbs are supported by a feature that allows one to use Zigbee smart home hubs supported by Zigbee standards. You can use Hue bulbs after completing the setup of Amazon’s Echo speaker models.
Echo speakers, such as the Amazon Echo Plus, Amazon Echo Show 10 (not first-gen), (4th-gen) Echo, and Echo Studio can be used as Zigbee hubs to support the Philip setup without a bridge. After using Echo speakers, use the Alexa app to search for the hue bulb. Once the device is detected, the next part is adding the hue bulb by using the plus button on the interface of your screen.
Custom scenes cannot be created (as of the date this was published), but you can group smart lights of different brands with the Amazon Echo hub option. For controlling the light, Alexa can be used to control all the features of light by using your voice or entering the instructions on Alexa.
The Ikea Tradfri gateway plugs directly into an outlet and controls the communication between your phone and the bulbs. The smart bulbs are already installed by you, and you have to connect the Ikea Tradfri gateway directly to the router.
After this, it starts working. The semi-simple process is to hold and press the button for ten seconds within approximately two centimeters of the router. After releasing the button, the light will blink, confirming that the hue light has been added. The Ikea Tradfri system is great because it saves the person from the hustle of plugging two hubs into the router.
However, there are certain limitations, such as you can’t enjoy scheduling, geolocating, and color cycling options that otherwise you could enjoy with a hue bridge. But, the Ikea Tradfri gateway is a great option to be used as an alternative to Philip’s set-up with a hue bridge.
To Bridge Or Not To Bridge
There are a lot of reasons why I like the option to use the bridge and there are some reasons I’d opt out. Chief among them, the Philips Hue bridge makes it easy to control all of your Philips smart bulbs from one central location. Whether that’s your smartphone, tablet, or computer…it doesn’t matter. With the bridge, you can easily turn lights on or off, dim or brighten them, and even change their color. You can also create custom lighting scenes for different occasions, so your home always has the perfect ambiance. You truly unlock the technology’s potential by using it. On the flip side, setting up your Philips smart bulbs with Amazon Alexa is really easy and if you have your smart home ecosystem integrated already with Alexa, it’s a no-brainer.
What I love about the innovation and evolution of technology (smart home technology included) is the improvements being made to fit the end user. Gone are the days when a person would have to stick to one process of setting up a lighting system. Nowadays, there are alternatives and options, which I’m a big fan of.
Nowadays, streaming content on the go has become a standard norm, and because of this, TVs and speakers that allow users to do this are rapidly growing in popularity. One of the similarities among devices that support on-the-go content consumption is that they allow casting with Chromecast. I’ll admit, one of the things I find myself doing regularly is sharing video or content with family and friends via my phone. Having that ability to cast it to my TV is an awesome feature.
Using Google’s Chromecast, you can stream music and videos to compatible devices. In addition to this, you can use many mobile apps for accessing your favorite TV shows and playlists without any additional login requirements.
To keep it simple, Chromecast uses Wifi to allow you to cast media from your smartphone, tablet, or computer to other compatible devices. The Google casting technology is a built-in feature for certain selected television sets and allows you to cast your favorite seasons, sports, games, and much more onto a big screen. Additionally, you can use Chromecast to stream podcasts, music, and even the radio to compatible speakers.
One thing that stands out about Chromecast is that it allows you to cast content without any disruption. Using its multi-task features, you can send texts and accept calls without interrupting what’s being streamed to the big screen.
Chromecast uses Wi-Fi to connect to compatible devices and allows you to stream content from anywhere in your house. You can also connect a Chromecast dongle to your TV’s HDMI port and stream your favorite content. It allows you to use your smartphone or tablet as the cast controller for browsing, queueing, and controlling the content.
Chromecast works by using over 1000 Chromecast-enabled apps and allows you to stream over 200,000 tv shows and more than 30 million songs. Simply open a supported app, find something to watch or listen to, and simply tap on the cast button.
In addition to this, you can also use a Google Assistant device or app to control the cast with voice commands. It works wonders with Chromecast built-in devices, but some older models may not function as you’d expect them to.
Devices For Chromecast Built-in
Although many television sets support built-in Chromecast, Google’s own Chromecast dongle is a great entry point for those looking to start with Google’s smart home tech.
Other options, in addition to the Chromecast dongle, are also available. Casting with Chromecast is a built-in feature that comes with the Google Nest Hub Max and the Google Nest Hub. These smart display devices will appear as Chromecasts on your network and allow you to cast video and audio content to them from anywhere in the house. Although many video apps recognize Nest Hubs as a display option, it’s possible that some of the apps may not be compatible. In this regard, it’s an app-by-app basis on compatibility.
As for audio, Google Home speakers are a reliable option because they seamlessly integrate with Chromecast and allow you to enjoy the audio content without any interruptions. You can have your friends and family connect to these speakers as well.
Best Chromecast Built-in Speakers
Google’s own kit is the best go-to option for Chromecast built-in speakers, but other more premium options are also available. If you’re someone who doesn’t mind spending some money, consider the Naim Audio Mu-so Qb. It has the great audio quality and gives control over style and substance.
However, the Marshall Uxbridge Voice can also be a great option if you’re on a budget. It’s compatible with wireless streaming and allows you to cast audio from your smartphone or tablet. Along with these, there’s a wide array of Chromecast built-in speakers, each one with unique functionalities, that you can choose from.
Best Chromecast Built-in TVs
Generally, any television set that comes with Android TV supports Chromecast standard built-in, and you don’t need to buy any additional devices to cast your content.
Sony has been committed to launching Android TVs that support Chromecast capabilities. Some of these TV sets include the Bravia XR Z9K, Bravia XR A95K, and the Bravia XR A90K. In addition to Sony, other manufacturers that provide Chromecast built-in TVs and displays include Philips, Skyworth, and Vizio. You can also connect the Nvidia TV Shield or the Nvidia TV Shield Pro to your existing TV’s HDMI port to enable Chromecast capabilities.
Setting Up Google Chromecast
You’ll have to set up Chromecast with your TV or speakers to cast your media. You must plug a Chromecast device into your TV and download the Google Home App.
Then simply search and select the devices you want to connect, and enjoy casting your favorite movies, shows, or music to any TV or speaker in your house.
Chromecast: A Solid Casting Option For Families
Google Chromecast is the best option for those who want to consume content on the go. Numerous devices support Chromecast built-in, and additional devices can be connected to an existing TV’s HDMI port for casting as well. Once connected, casting with Chromecast will allow you to cast your favorite movies or tv seasons to the big screen or listen to music or podcasts from anywhere in the house.